
It has been an unusually cold and snowy winter here in Port Angeles.
Our house is at about 1000 feet, and we have had snow on the ground for more than five weeks. This, after an unusually warm fall.
We’re suffering from climatic whip-lash, and so are the critters.
We took the hummer feeder down in early September to encourage the birds to migrate, but the garden kept right on blooming until the first hard frost — December 5th. That night, the snow came.
The next morning, I put the hummingbird feeder back out, just in case some of the hummers hadn’t migrated in time. Sure enough, a male Anna’s hummingbird promptly claimed it.
The solution I use in the winter — one part sugar to three parts water — has a fairly low freezing point, so as long as the temperature stays above ~26 degrees F, the feeder is fine.
But the temperature has been dipping below that, and unless I take measures, the feeder freezes.
The simple solution is to pull the feeder in at night, and put it out in the daytime. That works fine if the colder temperatures are only at night, but it’s also a bit of a tyranny.
This tiny bird is dependent on me. If we had to go out of town, or I forgot to put it out one morning, or had to go out during the day and the feeder froze, the hummer might well die.
So, what to do?
Make a hummingbird feeder heater!
Below is my design for a heater. It has worked well to about 20 degrees F. This variant still leaves the little feeder straws vulnerable. Much below 20 degrees, and those will still freeze, rendering the beautifully fluid reservoir irrelevant.
Still, it fills in that critical 20-25 degree gap, which covers the vast majority of problematic temperatures here in the Pacific Northwest.
And let’s be honest: hummingbirds in sub-freezing temperatures are probably only an issue in a very narrow geographic area. I doubt it comes up much outside of the Pacific Northwest.
Hummingbird feeder heater
Materials:
- Small heating pad (~6×8-12 inches)** Note that the model I link to here is a good size, but the cord is not technically outdoor grade. That means you should be sure to take it down before rainy weather. There may be outdoor-grade options, but I don’t know them.
- Yoghurt container (or other semi-cylindrical container that fits reasonably well over your hummingbird feeder’s reservoir)
- Bubble wrap
- Packing tape
- Plastic grocery bags
- Extension cord (and external power source)
- Binder clips
- Ladder (depending on hummer feeder placement)
If you have everything you need on hand, this will take about half an hour.
Making the heater unit
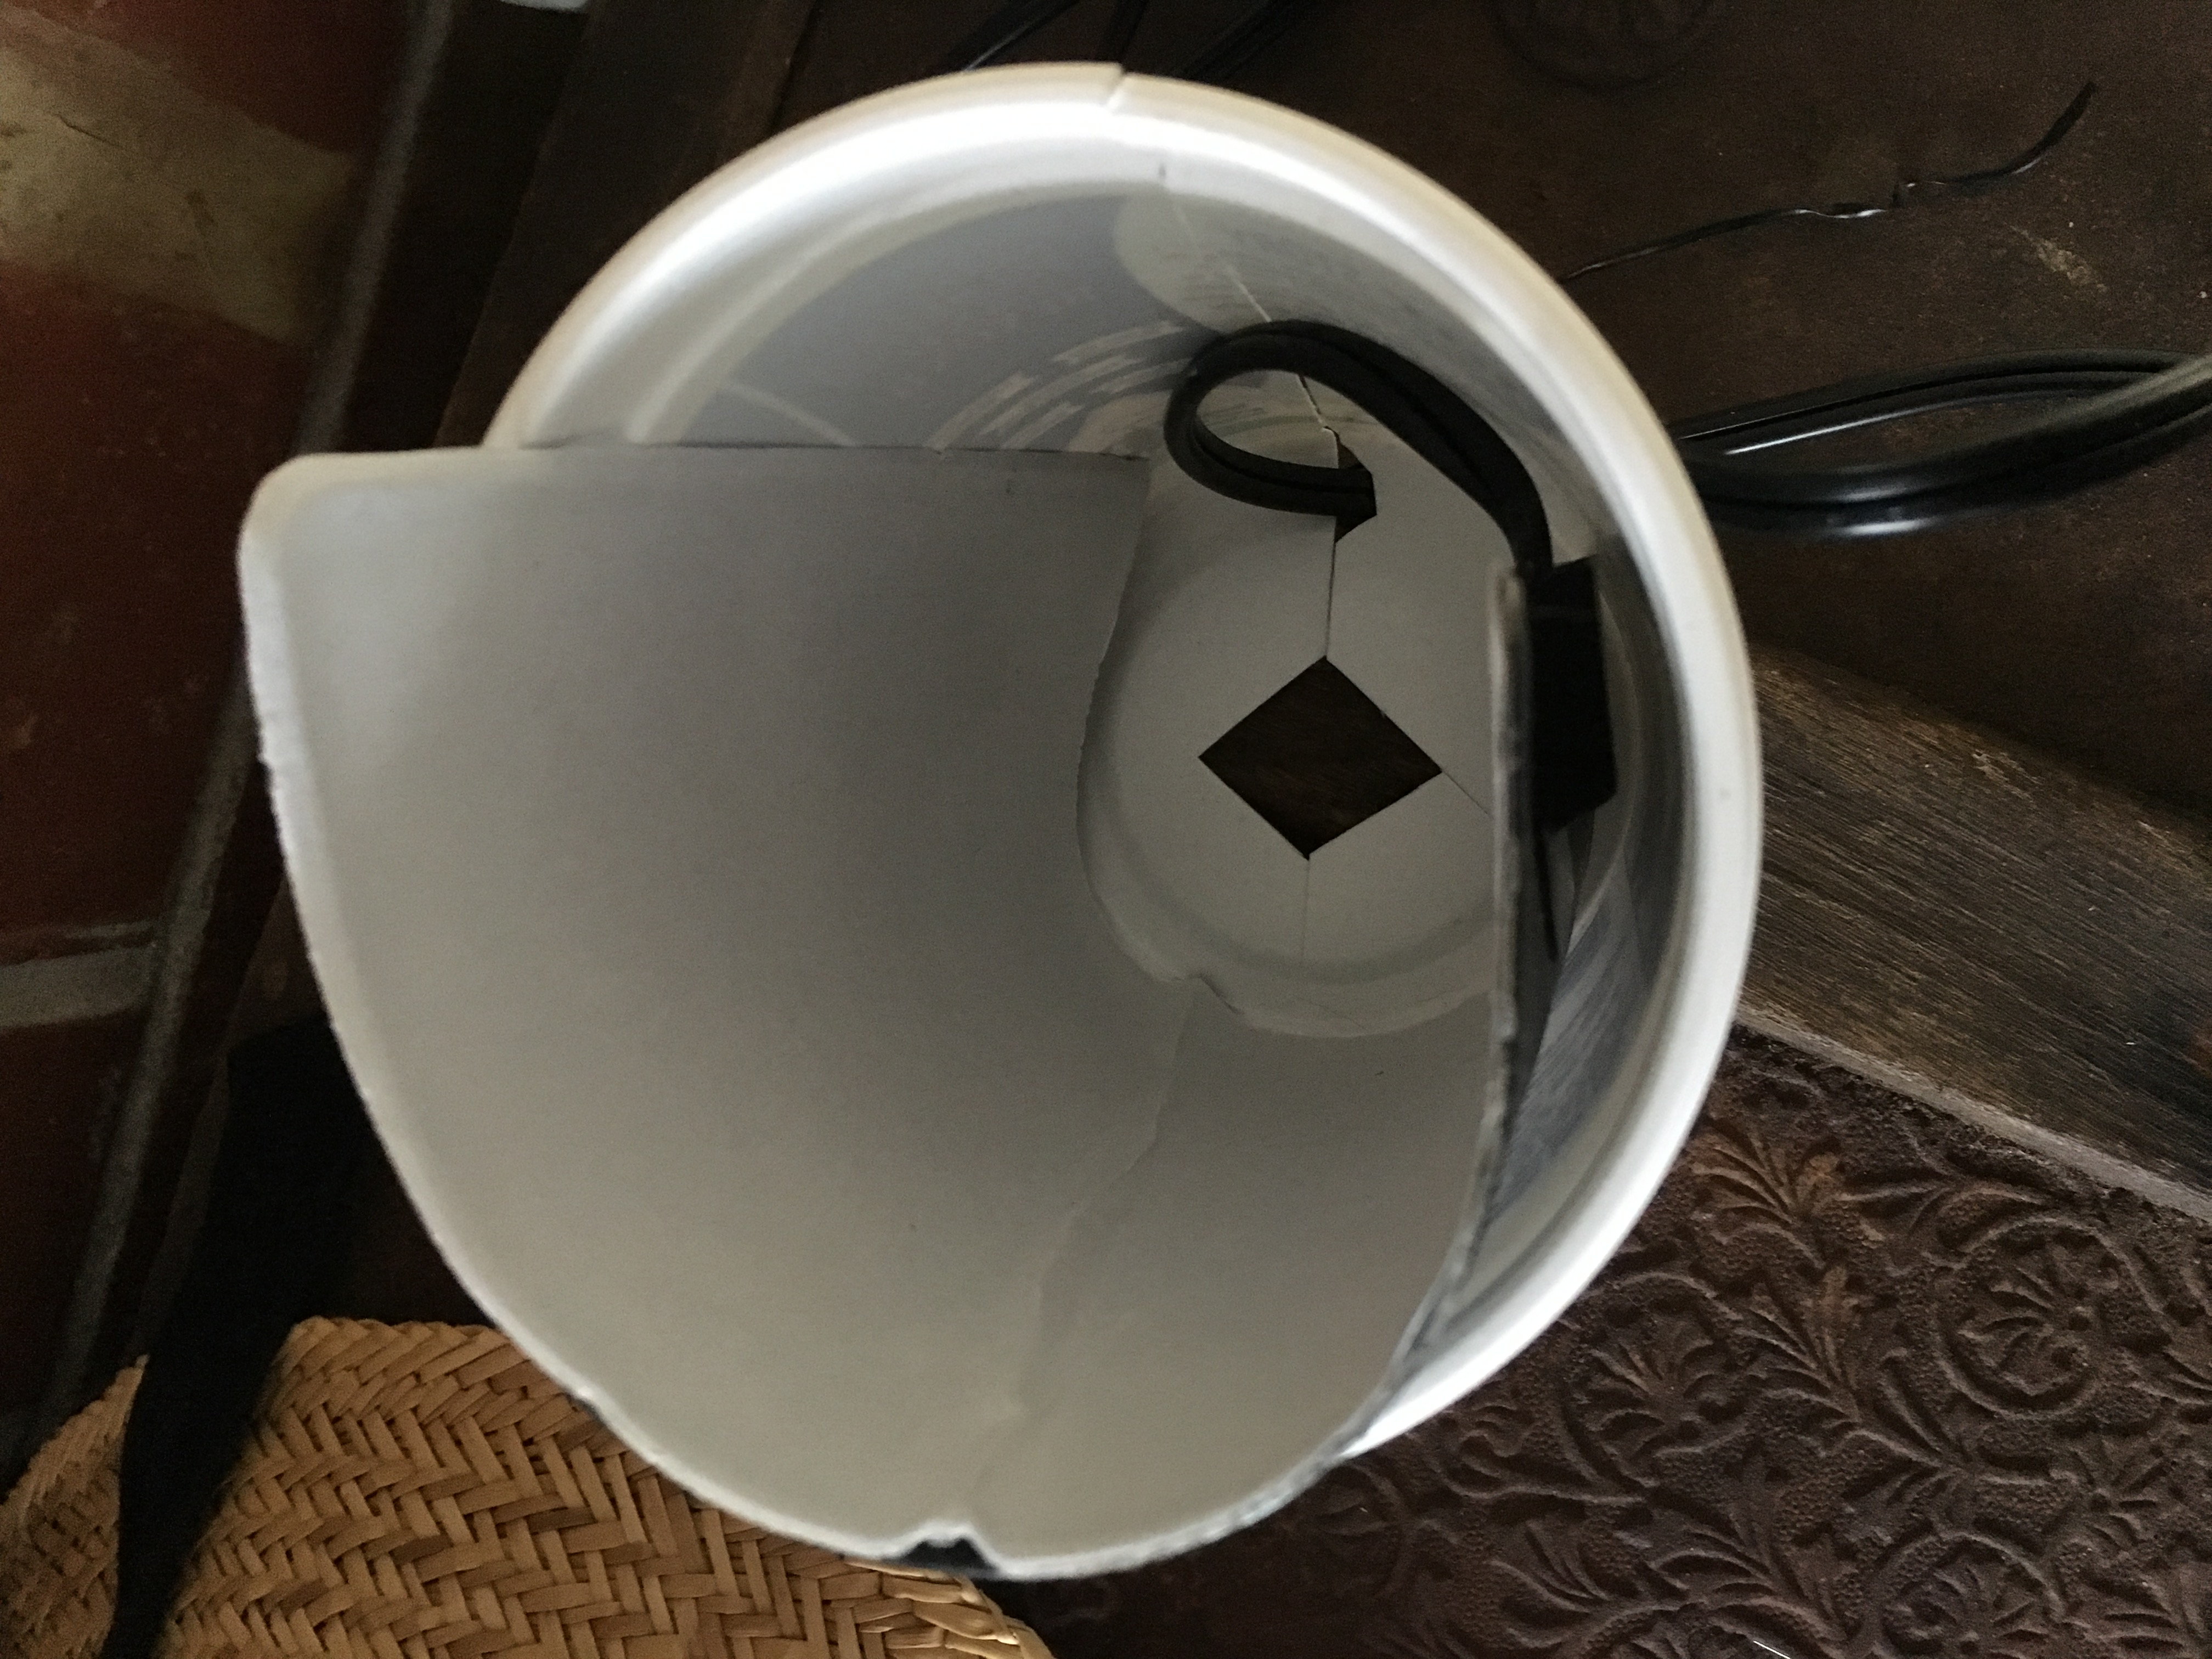
1. Using a good pair of scissors, cut down one side of the yoghurt container to the bottom, through to the middle of the bottom, and make a hole as close to the center as you can (a diamond or rectangle is likely to be easiest). This will allow the feeder’s hanger to go through. Note that the bottom of the yoghurt container will become the top of the heating unit.
Make a notch closer to the edge of the bottom. This will provide room for the power cord, without disrupting the feeder.
2. Take the heating pad and thread its power cord up the slit and through the notch. Curve the heating pad and slide it into the yoghurt container. It may not go all the way around. That’s ok. Position it so that the middle area is clear (both of the heating pad and power cord) — keep in mind that this will need to slide down over the feeder.
Stabilize the slit in the yoghurt container with packing tape.

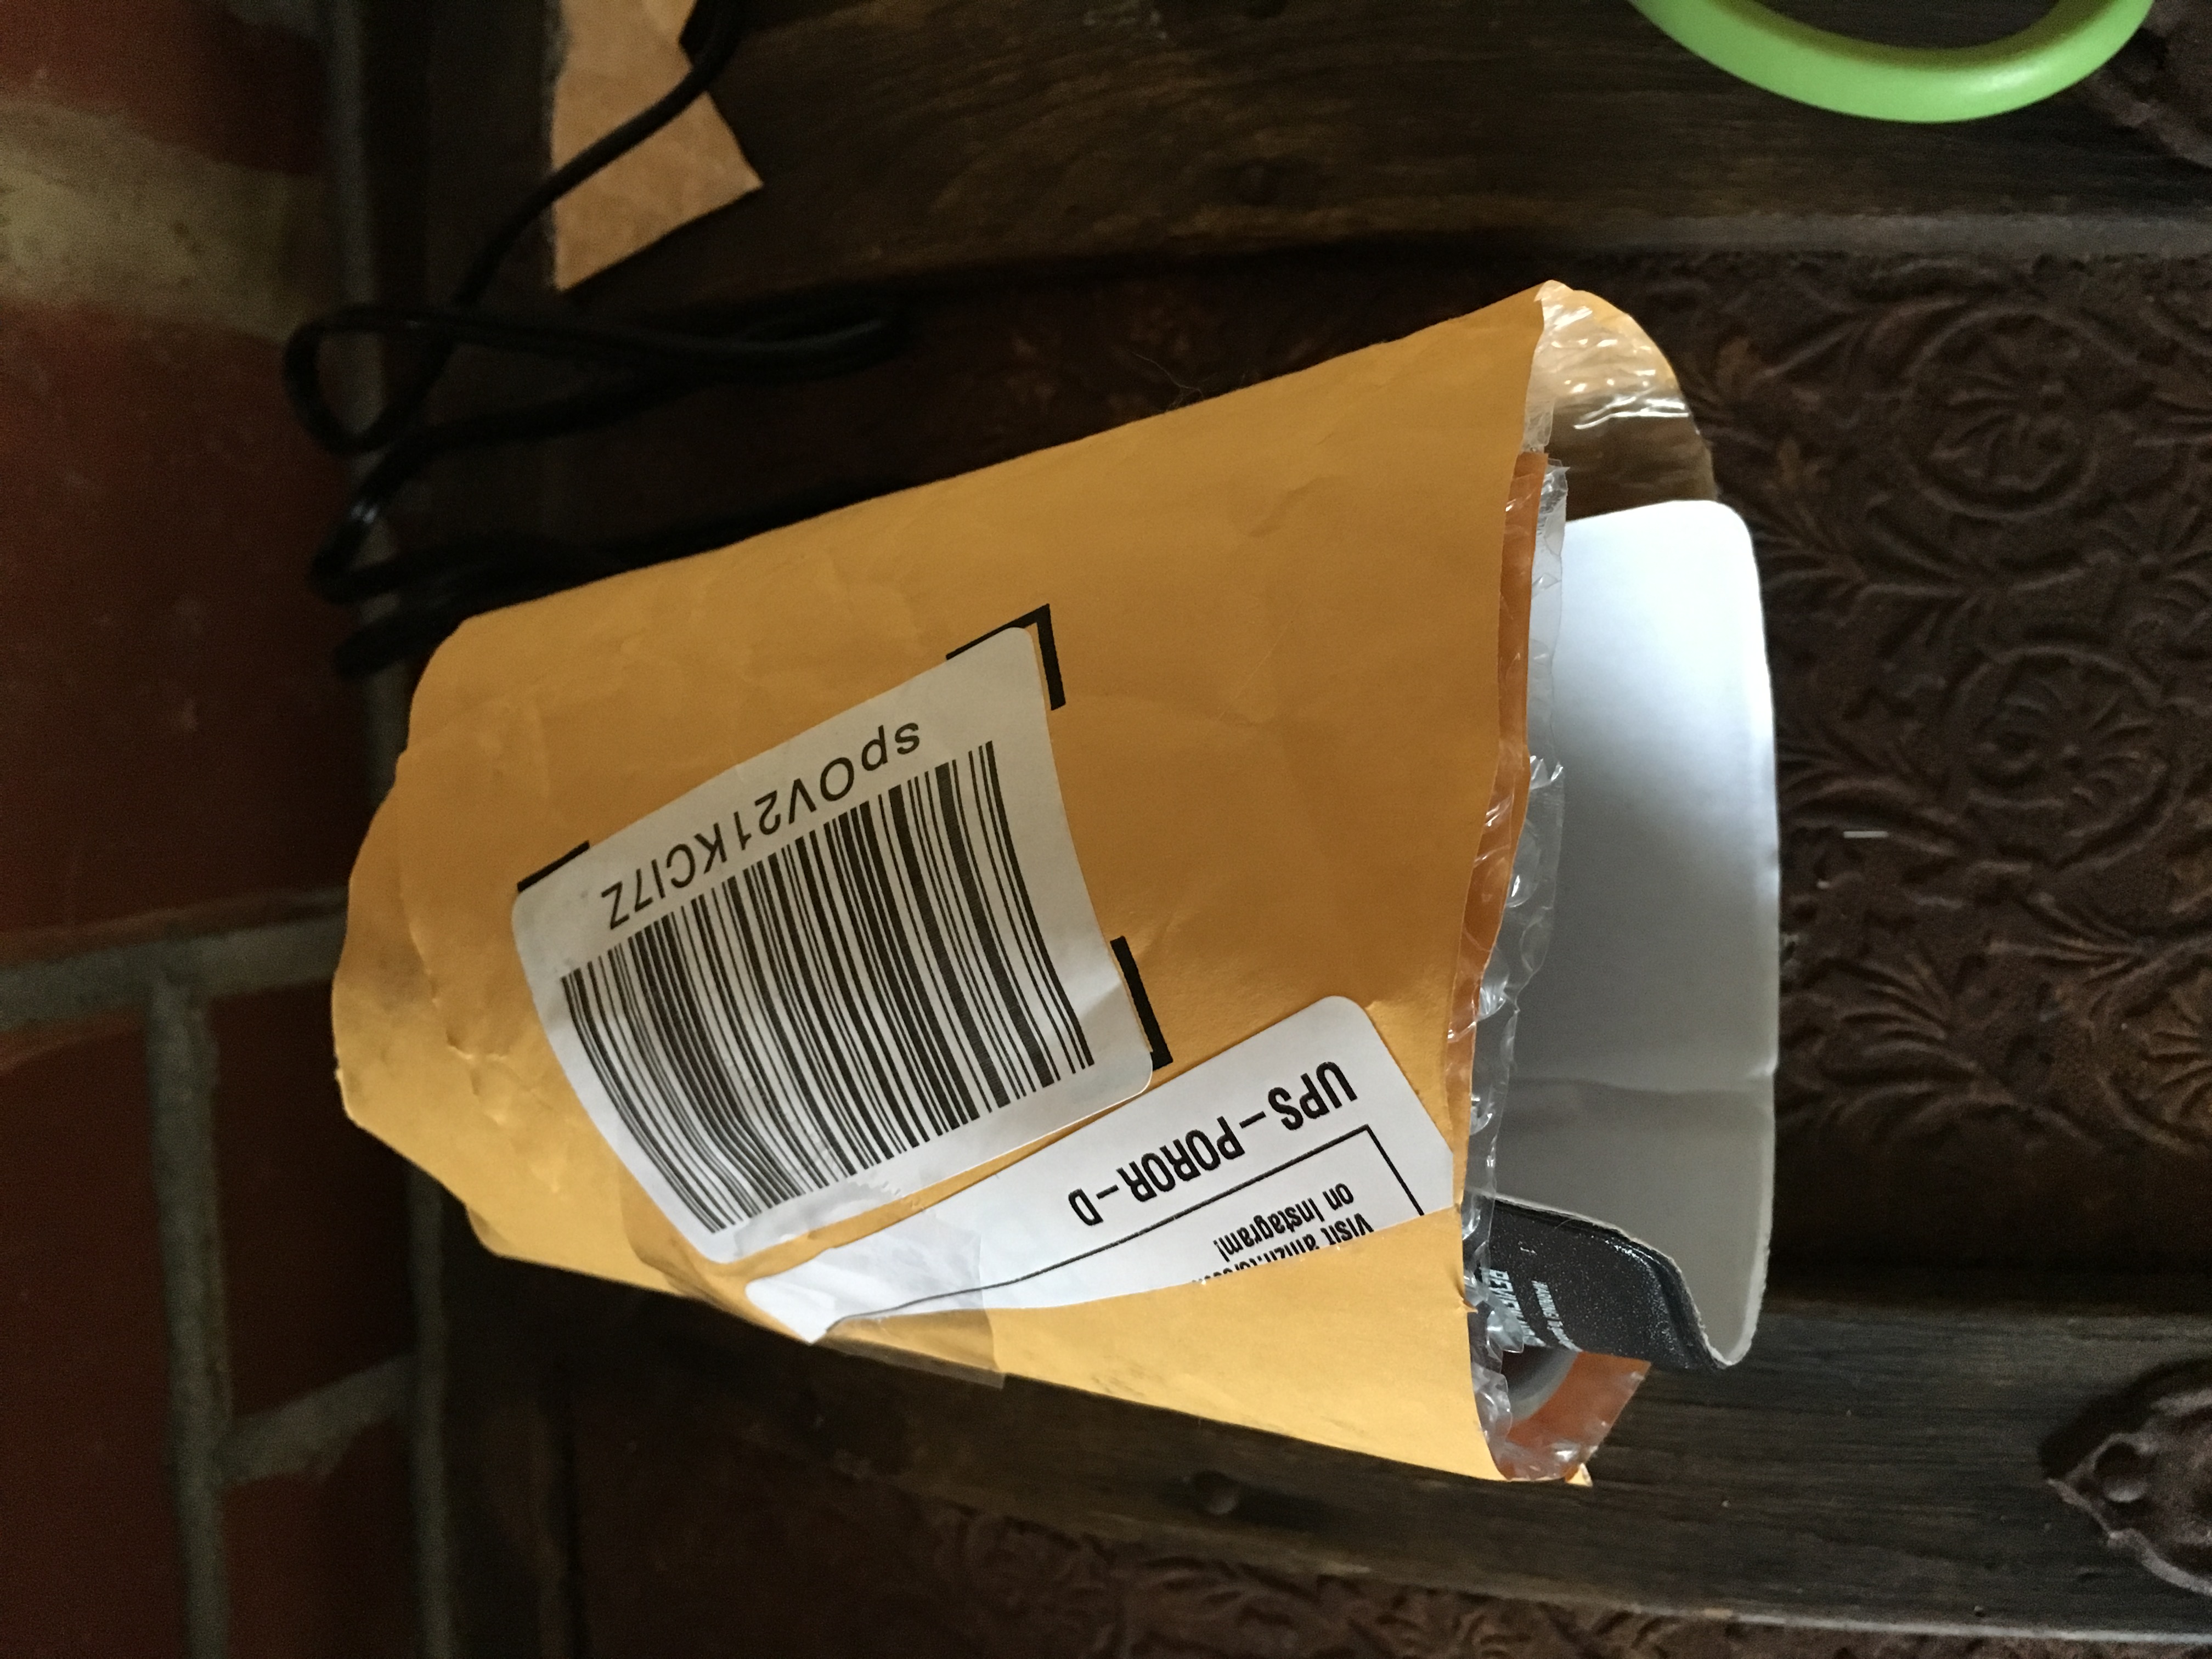
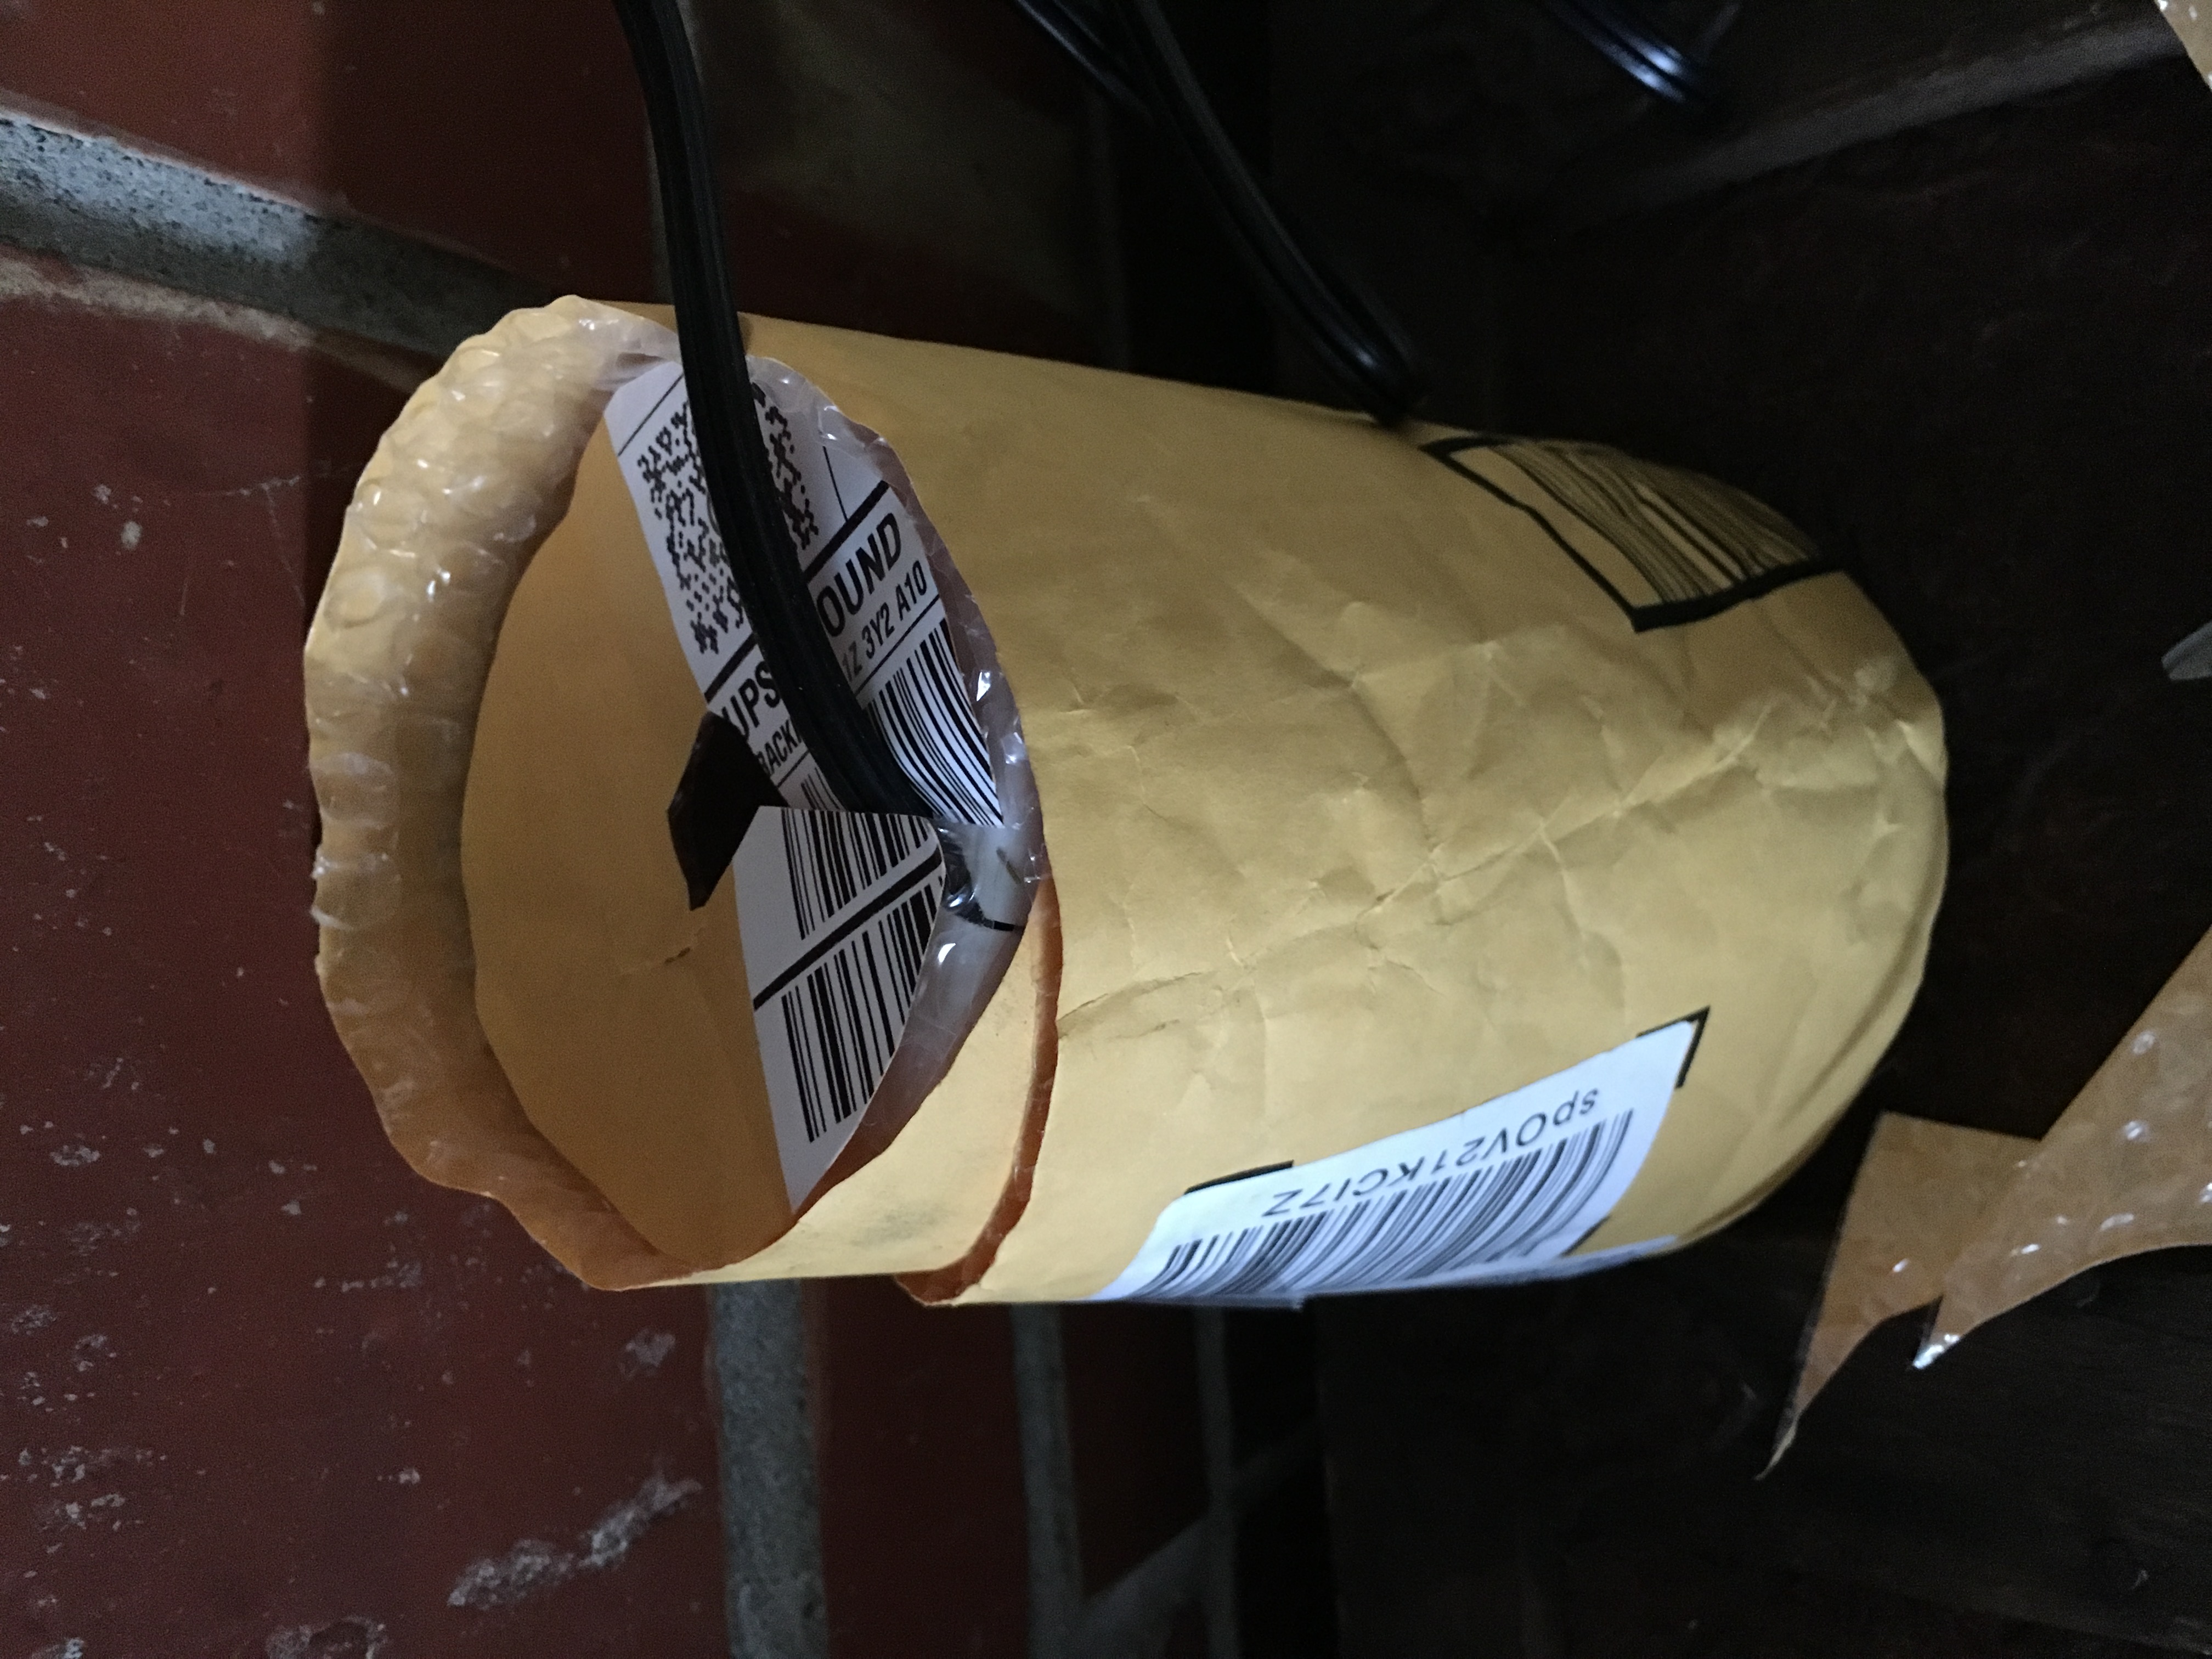
3. Take bubblewrap or a padded envelope (which is what I used), and wrap it around the yoghurt container. This will provide insulation, and help insure that most of the heat stays inside the yoghurt container. Because the yoghurt container does not have perfectly vertical sides, you will need to offset the bubblewrap some so that it goes high on one side, and overlaps on the other (to try to cover the whole container).
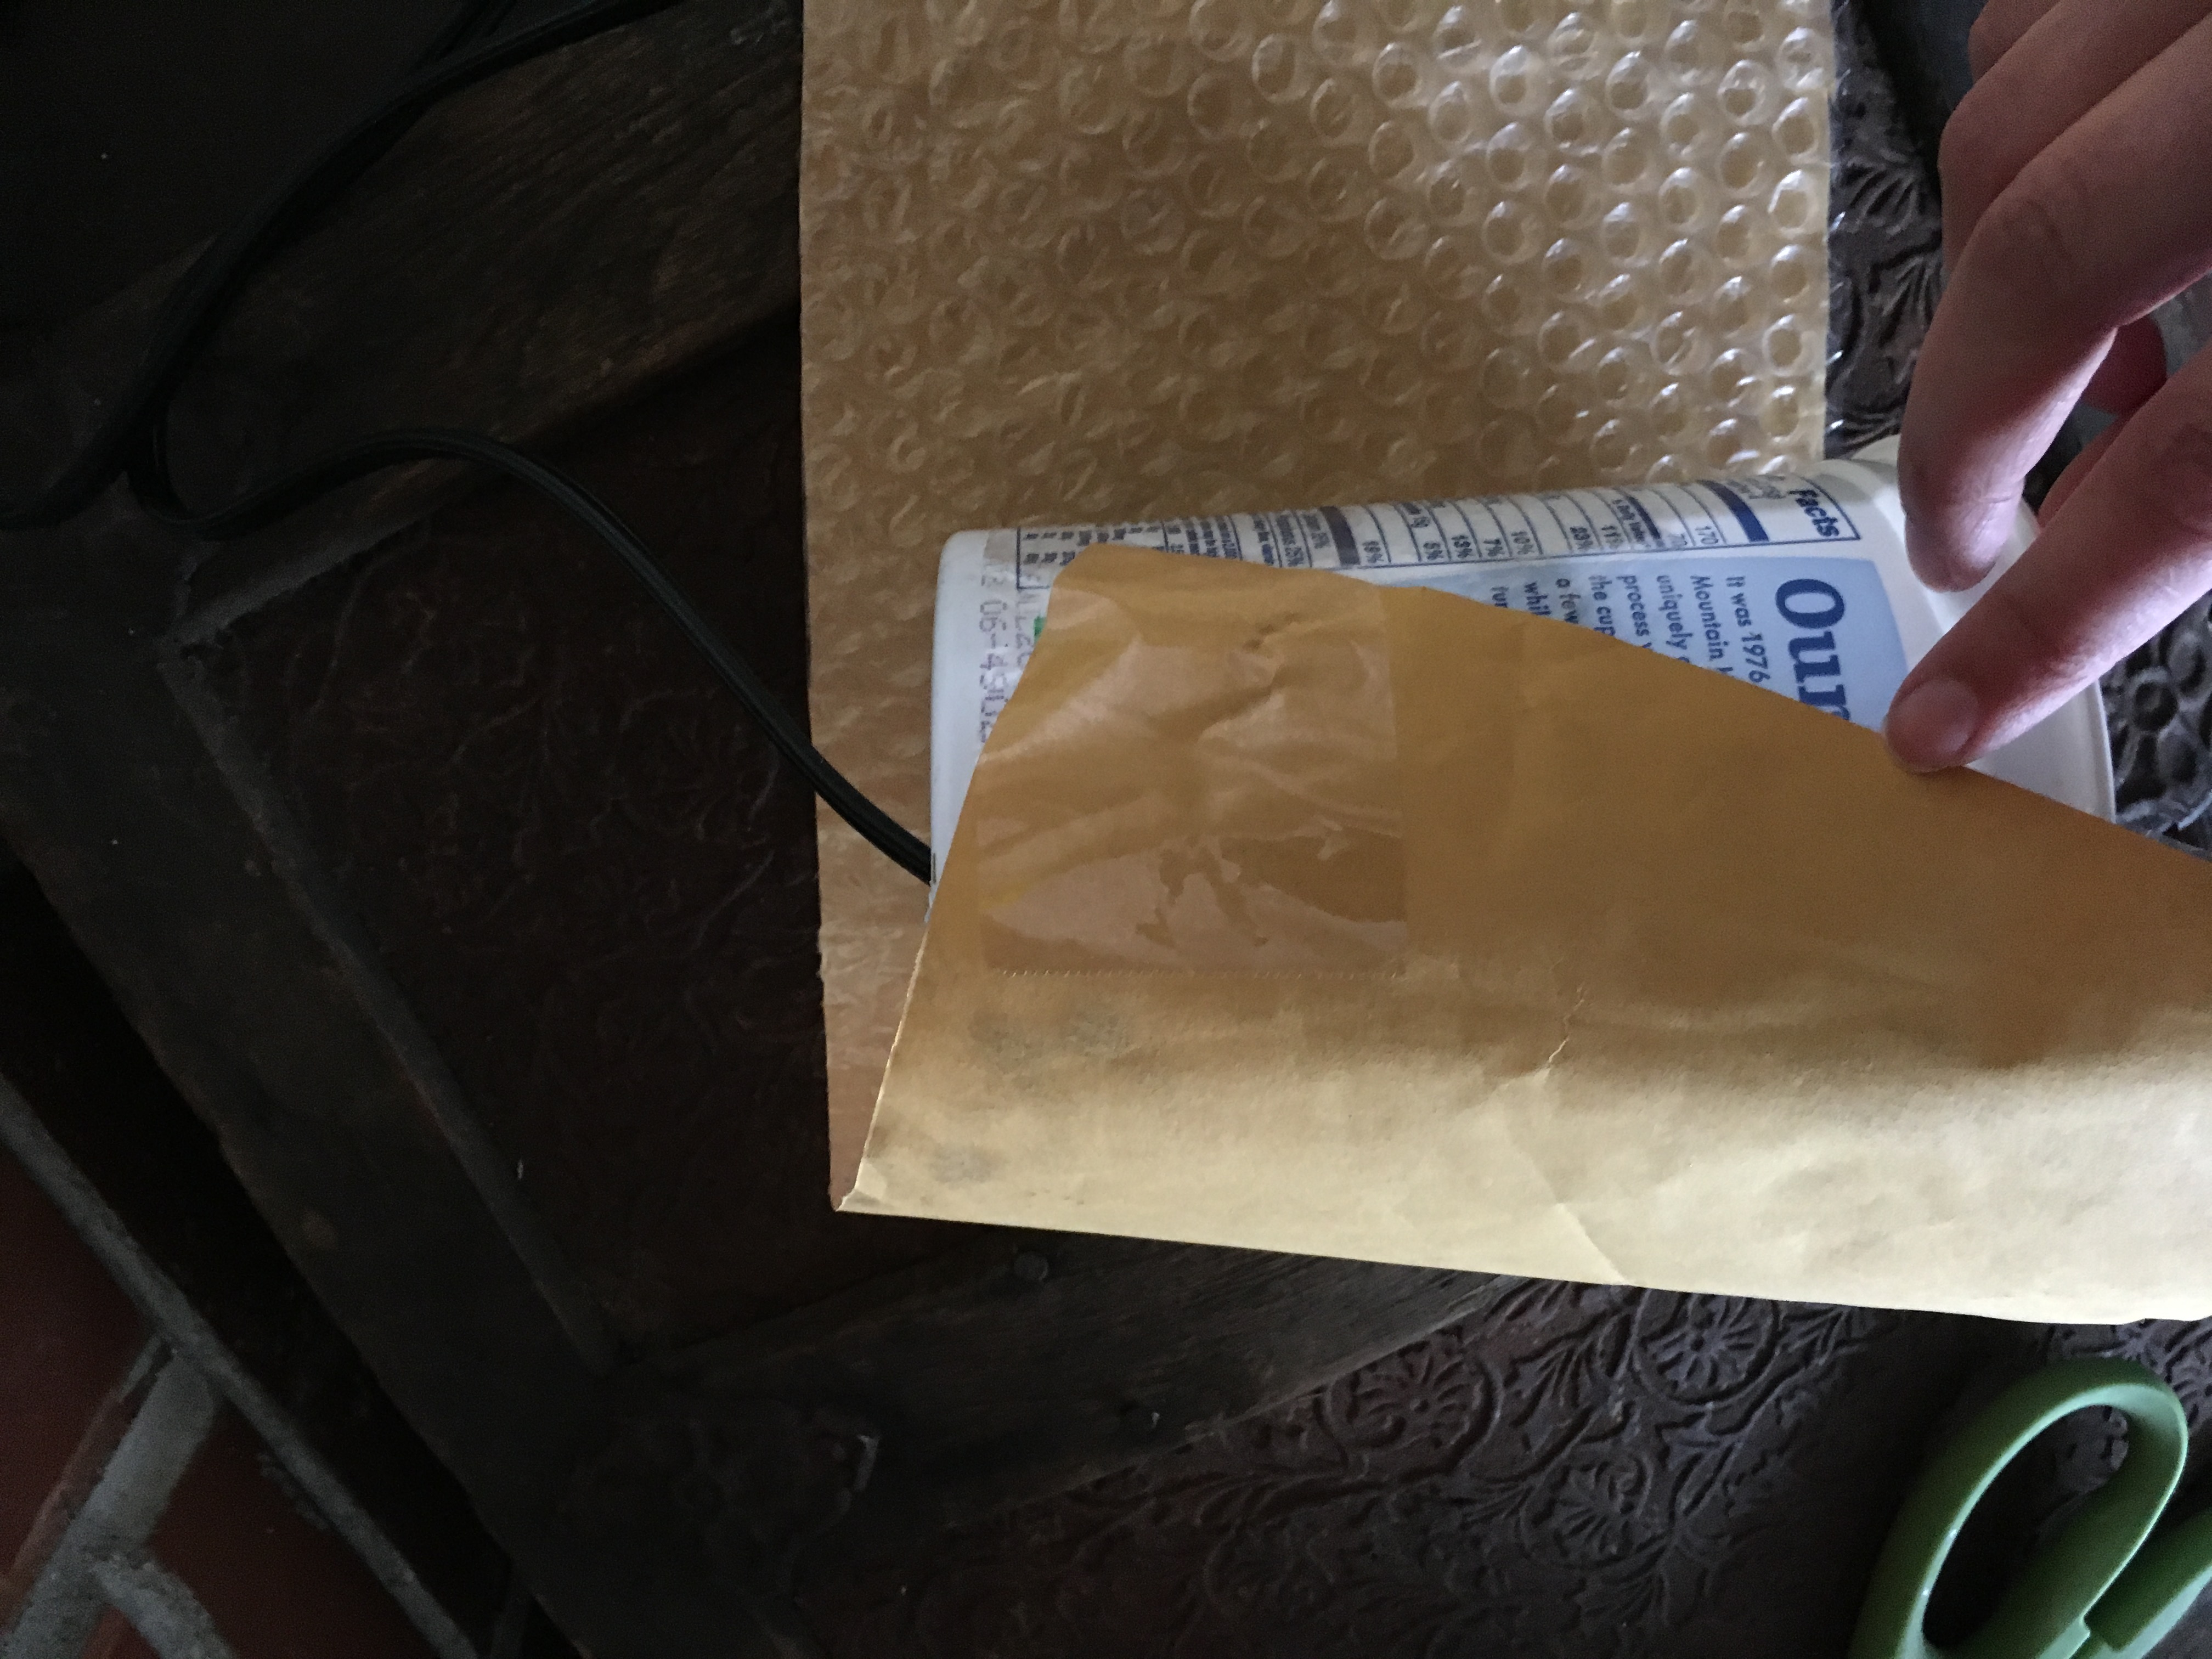
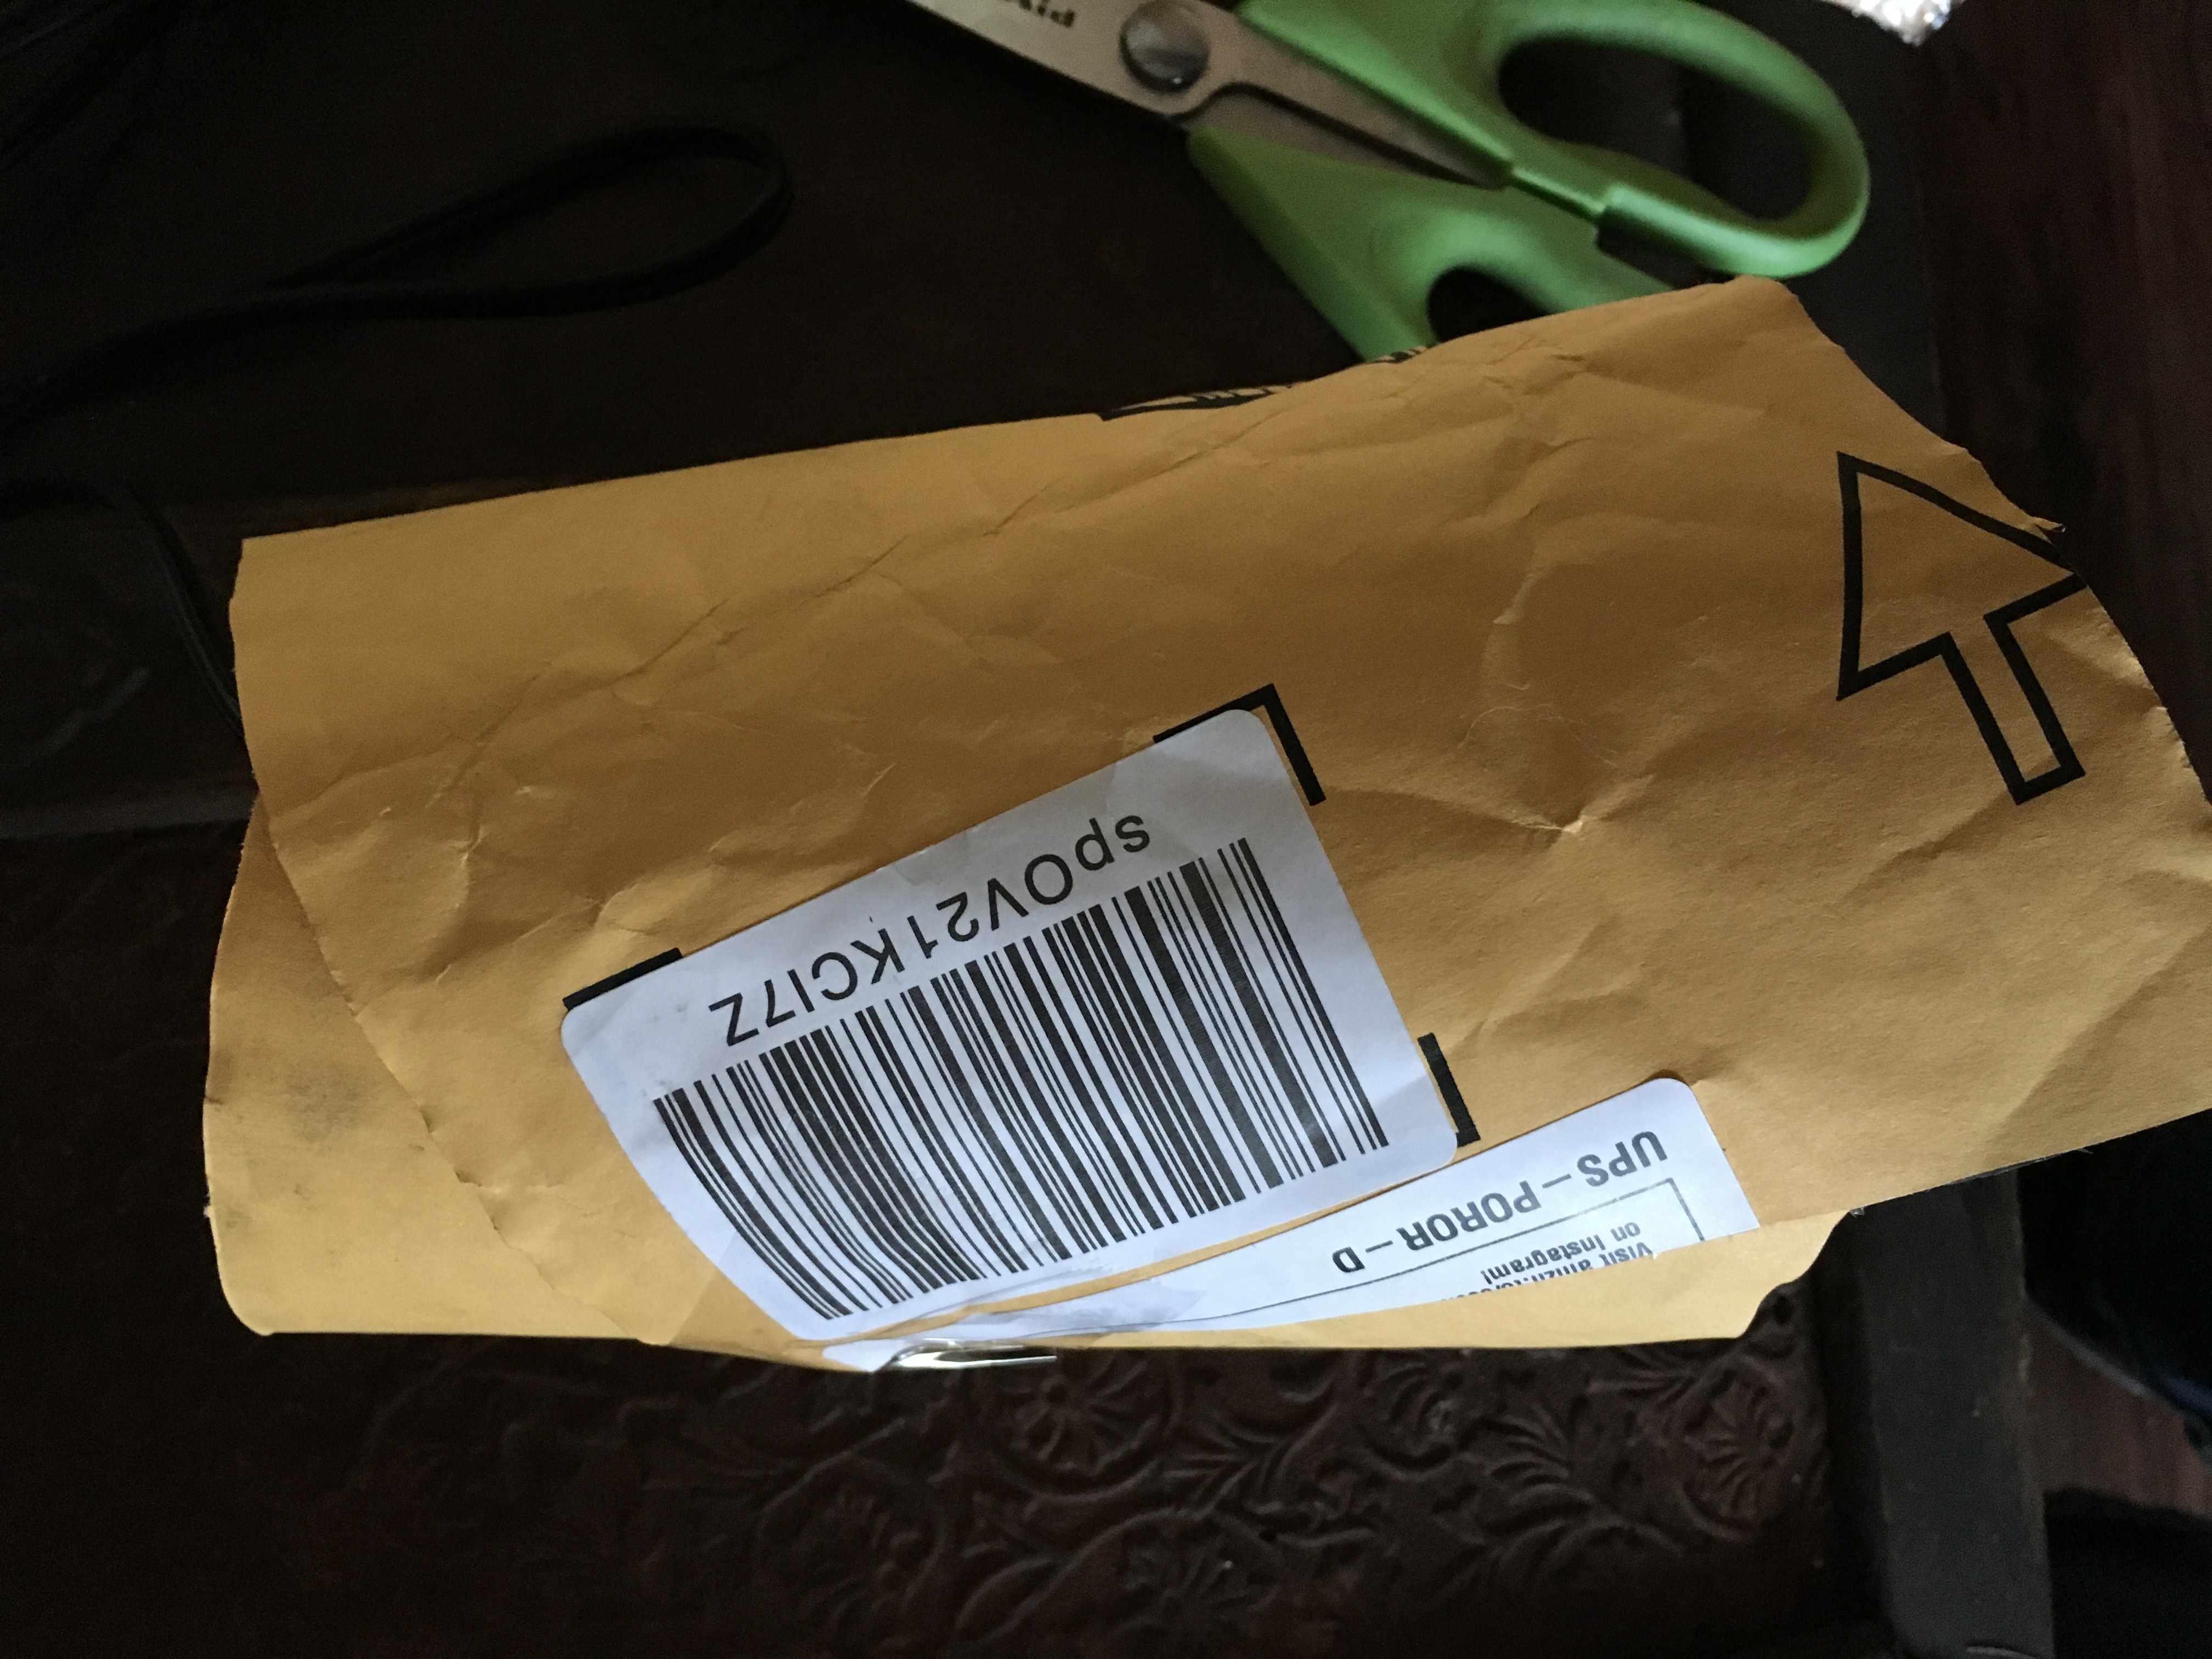
Clip the excess off around the bottom.
4. Take another bit of bubblewrap and make a circle. Cut a slit and a hole to correspond with the gaps in the yoghurt container’s lid. Put it on the bottom of the yoghurt container.
5. Cut slits in the part of the bubblewrap that is sticking up above the bottom, and fold them down onto the bottom. Tape into place (this tidies it up and adds a little more insulation). Apply packing tape to the junction between the bottom and the sides.

6. Cut a hole in the bottom of a plastic grocery bag. Thread the bottom of the yoghurt container through so that the bottom of the container lines up with the hole, allowing the heating pad cord to go through and giving access to the hole in the middle.
Tape around the yoghurt container in the bag, to snug the bag on and generally stabilize things.

Tuck the open top of the bag through to line the yoghurt container’s central space. Make sure that there is a clear path through the yoghurt container, through the hole, and out the other side — that’s where the hummer feeder and its cord will go.
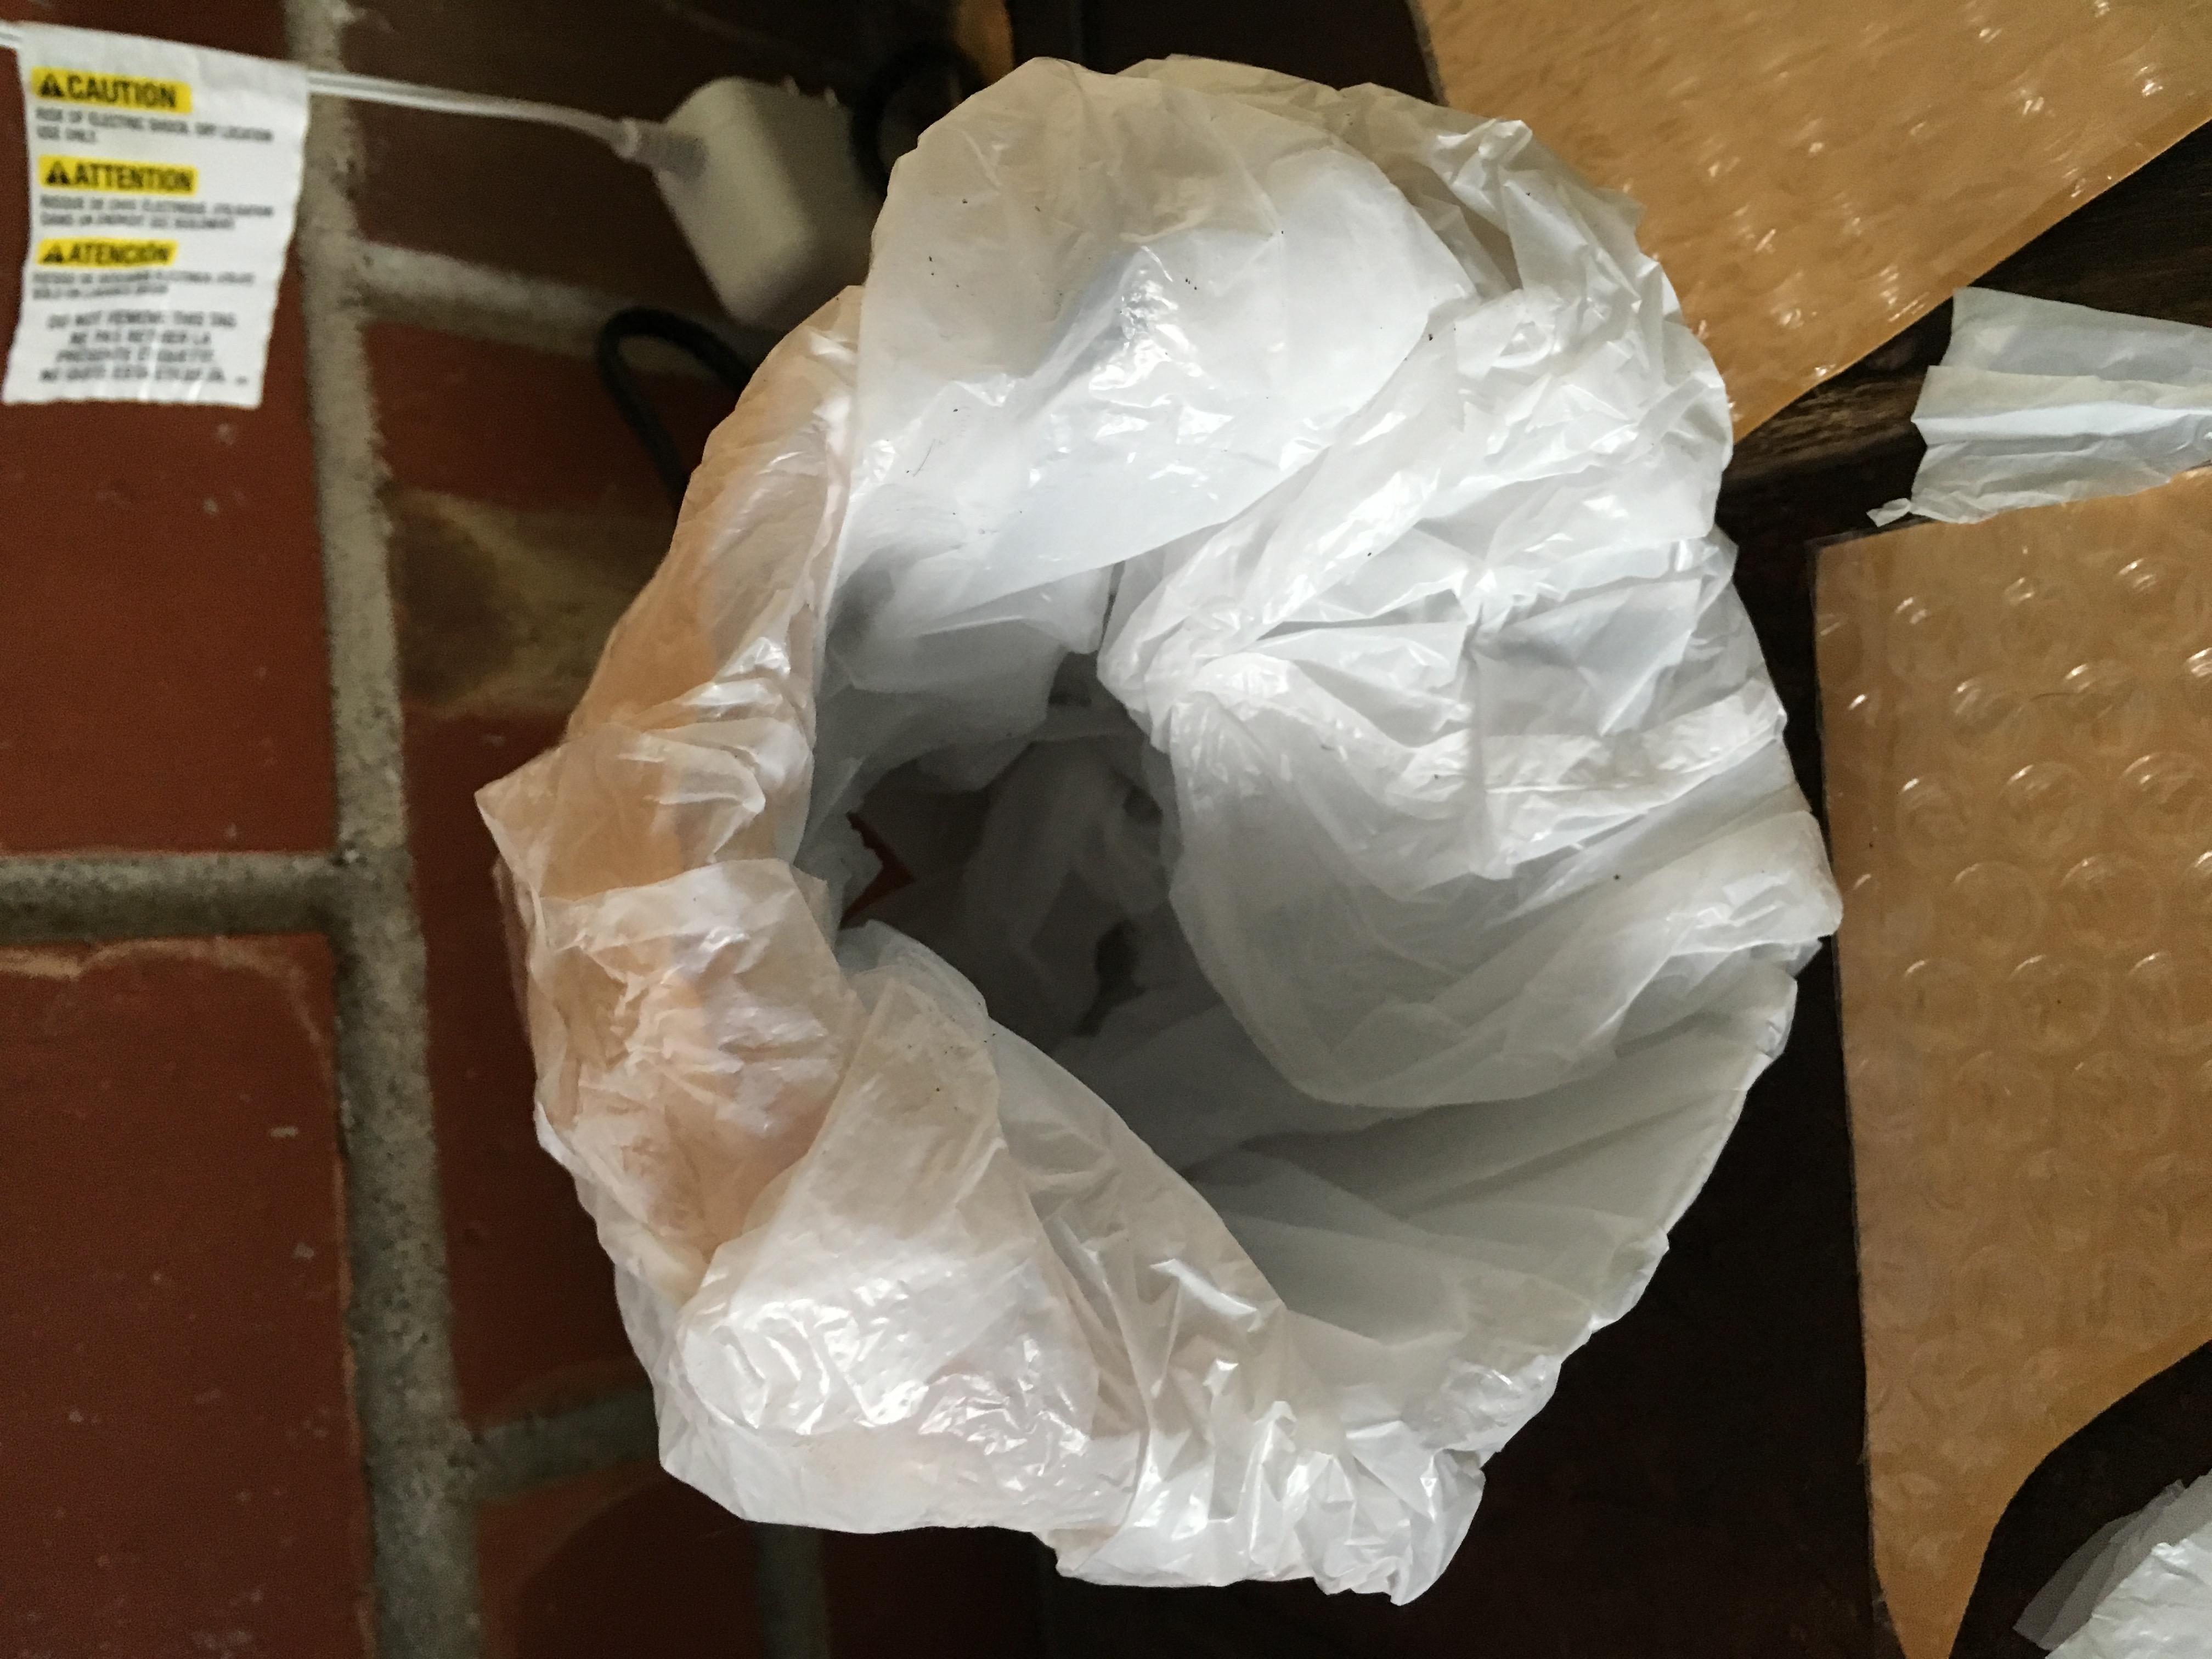
The grocery bag will help protect your work from any stray sugar water, and will help restrict the escape of warm air (we want to keep it in the cavity, and this is part 1 of that effort).
7. Make sure that your hummer feeder fits nicely inside the cavity, and that its cord can get through the top hole. If so, you’re ready for installation!
Note that the finer points of installation will depend on whether your feeder is on a pulley system (as mine is), or whether you just hang it each time. In the former case, you want the heater installed where the feeder will hang, and then you’ll hoist the feeder into it (and adjust). In the latter case, you’ll put the heater over the feeder, and then install the whole shebang. More on that in 10.
The cord arrangement below should work well for either case.
8. Set up your cords. Note that you want the cord of the heater coming down from above, close to where the feeder itself hangs. This will keep the heater from tilting the feeder.
I tacked a couple nails into the eave to one side of the feeder. I hung a binder clip on each. I clipped an outdoor-grade extension cord with one, and hung it. I then clipped the cord of the heating pad with the other, and hung it.
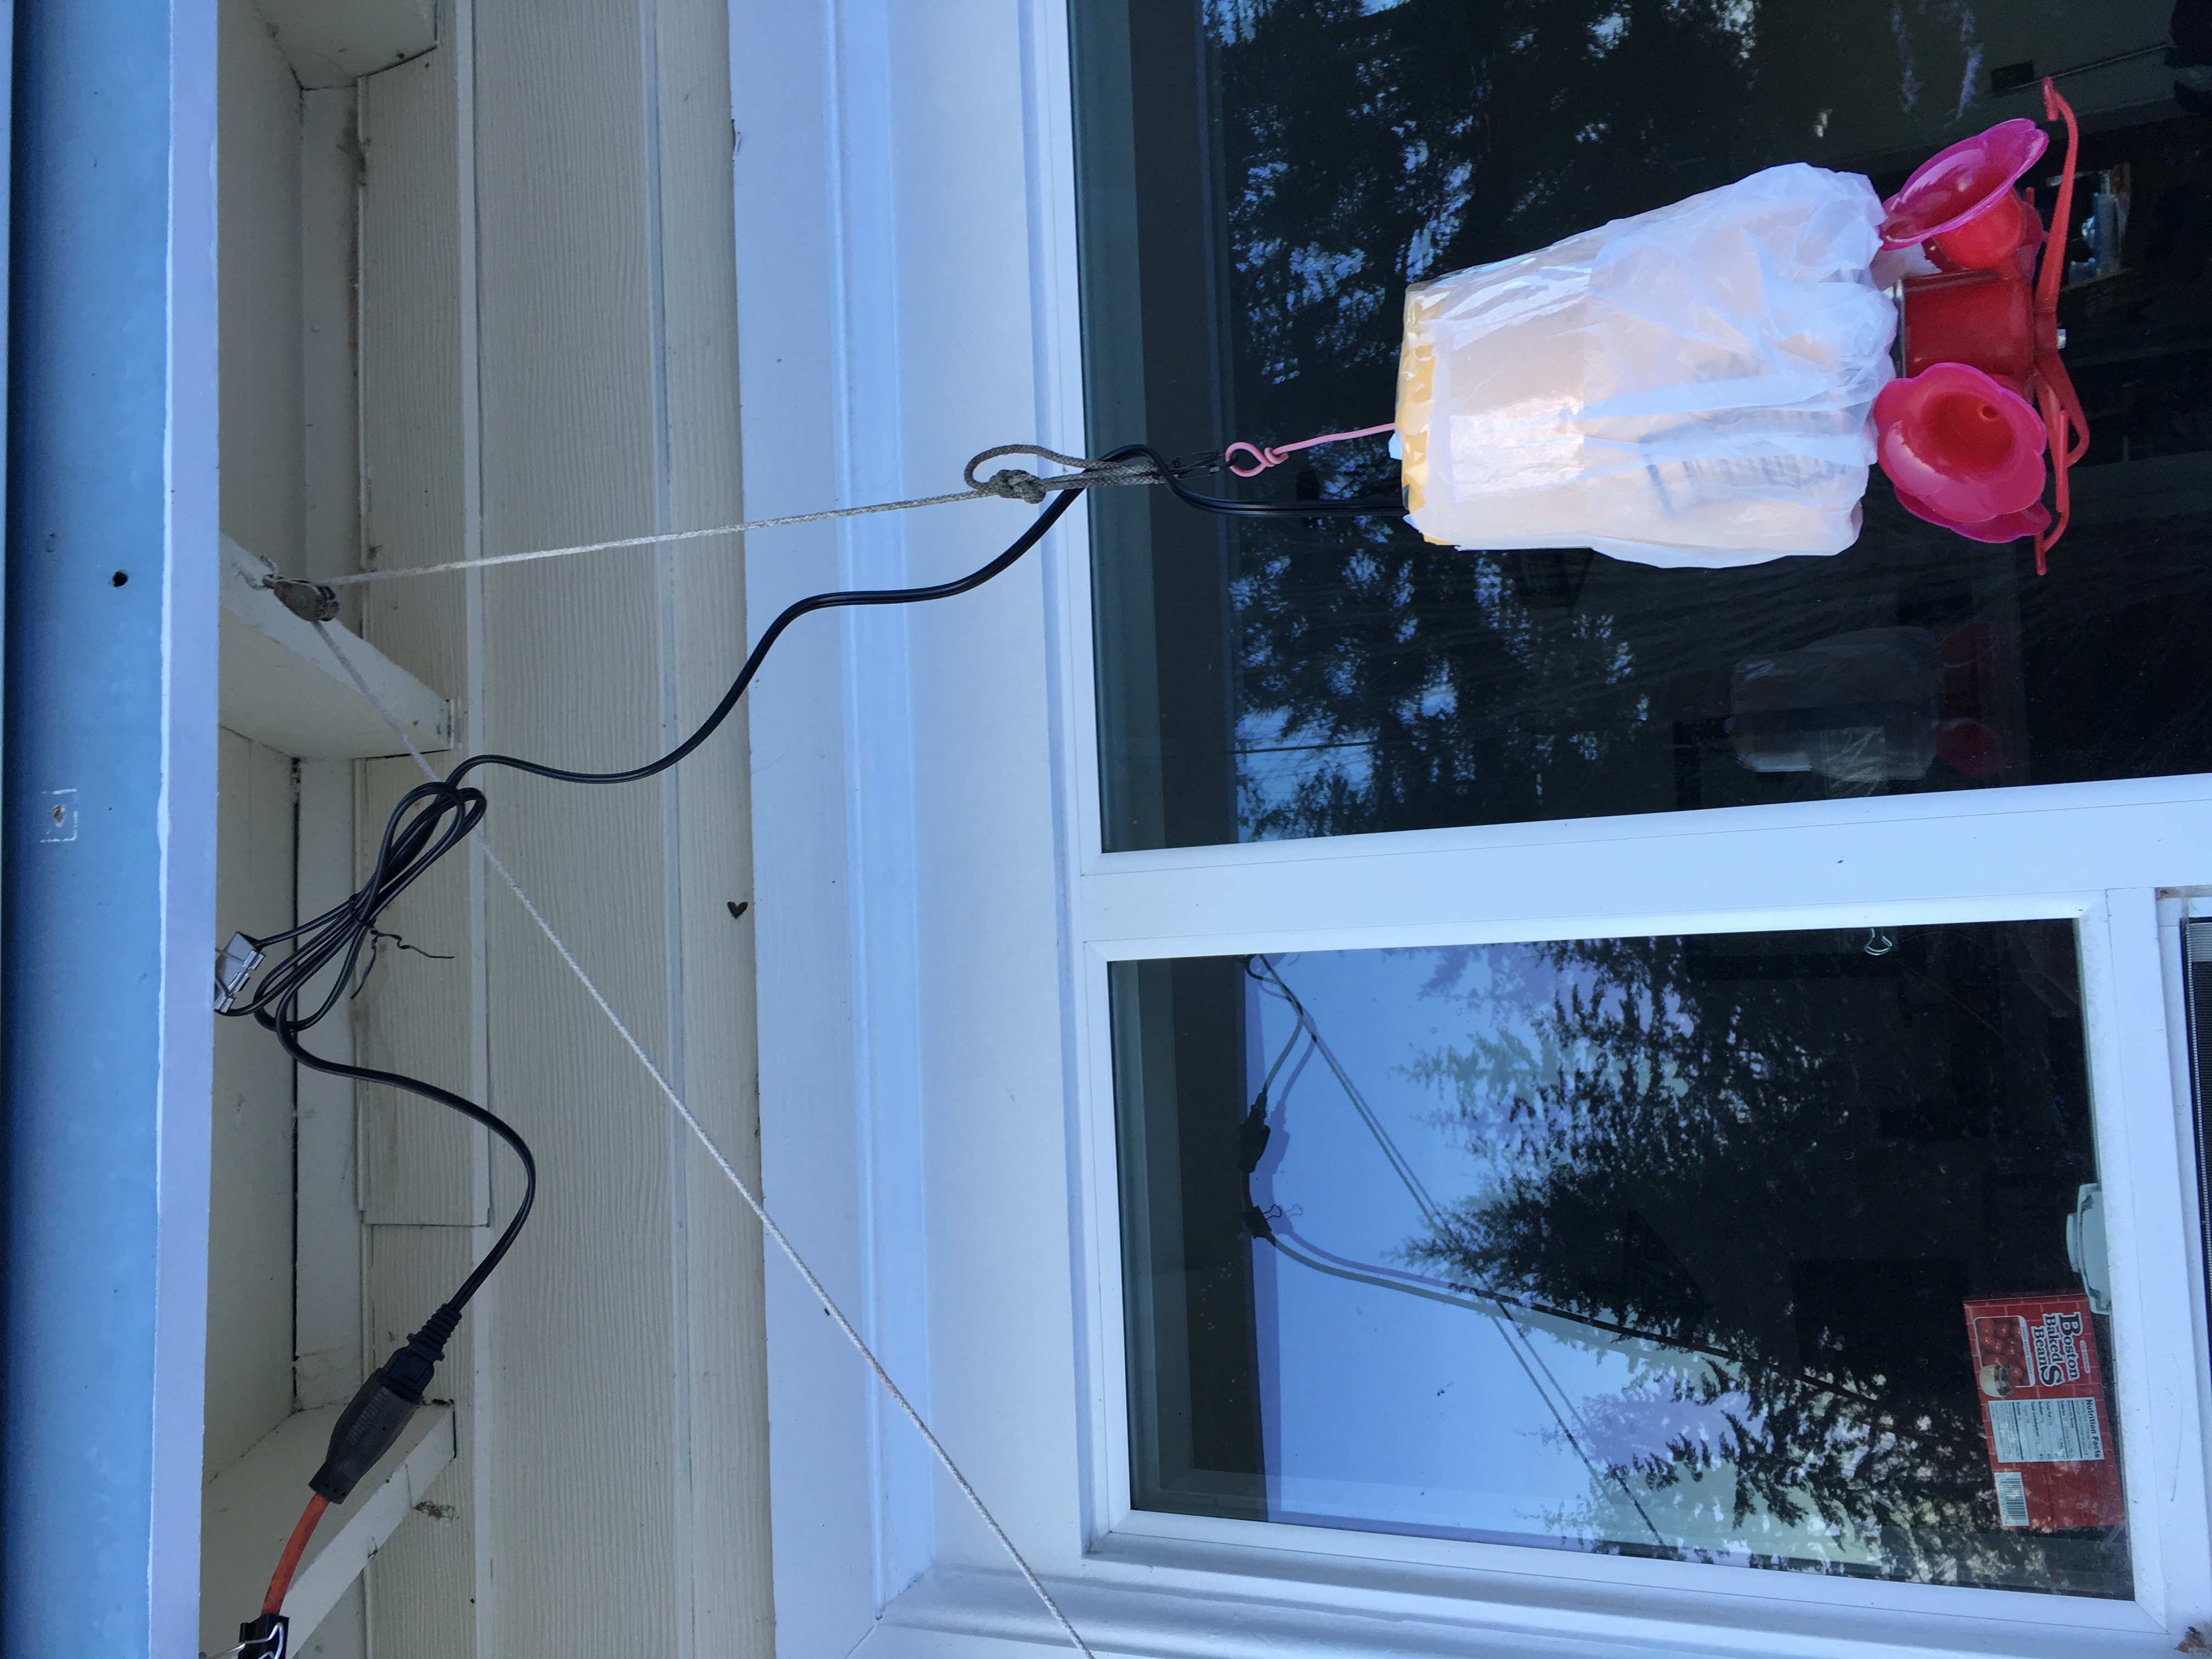
That keeps the cords at a good angle, and keeps the junction out of the weather.
9. Prep the feeder.
You will note that the heater does not provide close contact with the feeder, and there is likely to be a significant air gap between the bottom of the heater and the lower part of the feeder. It is important to fill that.
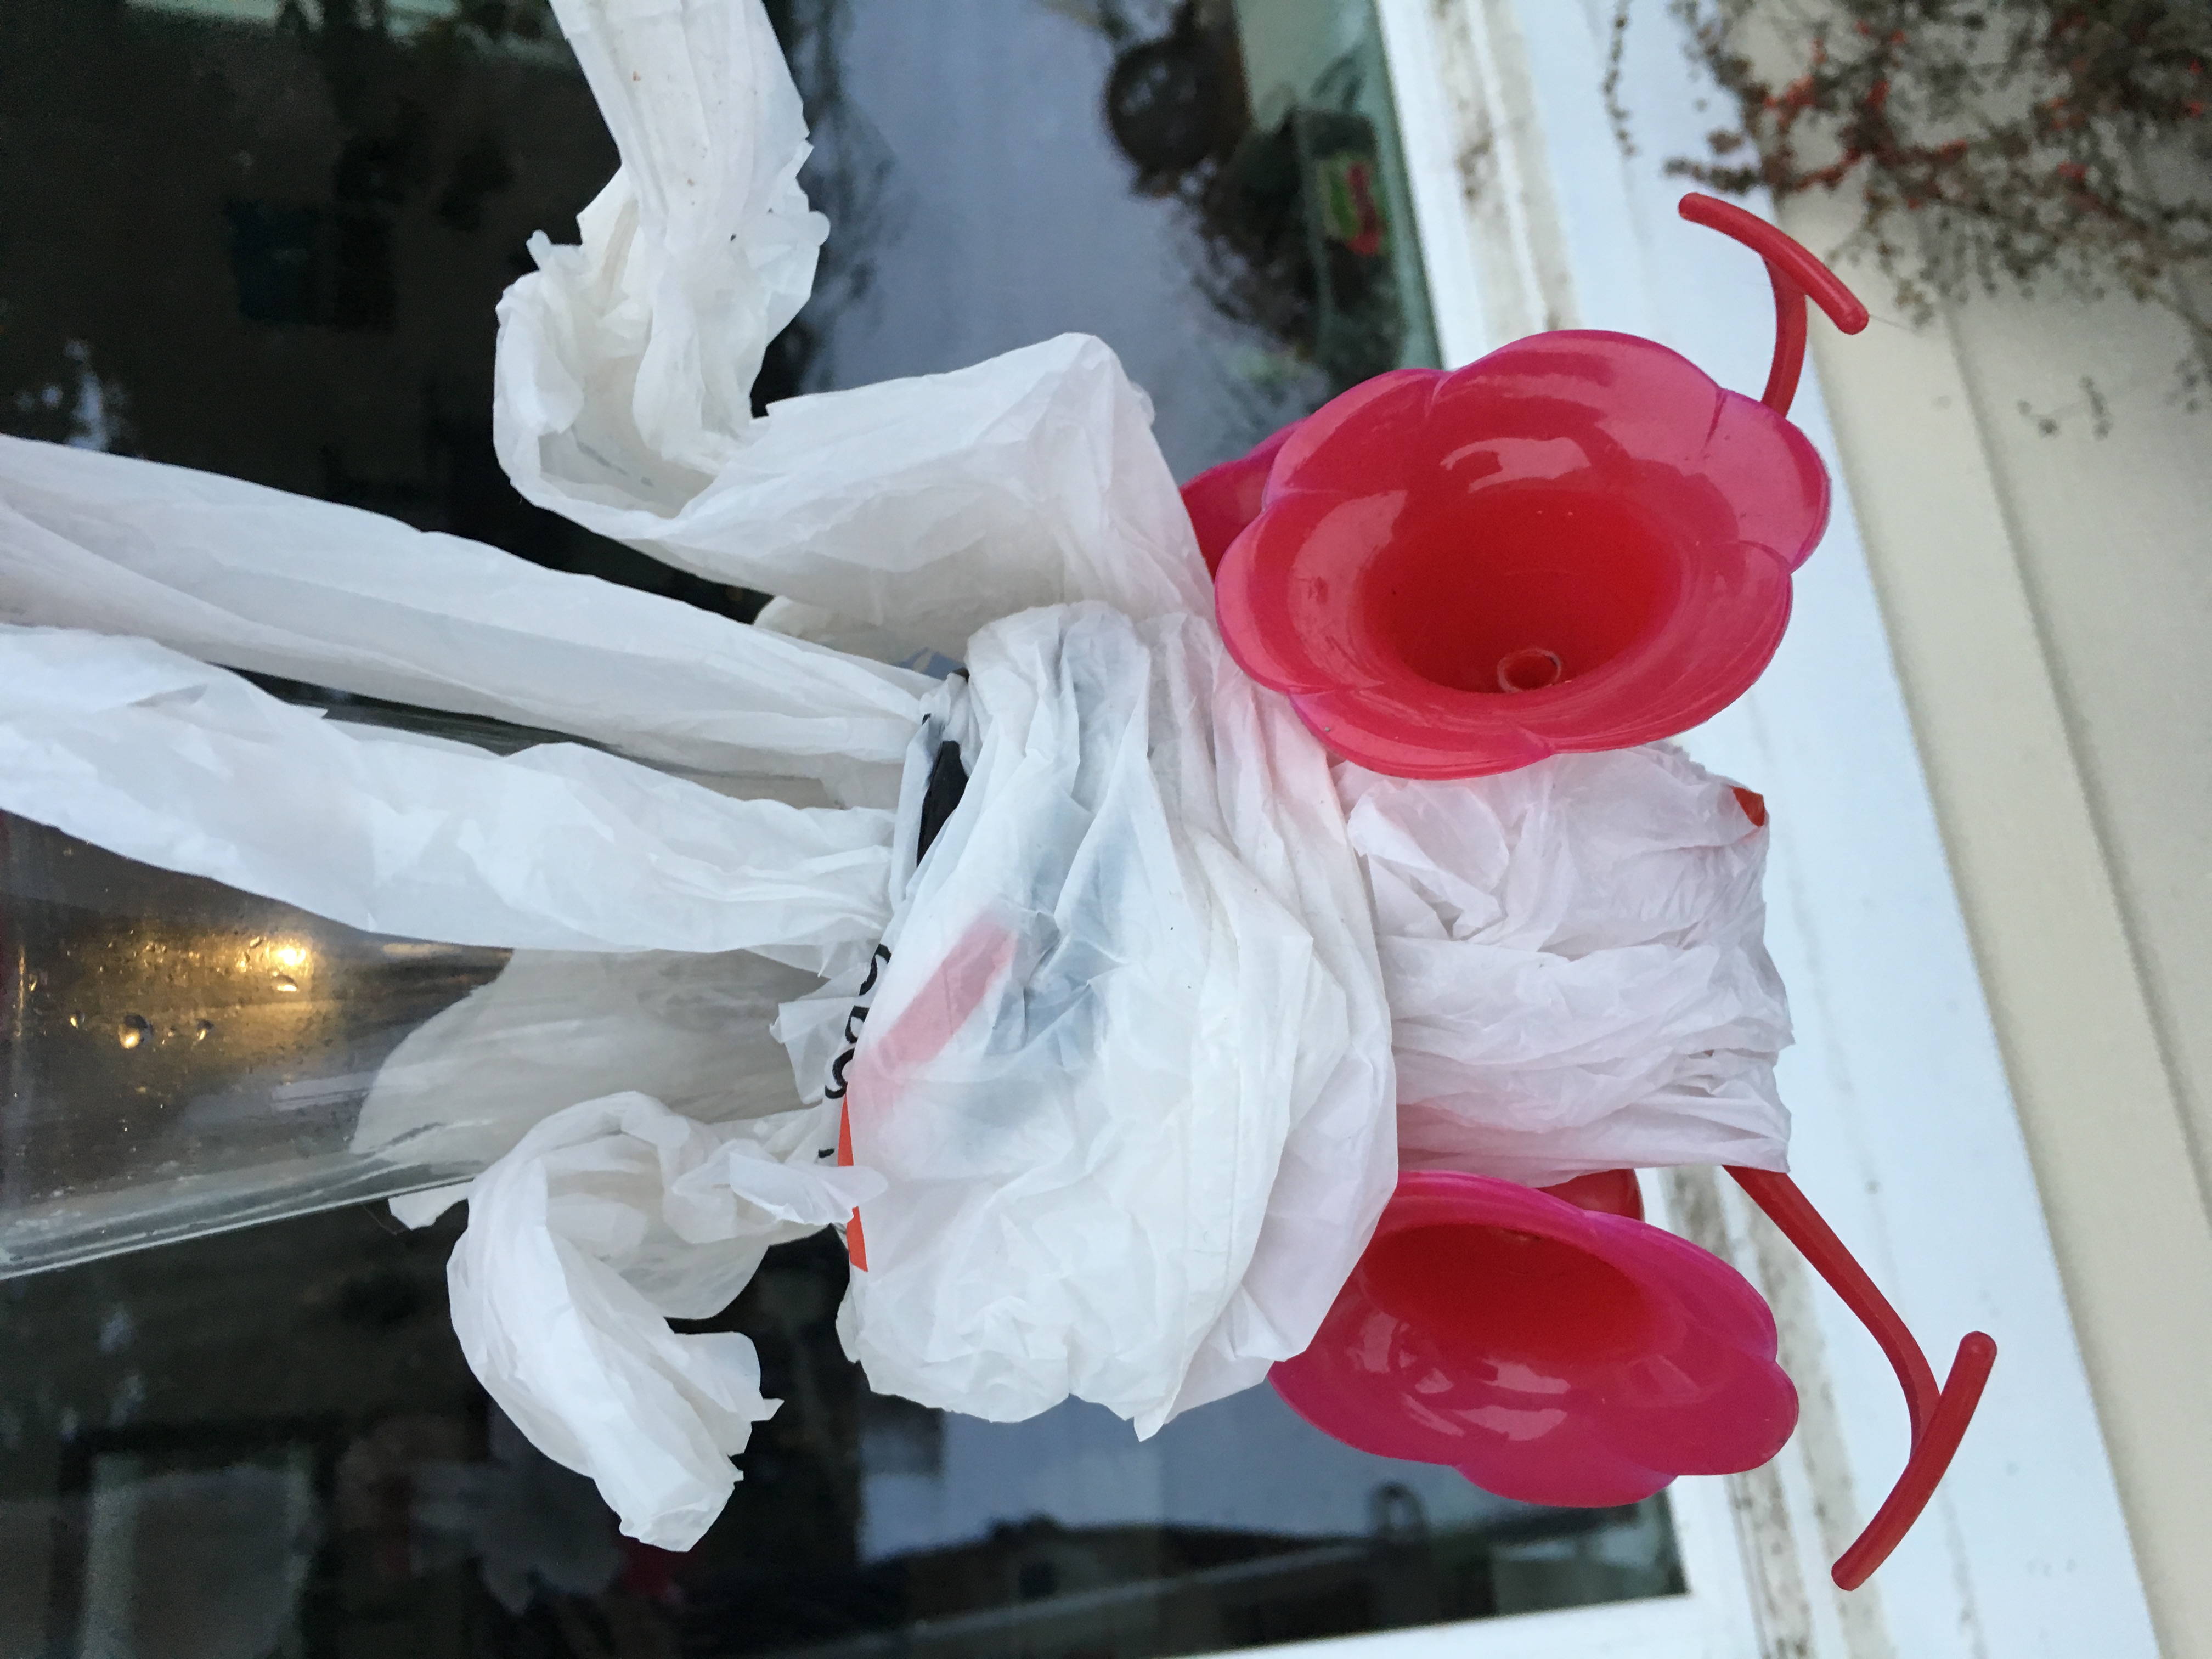
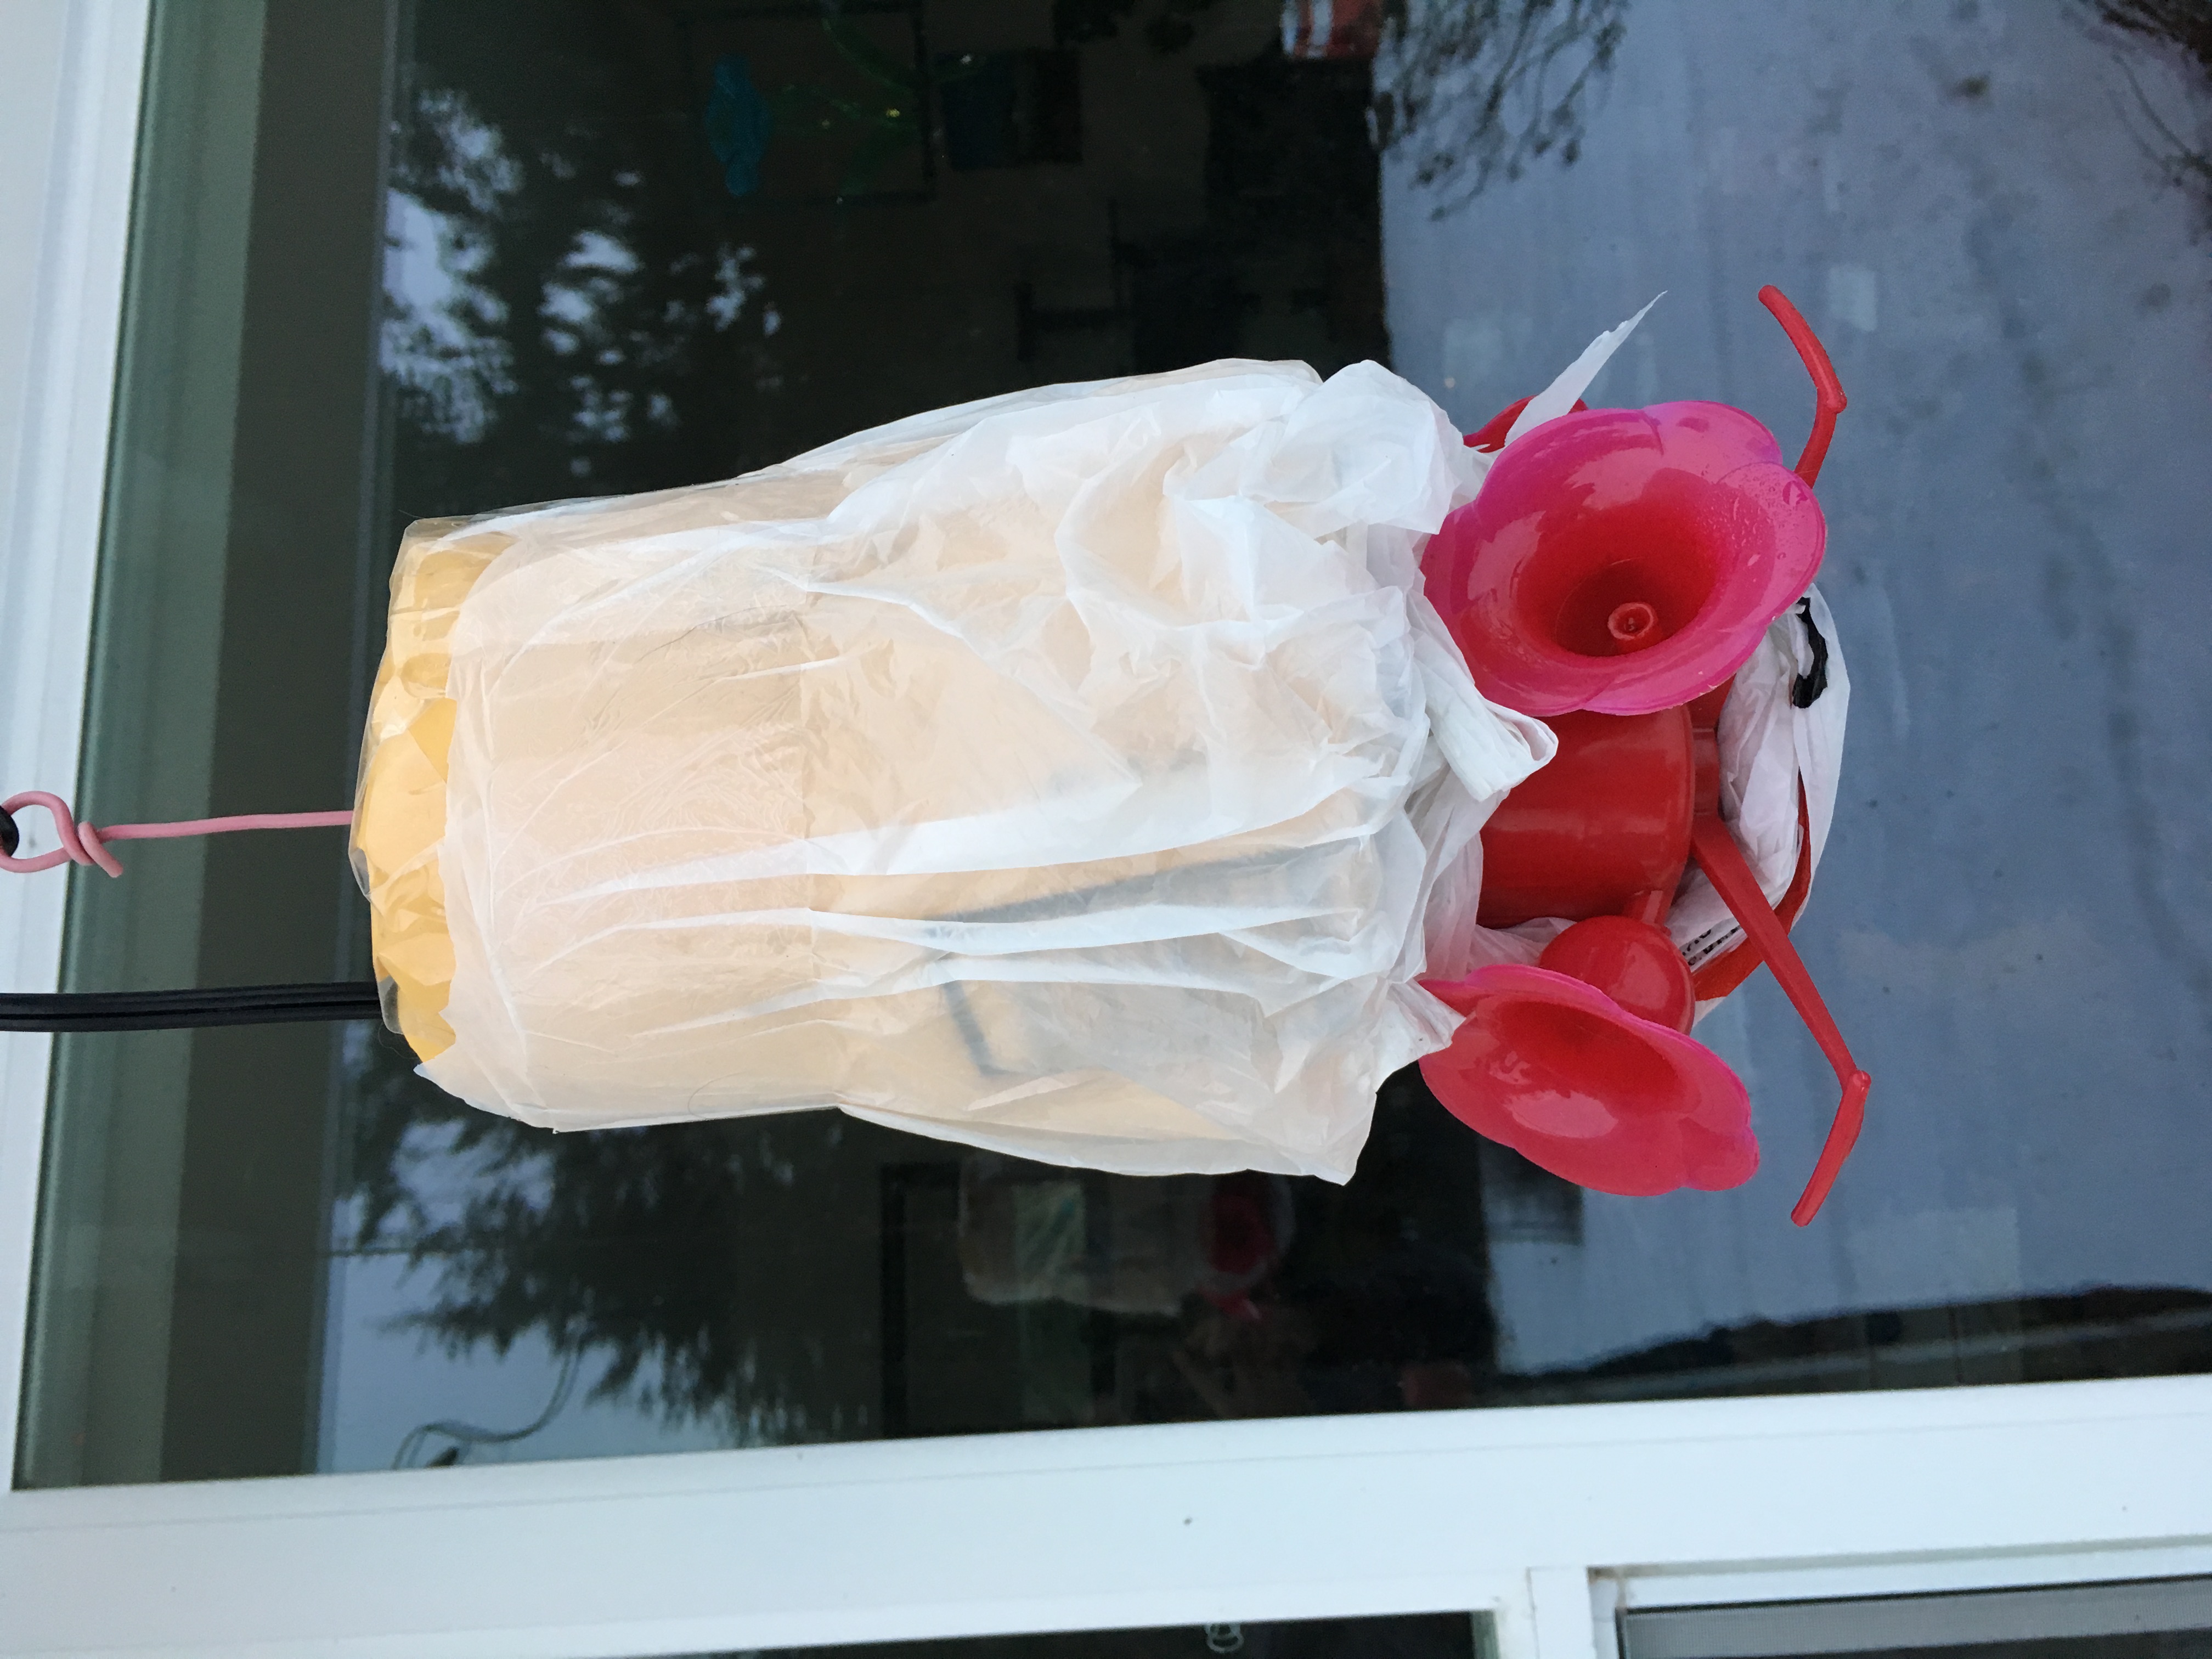
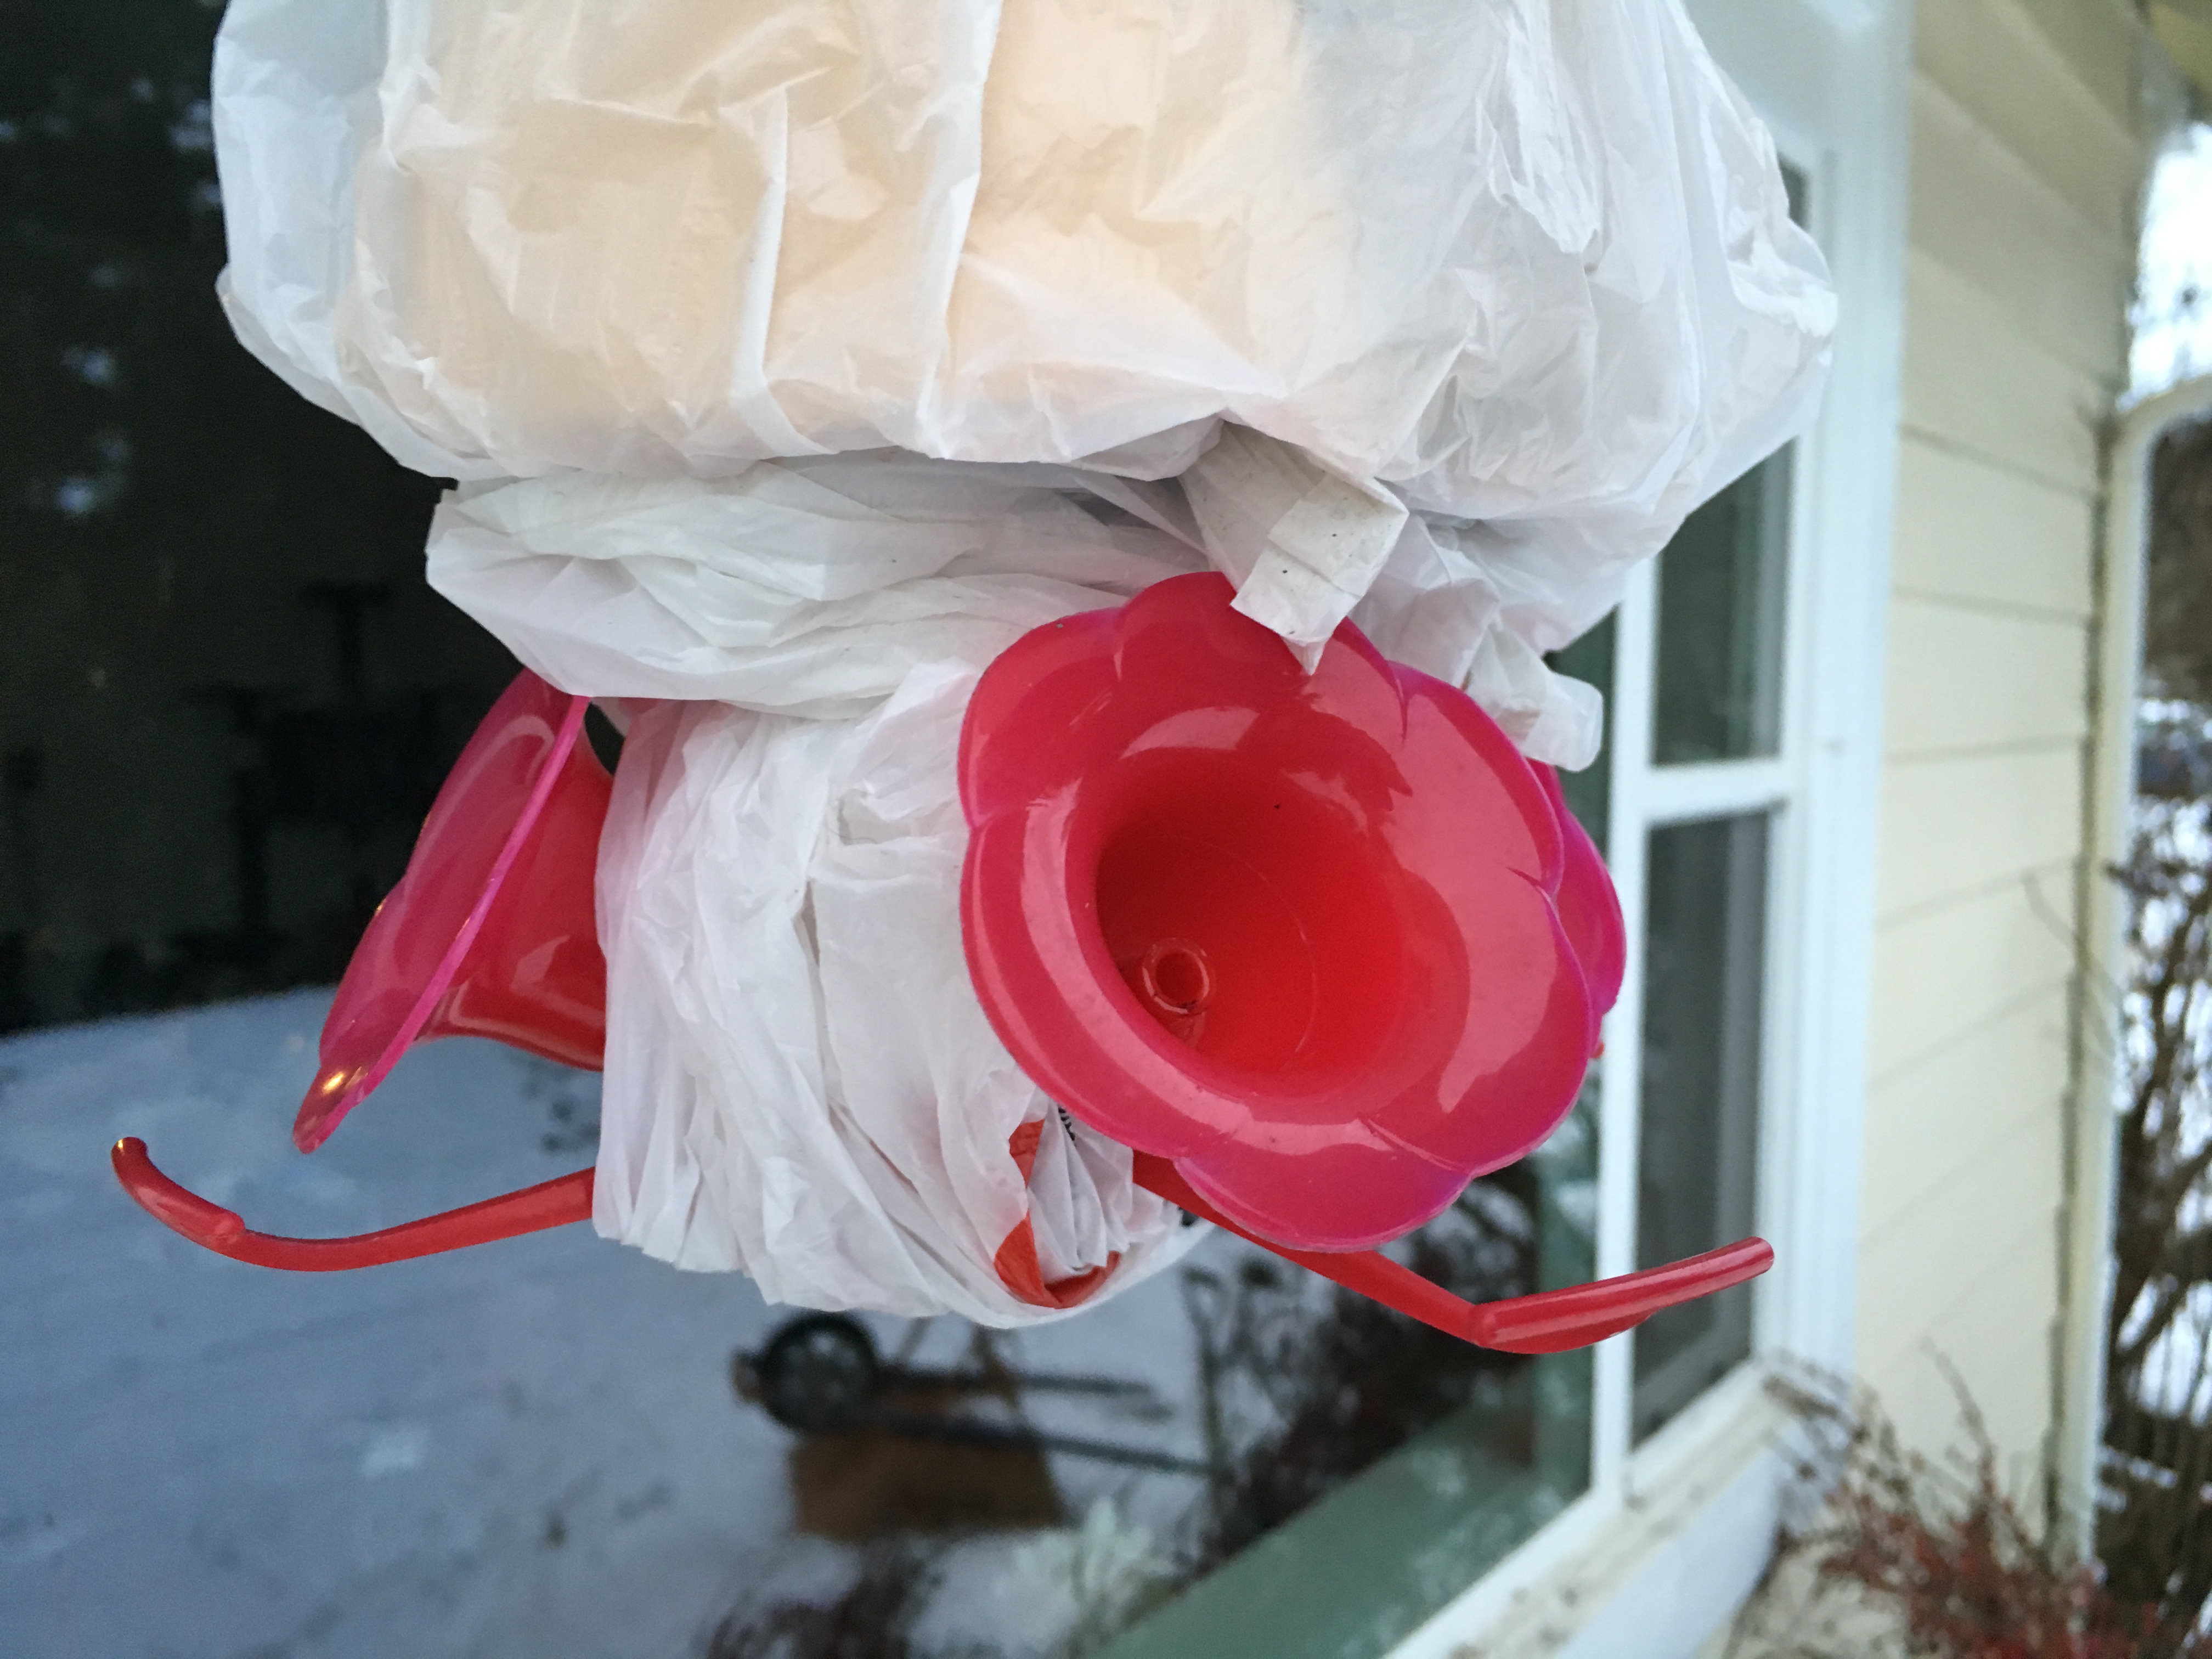
At minimum, tie a plastic grocery bag around the feeder, down close to the flowers. This will fill the gap between the heating hood and the feeder, and allow warm air to build up inside.
However, I found that with that arrangement the feeding straws still tended to freeze at 23-24 degrees F, even though the reservoir was lovely and fluid. To fix this, take another plastic bag, slide it under the middle of the hummer feeder, pull the ends up on either side and tie it on (e.g. With the second plastic bag mentioned above). This will create some protection and heat transmission for the lower part of the feeder. With this arrangement, I was able to predictably have fully accessible hummer water at 20 degrees F. It could probably go a little lower, but you might need to strategically add more insulation — e.g. a second grocery bag going under the bottom, up between the other pair of flowers (if you’re using the common four-flower feeder design).

10. Put up the feeder.
10a. If you have a pulley system, hang the heater where you want the feeder to be. Thread the cord from the pulley through the hole in the top of the heater, and pull it down until it’s at a comfortable height to mount the feeder. You will then hook up the feeder and hoist it until it’s in the heater. You will need to be able to reach the feeder at its final position, so that you can make sure everything is snug, and check for freezing.
10b. If you just hang your feeder, slide the heating hood onto the feeder and thread the feeder’s cord through the top.
Mount the feeder and plug the heater’s cord in, ideally clipping the heater’s cord into the appropriate support (see 8).
11. Make sure that you don’t have any big gaps between the heating hood and its plastic bag scarf. If there are any, adjust the plastic to cover them. You want to keep the warm space as warm as possible.
11. Check the feeder.
This is very important, especially if this is your first time mounting the feeder, or if the weather has suddenly gotten colder.
If the little access points freeze, the hummer still can’t get to the food. If this happens, get everything thawed out (remember, that tiny bird is counting on you!), and then get it set up again, possibly adding a bit more insulation around the lower part of the feeder.
If it is very cold, you may still need to bring the feeder in at night, and then just use the heating hood to keep it fluid during the day.
Once you have observed the hood’s behavior at various temperatures over a few days, you can feel more secure, but keep an eye on it.
One last note:
This is a contingency plan, for if the weather gets brutally cold and there are still hummingbirds around. I recommend taking your hummingbird feeder in for most of the autumn, because ideally there won’t be any hummingbirds around in that ultra-cold weather.
But when the ultra-cold weather does come, if there are still a few holdouts, they may well die without your intervention.
Let me know if you try this, and how it goes!
I would be especially interested in any cold-weather improvements, or adjustments for different kinds of hummingbird feeders.