The Situation
A couple weeks ago we discovered that one of our two hives had split itself (probably in June), and the old queen/half the colony had settled on a Douglas Fir branch about 40 feet up.
When bees swarm, the beekeeper has a limited window to tempt the bees back into an empty box. Otherwise, the bees will find whatever digs are available: hollow trees and house walls are favorites.
Every once in a while, the bees don’t find any good sites, and they stay put in the open. Apparently that’s what happened here.
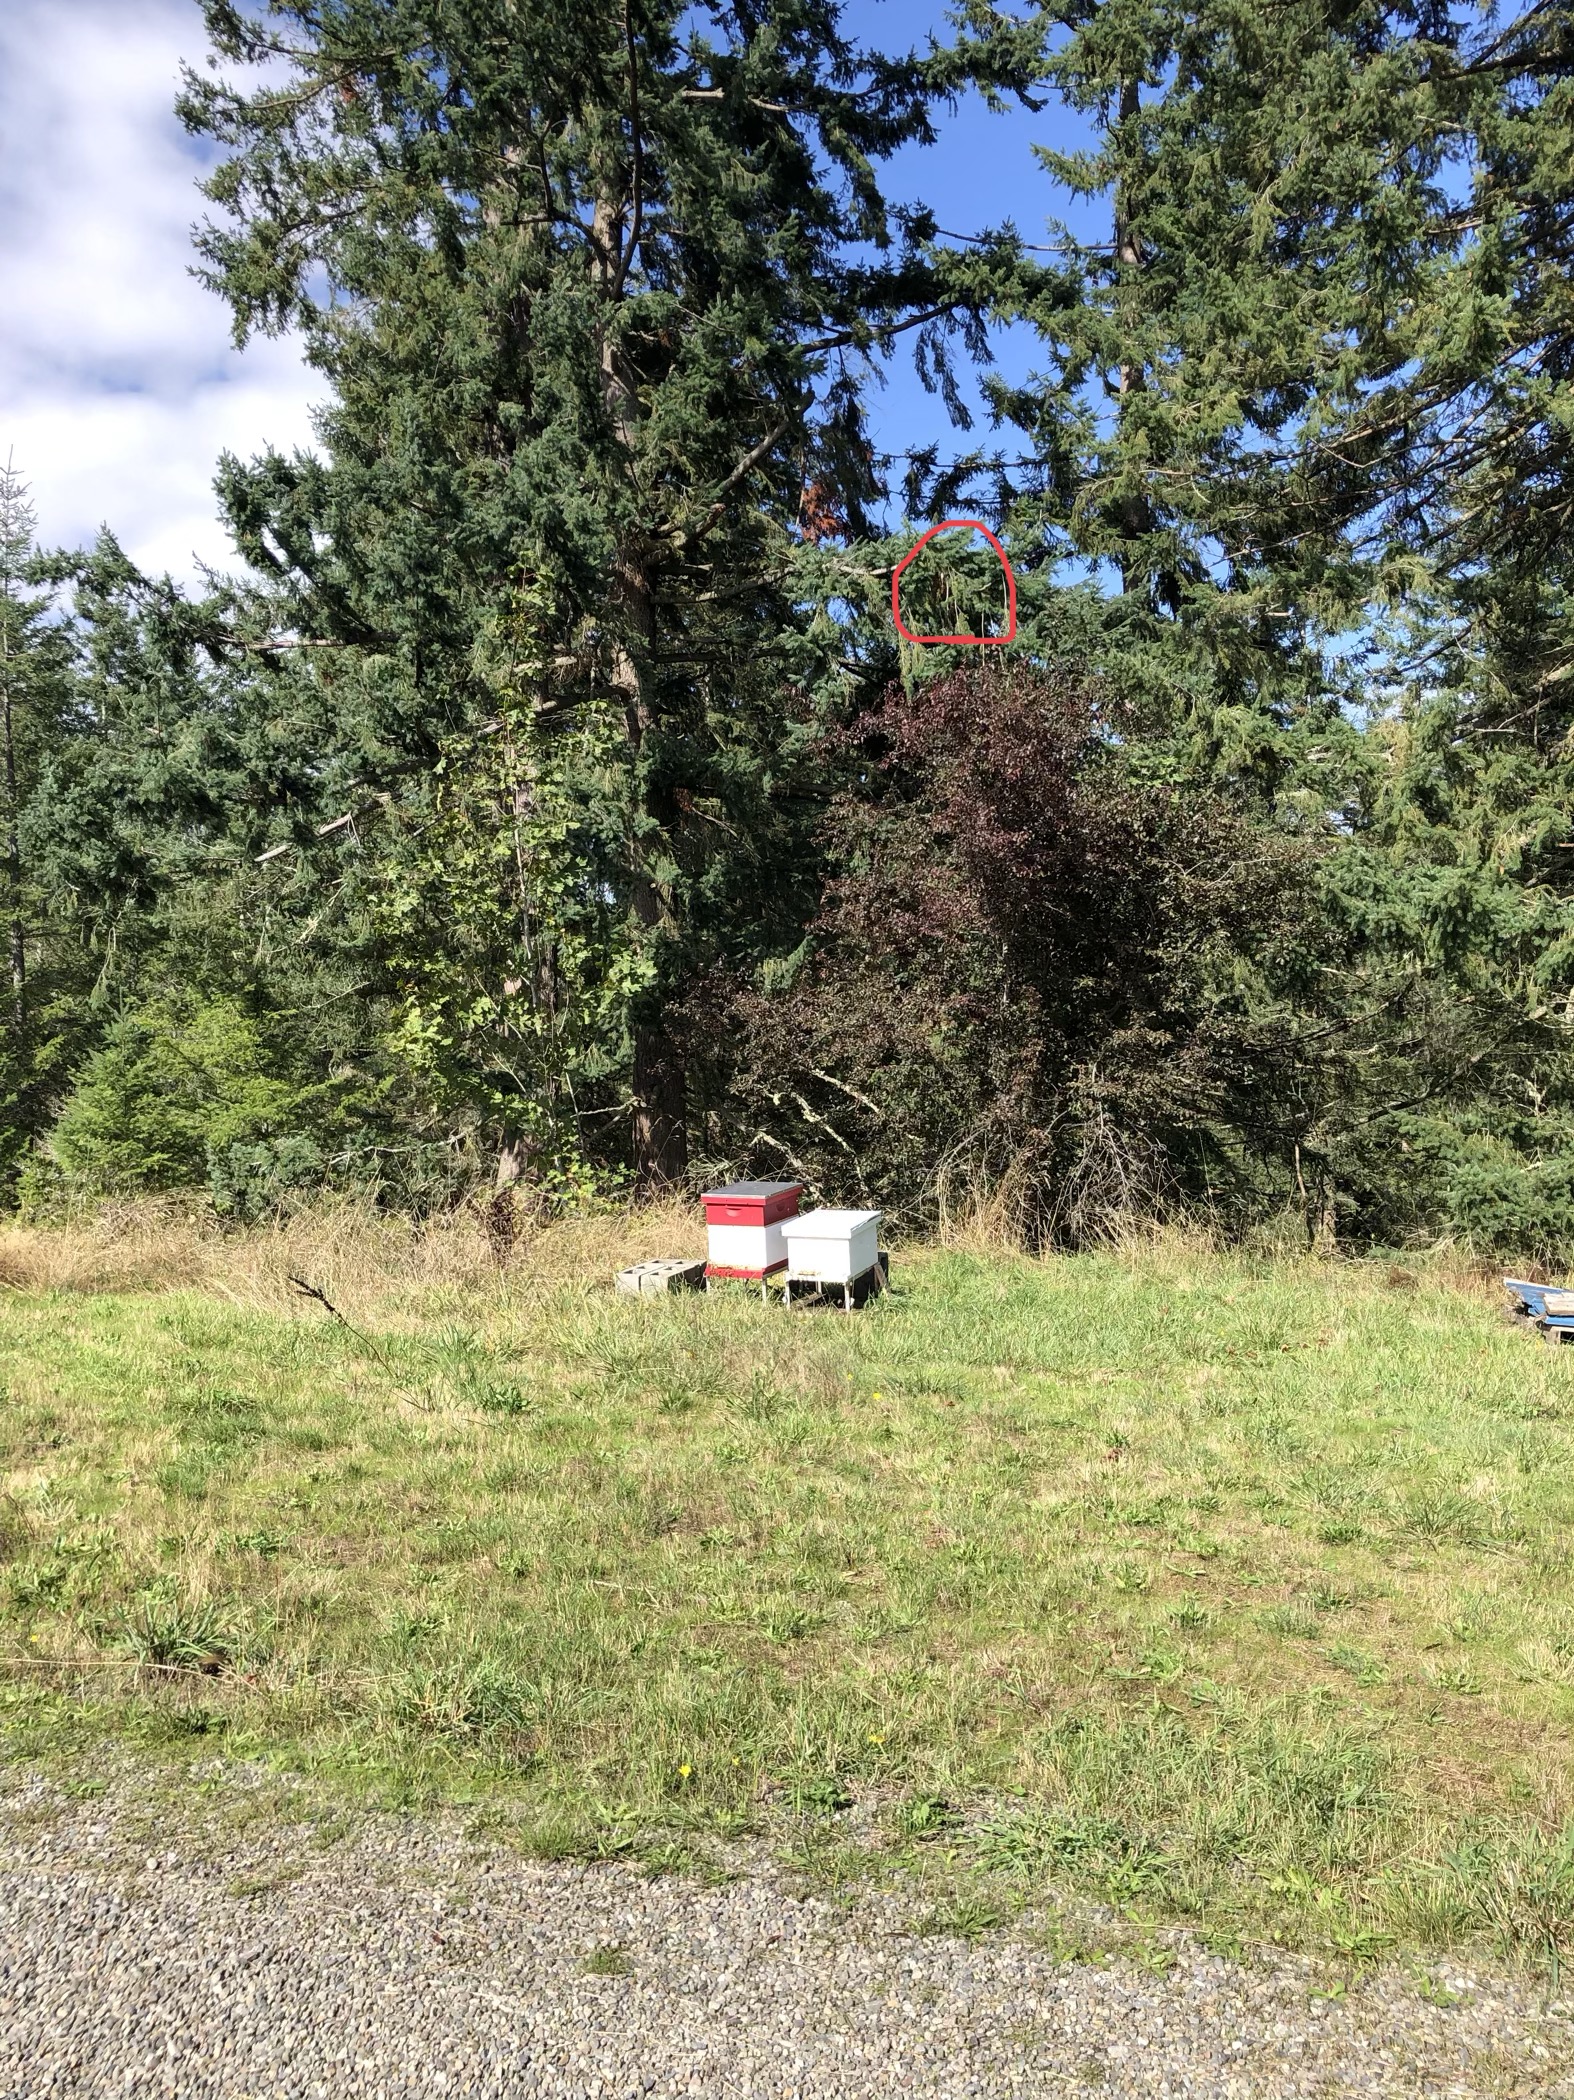
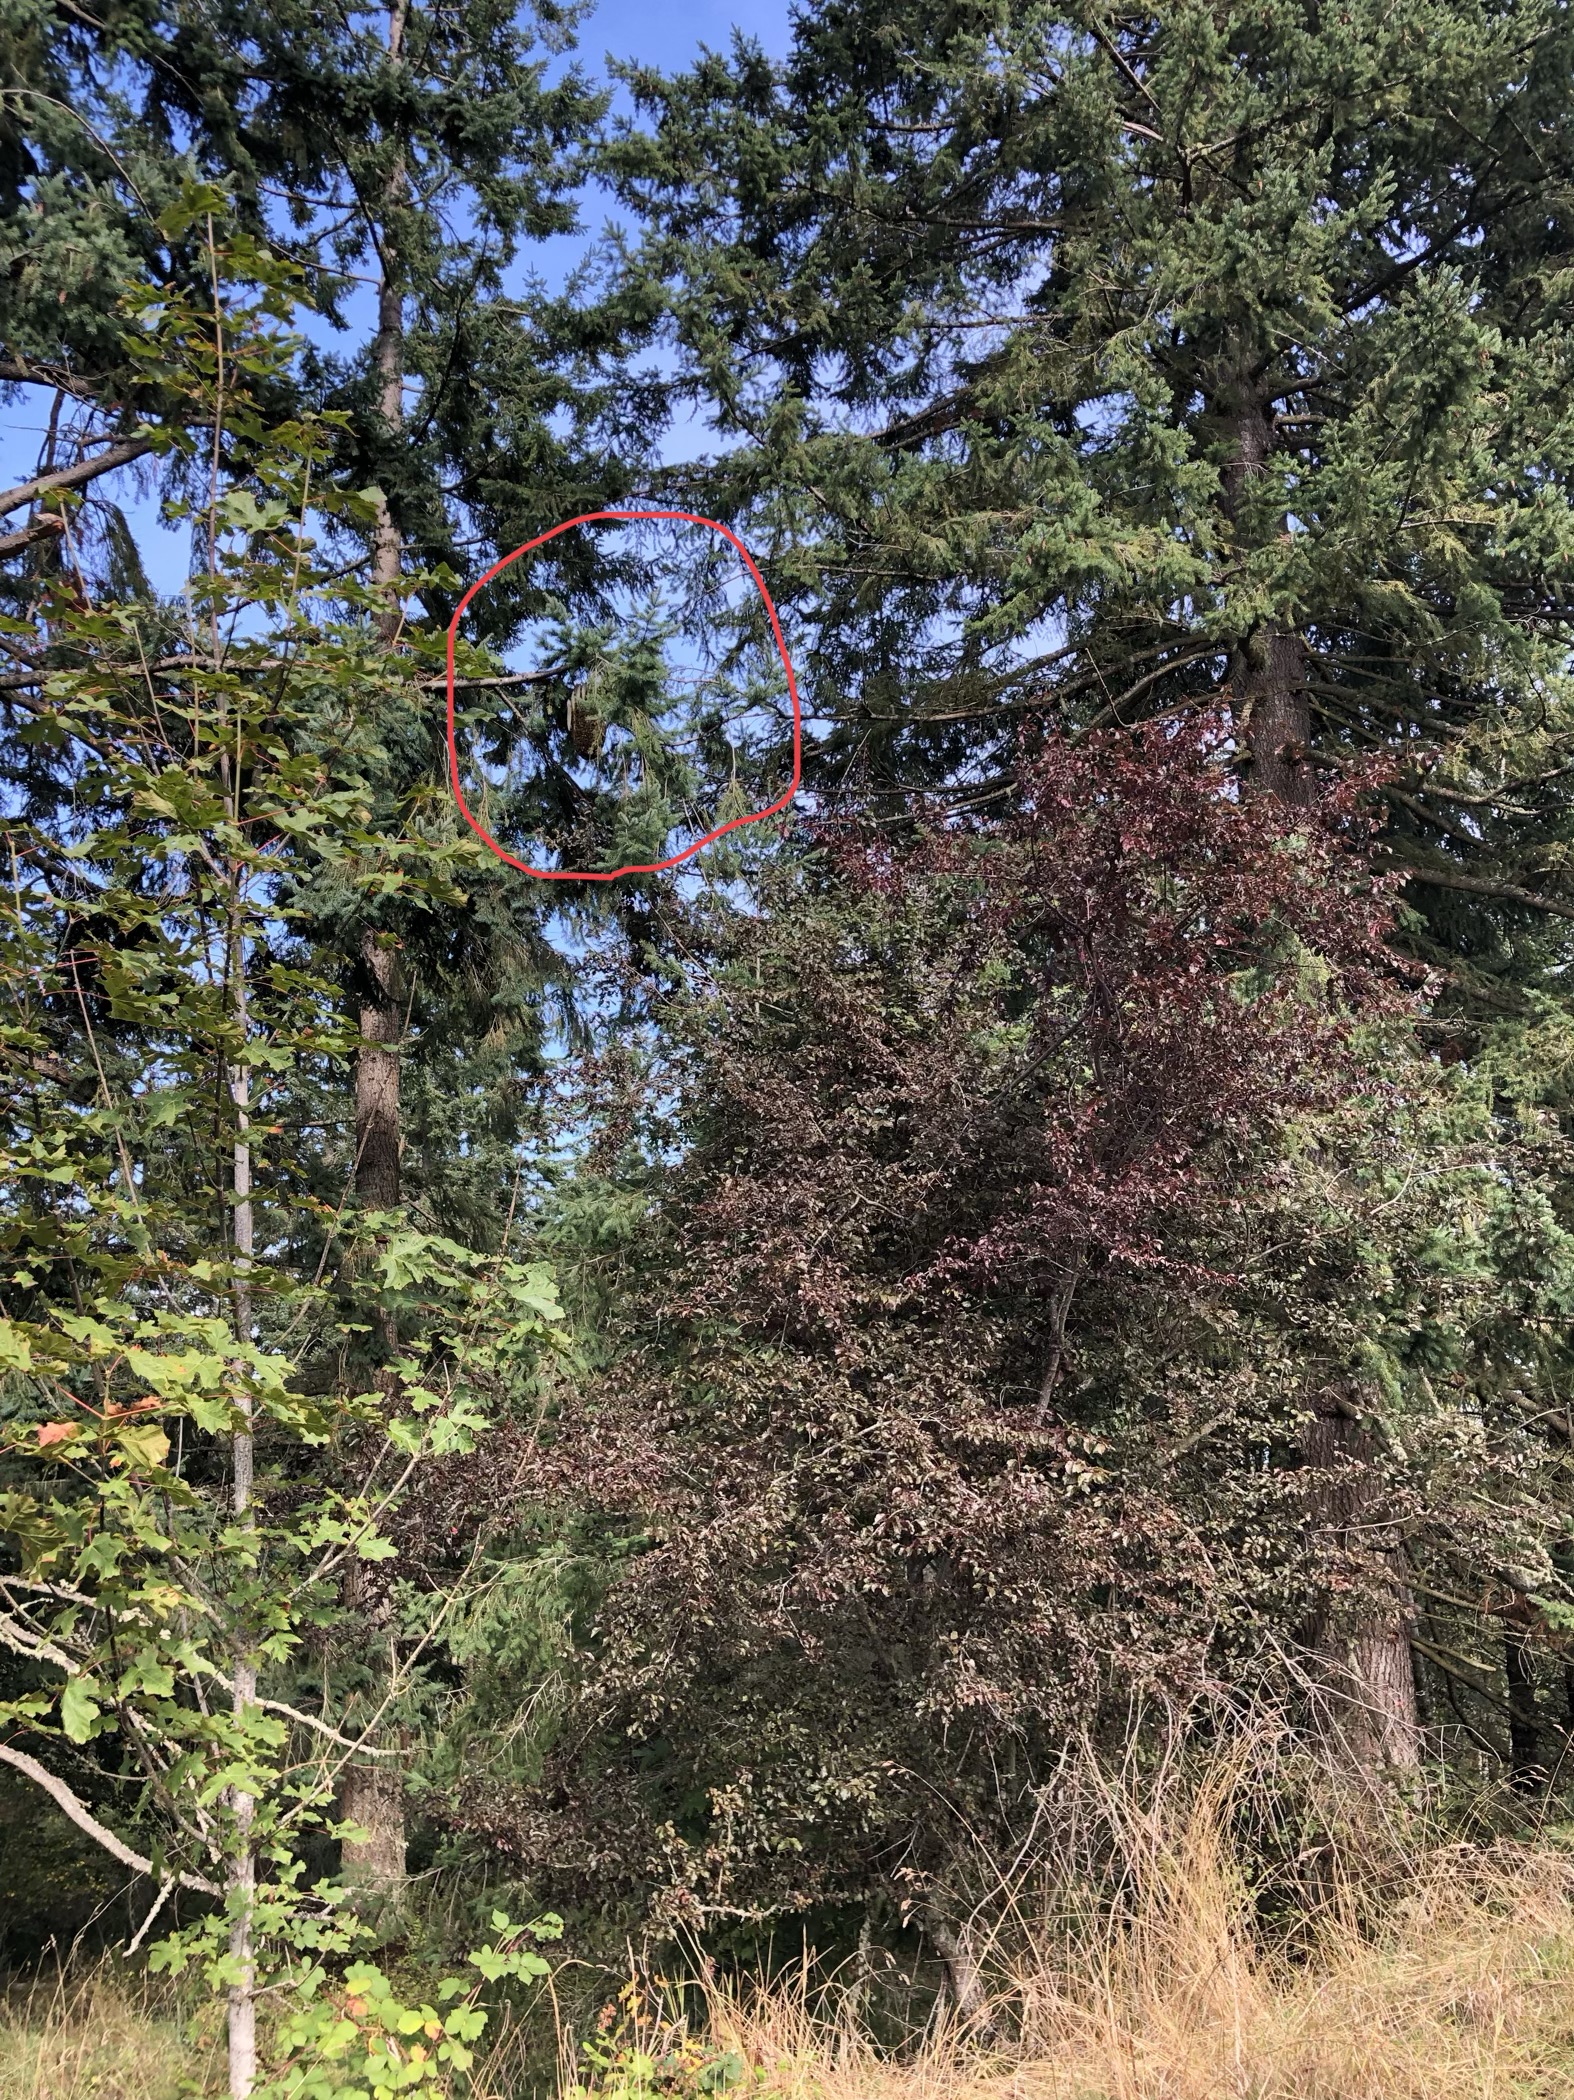
How could we have missed this? Well, although the colony was clearly visible from one vantage, it was masked by the end of the branch from the house. And apparently we don’t inspect our tree line very often. Yes, it’s a bit embarrassing. But would you spot it in this picture? See red circle.
At the time I thought it was neat but sad: neat, because it is amazing to see how the bees build their colony when left to their own devices; sad, because there is no way an exposed colony can survive the winter in our climate (cold + rain + wind = dead bees)… but it was too high to rescue. Or that was the initial conclusion.
Of course, having given them up for lost, our brains immediately started working on how they could be saved. Ladders? No… none of ours were remotely long enough. Climb the tree? Doug Fir branches are made for breaking. Cherry picker? Cherry picker!
We got some tips from friends and called around. A very nice electrician was inclined to help us… but once we got more accurate distance details, they realized their cherry picker wouldn’t reach. They told us that some tree services have big bucket trucks, and gave us a name to start.
That tree service was favorably disposed (the owner has a wild colony in a cedar stump, and they actually tipped it upright when it fell over in a storm… hooray for heavy equipment)… but they couldn’t come until late October.
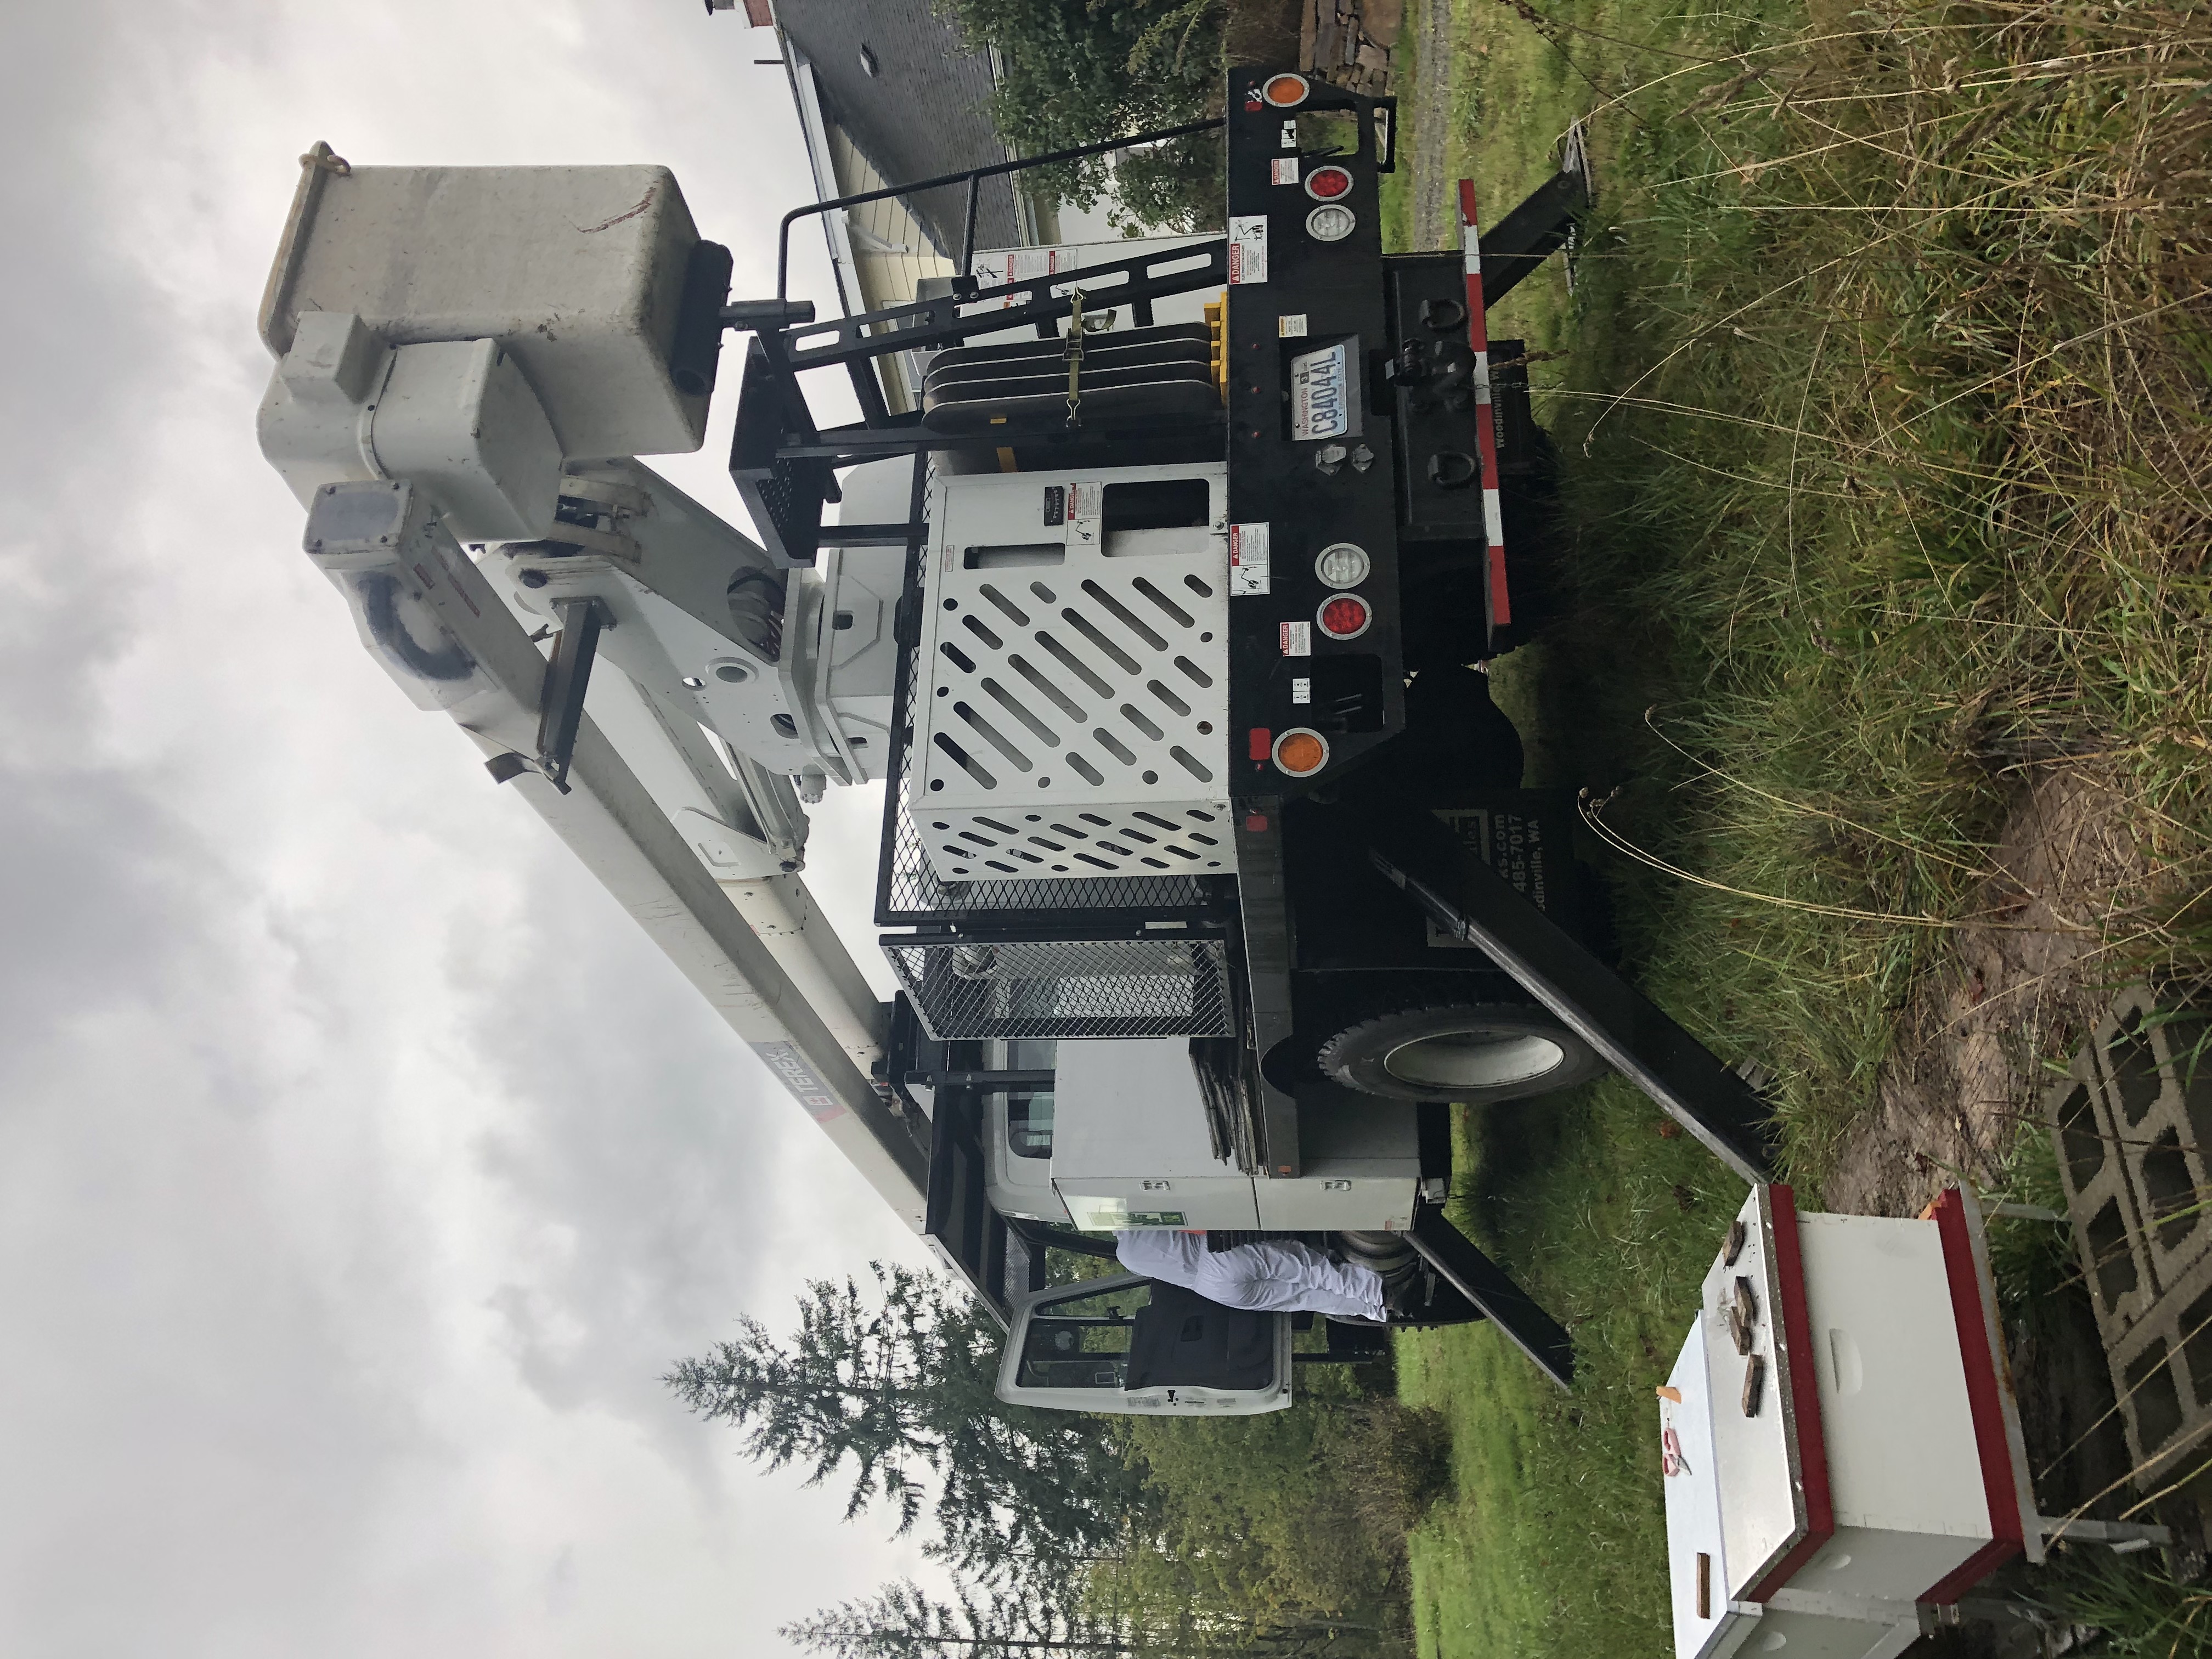
So we got in touch with an arborist who had worked with us on another project. Conor thought he could do it, and was able to come Saturday morning.
Here was the plan: go up, cut the end of the limb with the colony, bring it down, hang it on an A-frame ladder for better access, and try to rig the whole colony so that it could be settled in a bee box for the winter.
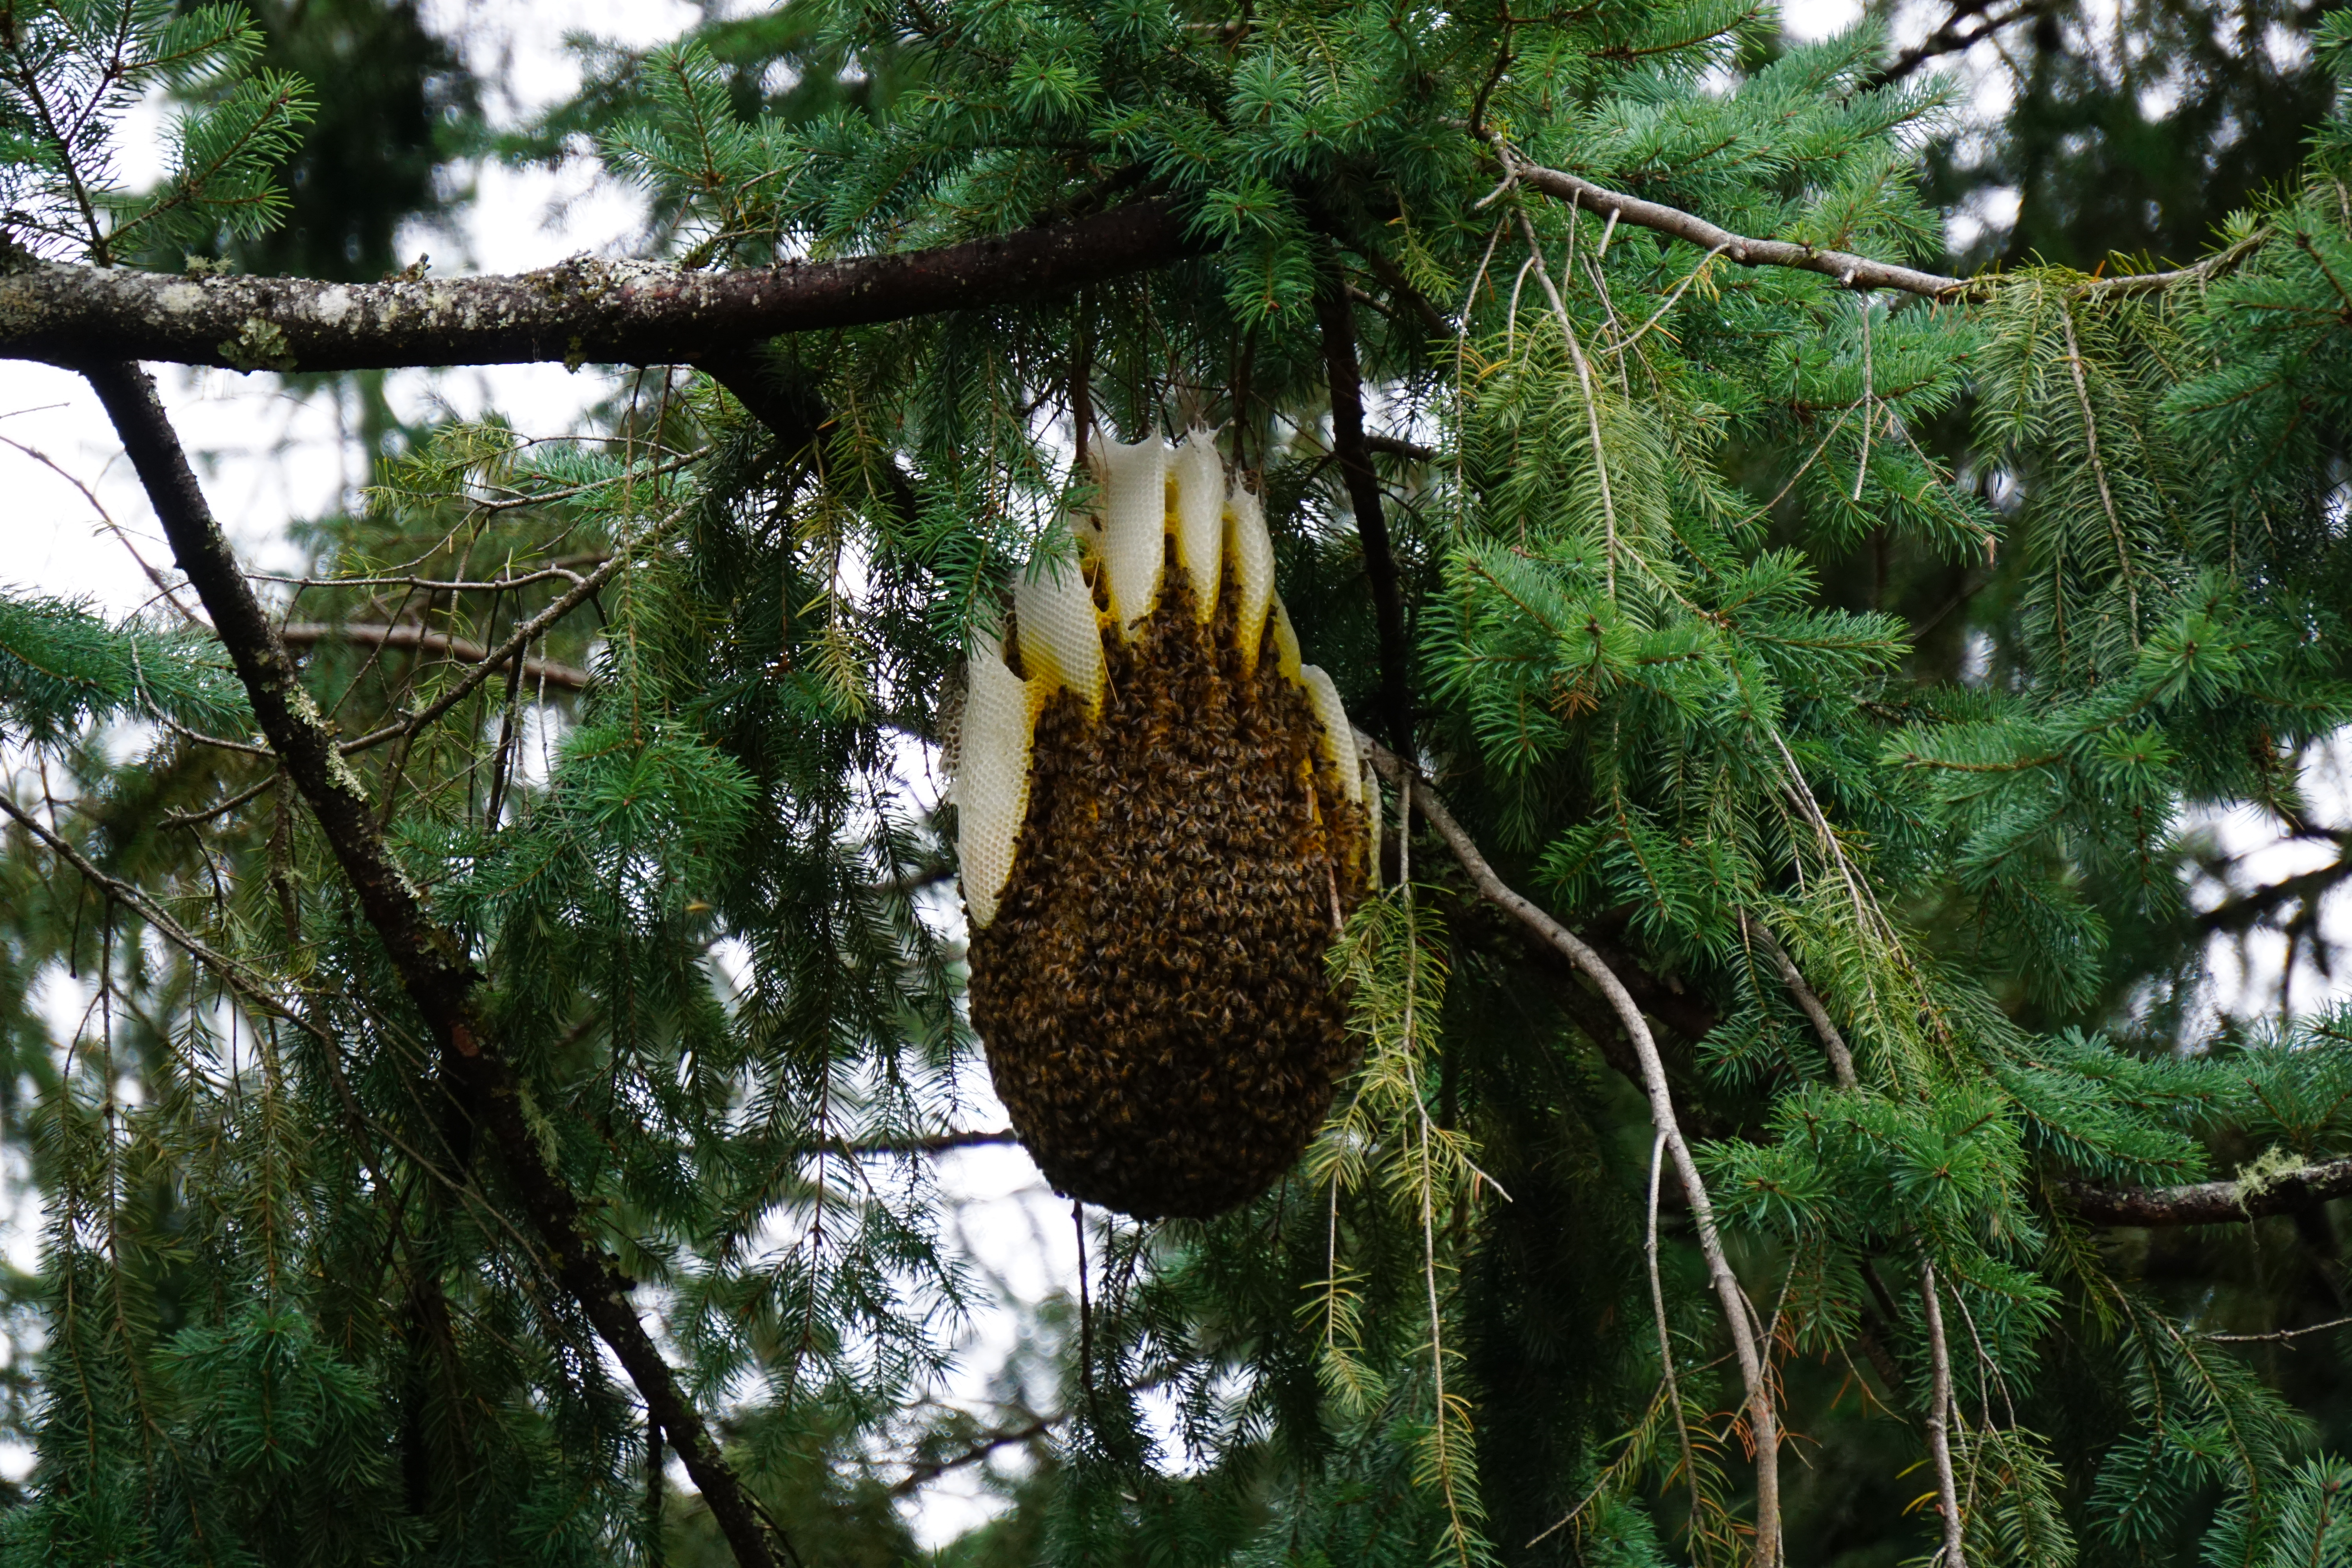
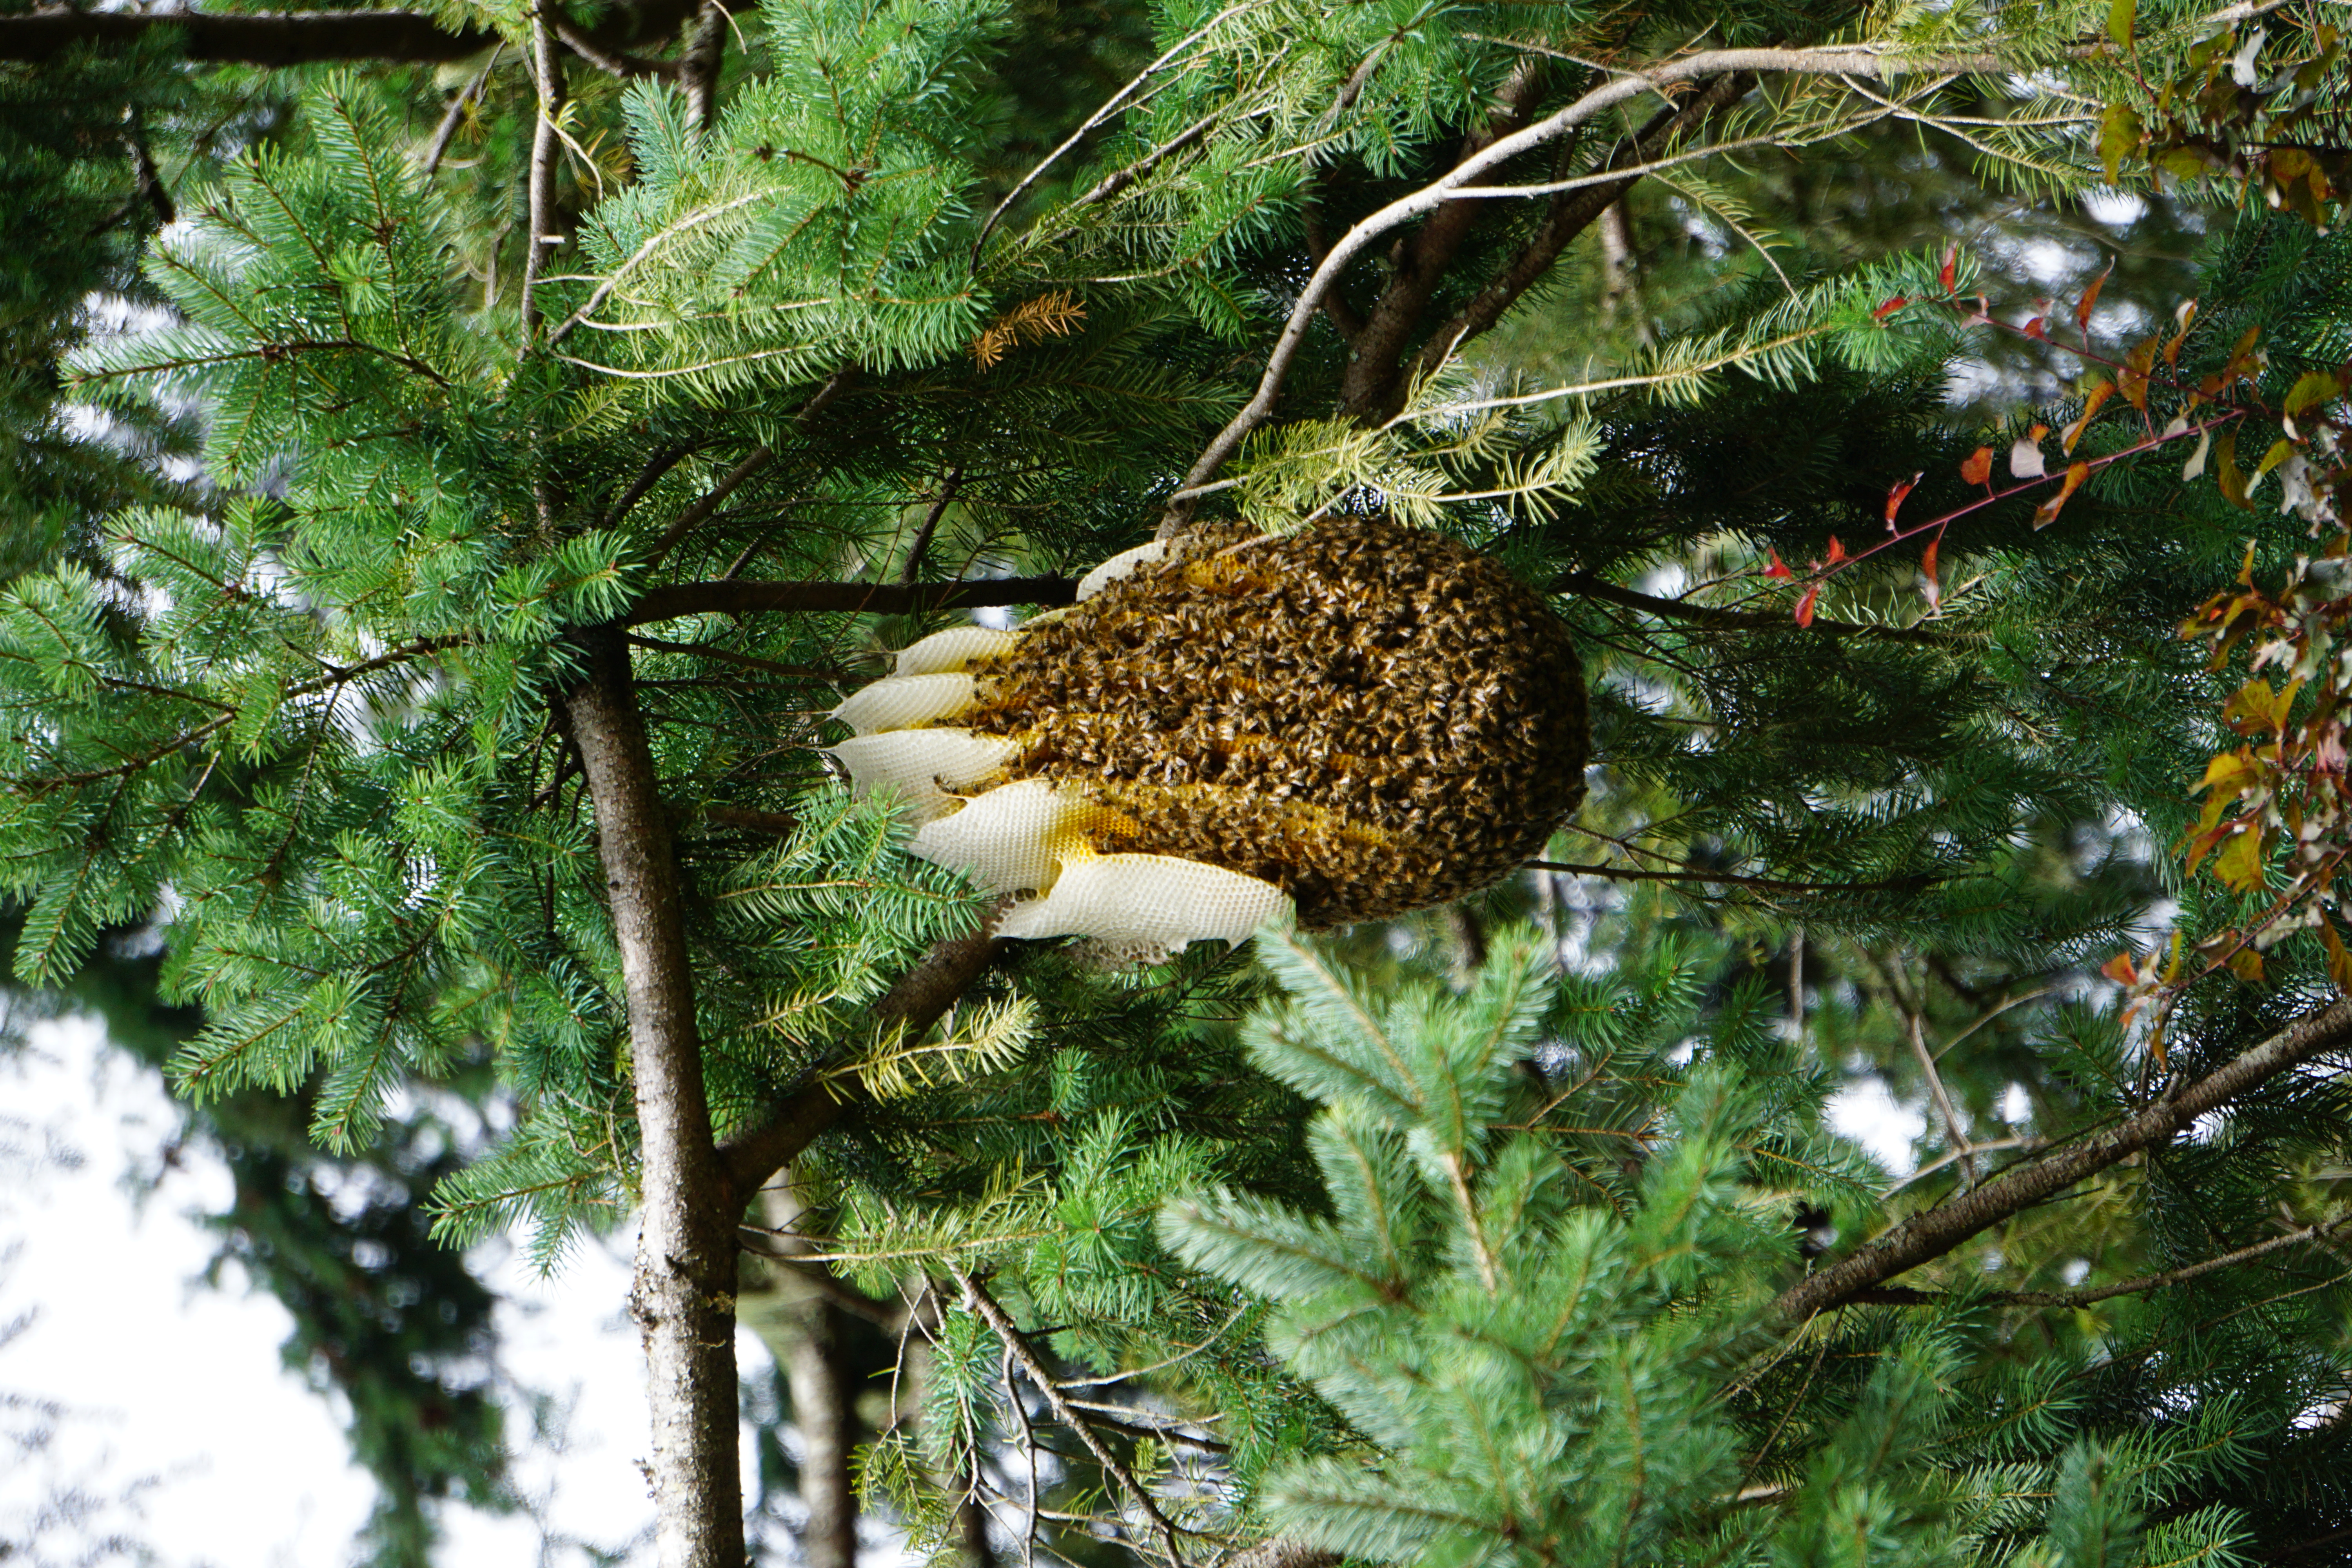
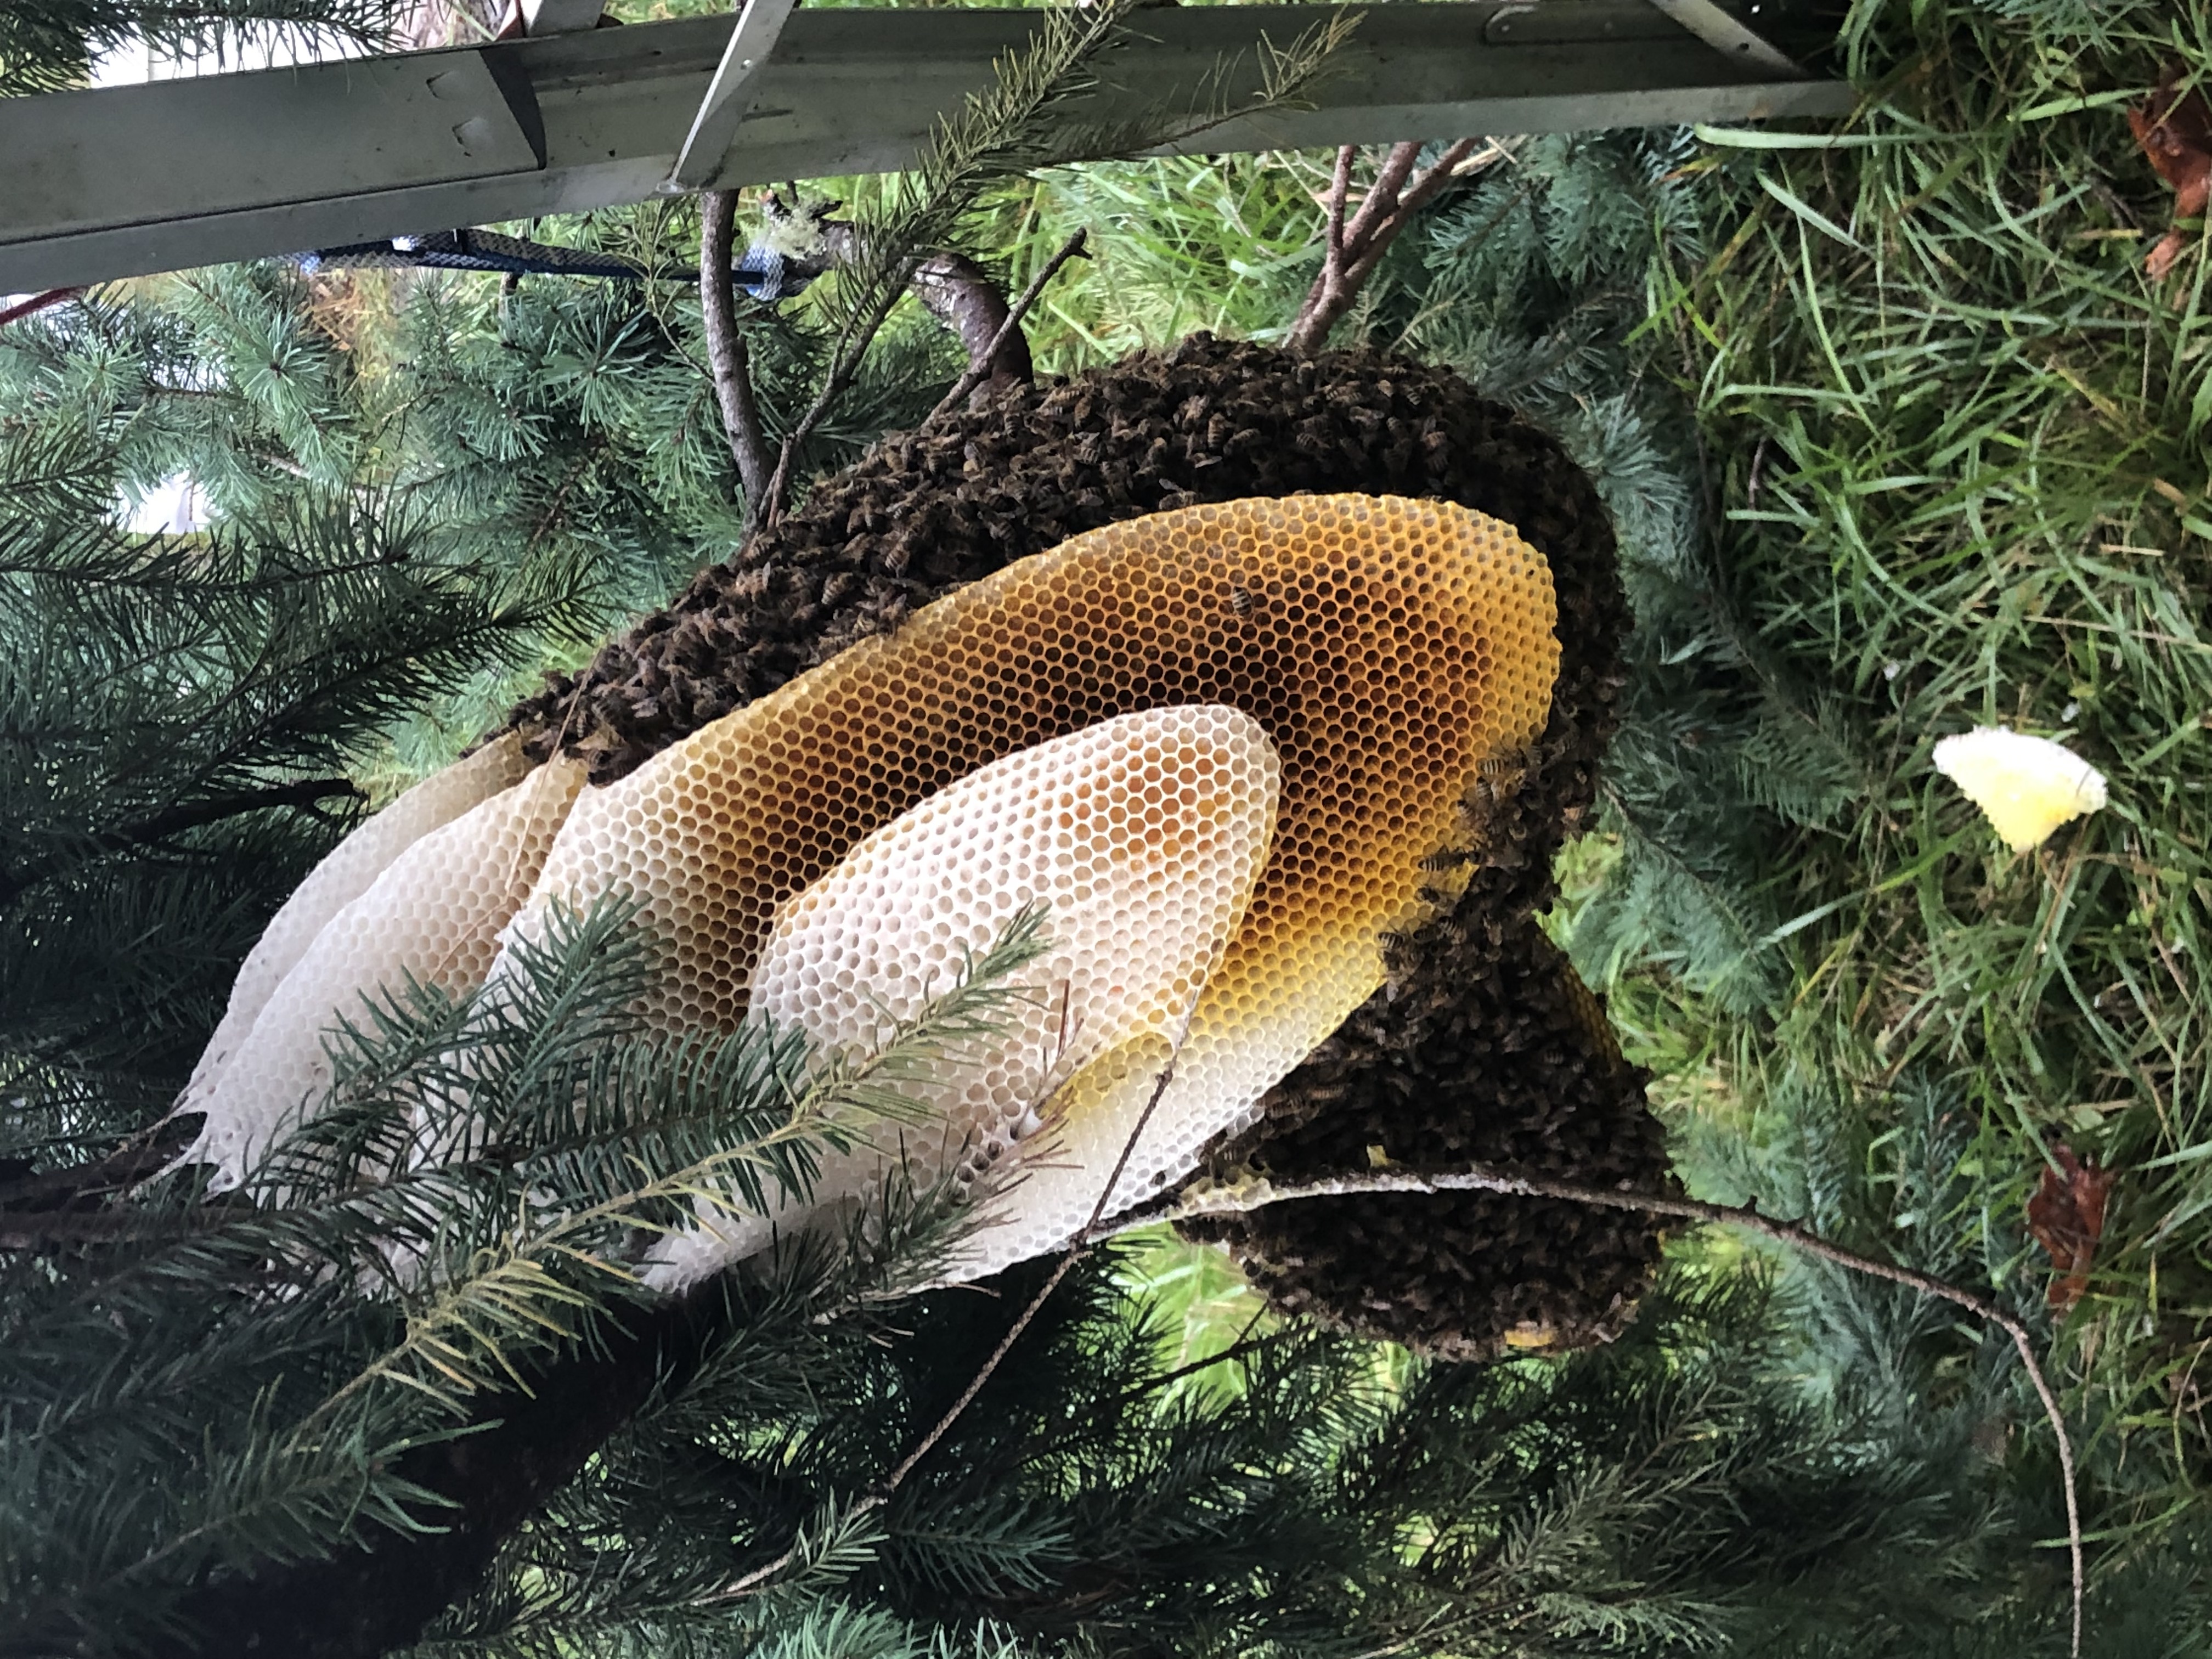
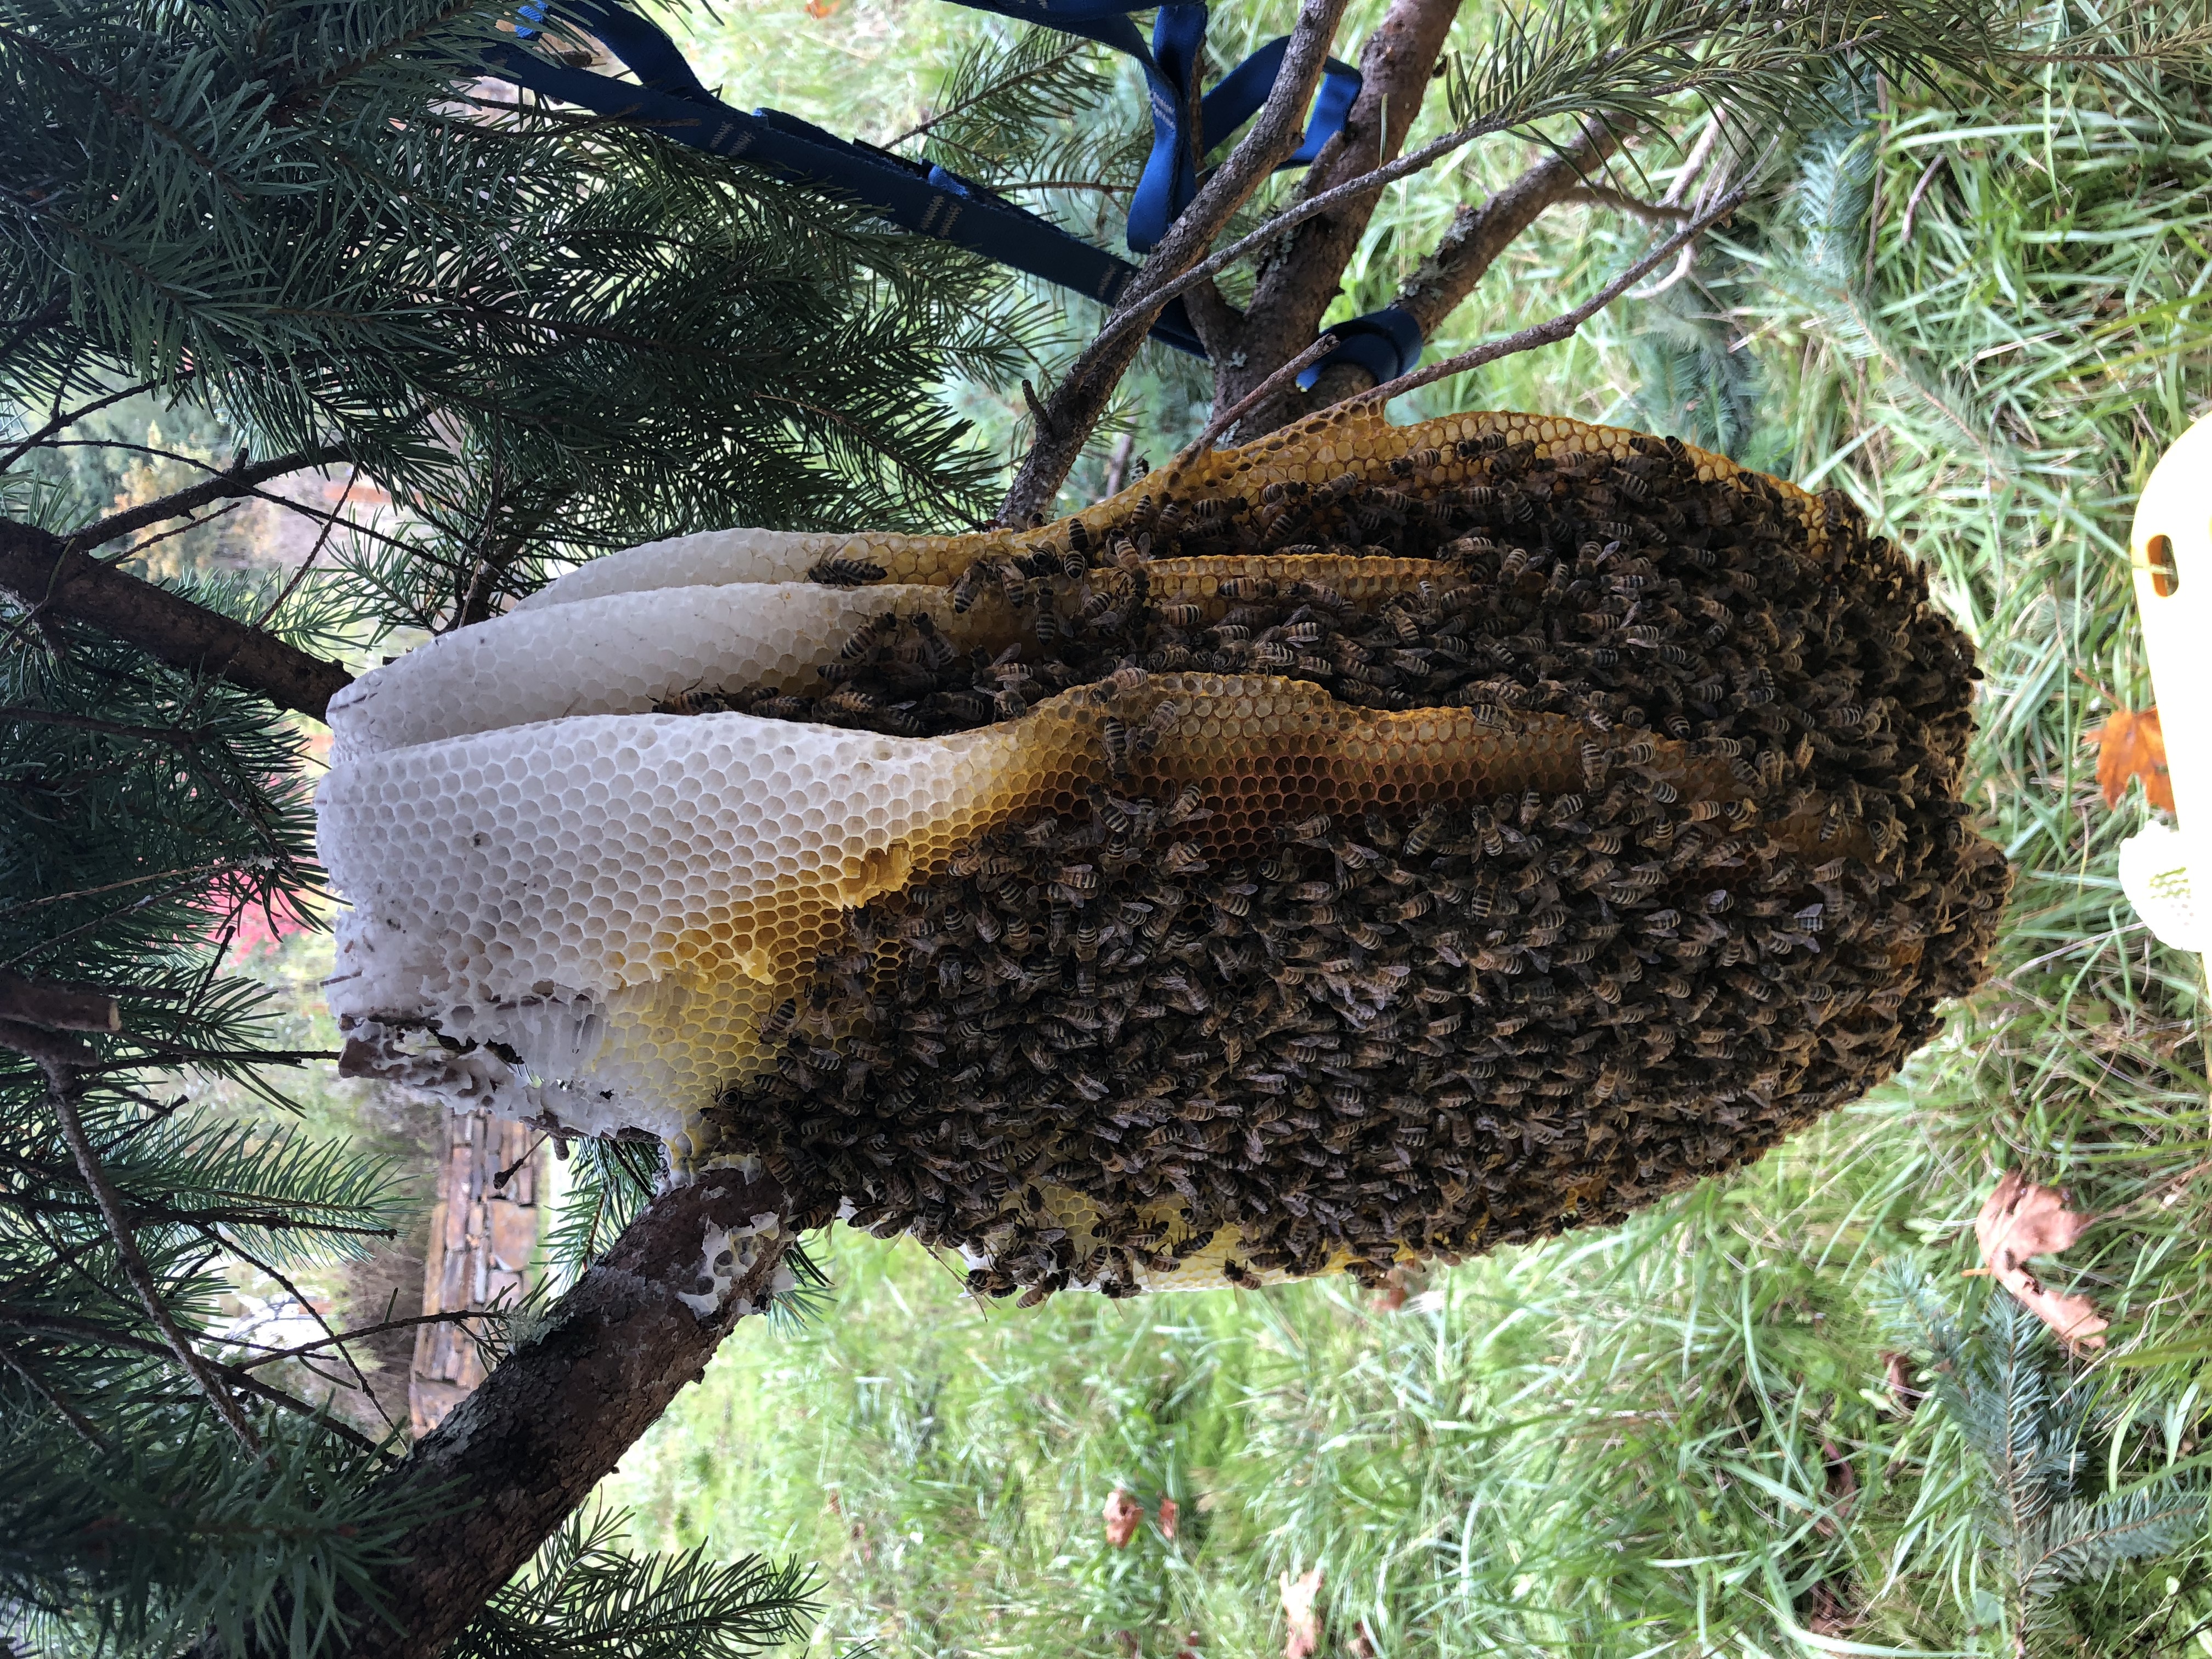
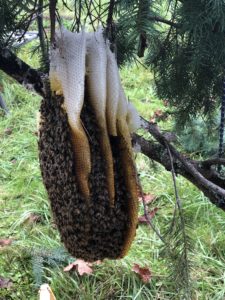
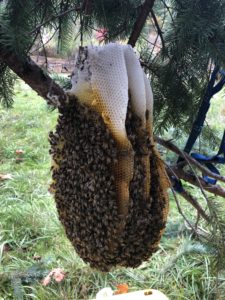
Before we get into what happened, here are a couple pics of the colony that I got with my telephoto. The picture where all the comb is showing was taken first thing in the morning, so they’re huddled in for warmth. The picture where there is a big ball of bees on the bottom was taken in the middle of the day, so they’re working and protecting the nest.
Phase I
Conor showed up with his bucket truck (I missed the technical name, but it has a 2 part hydraulic pivot that can lift a small basket up to 50 feet). We spent a few minutes sorting out the plan, and by 9 a.m. he was suited up and ready to go!
Since he had to go up solo, the plan was for him to cut the branch, holding it as best he could, and then bring it down to me. Two people would have been ideal, since with one person there was no way to hold the branch stable.
Here is his final approach up to the colony and the cutting of the branch (click links for video).
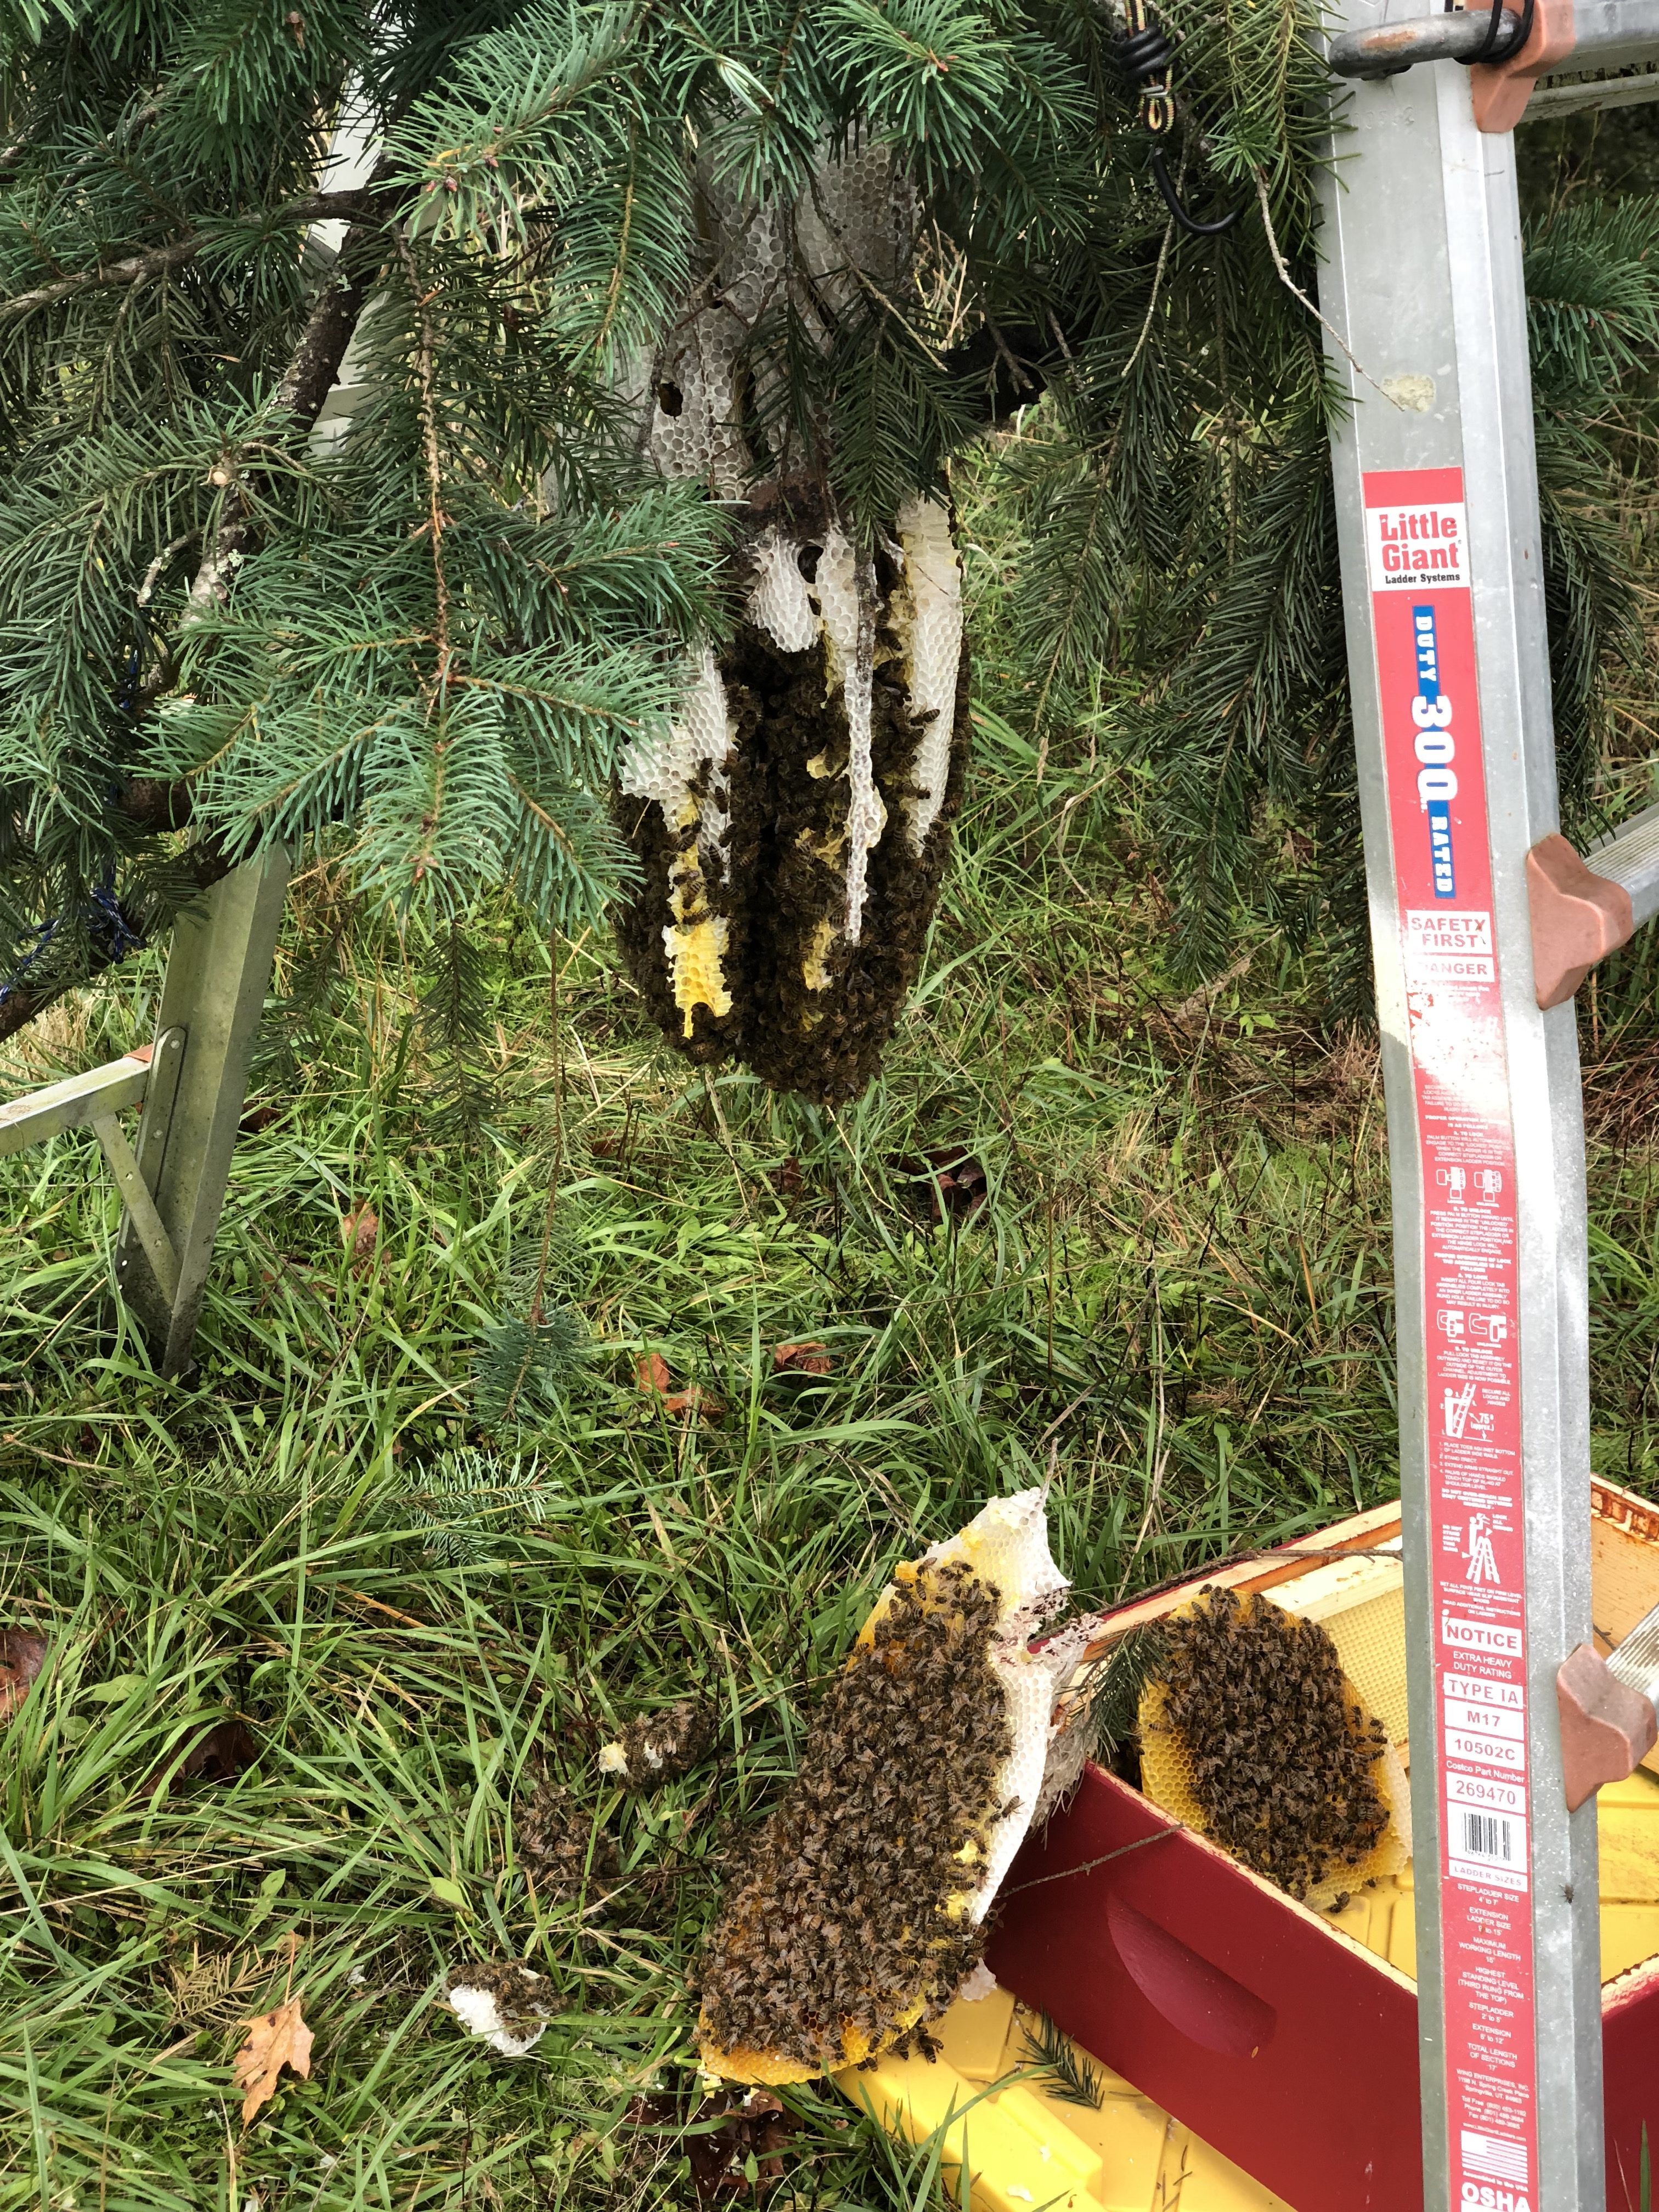
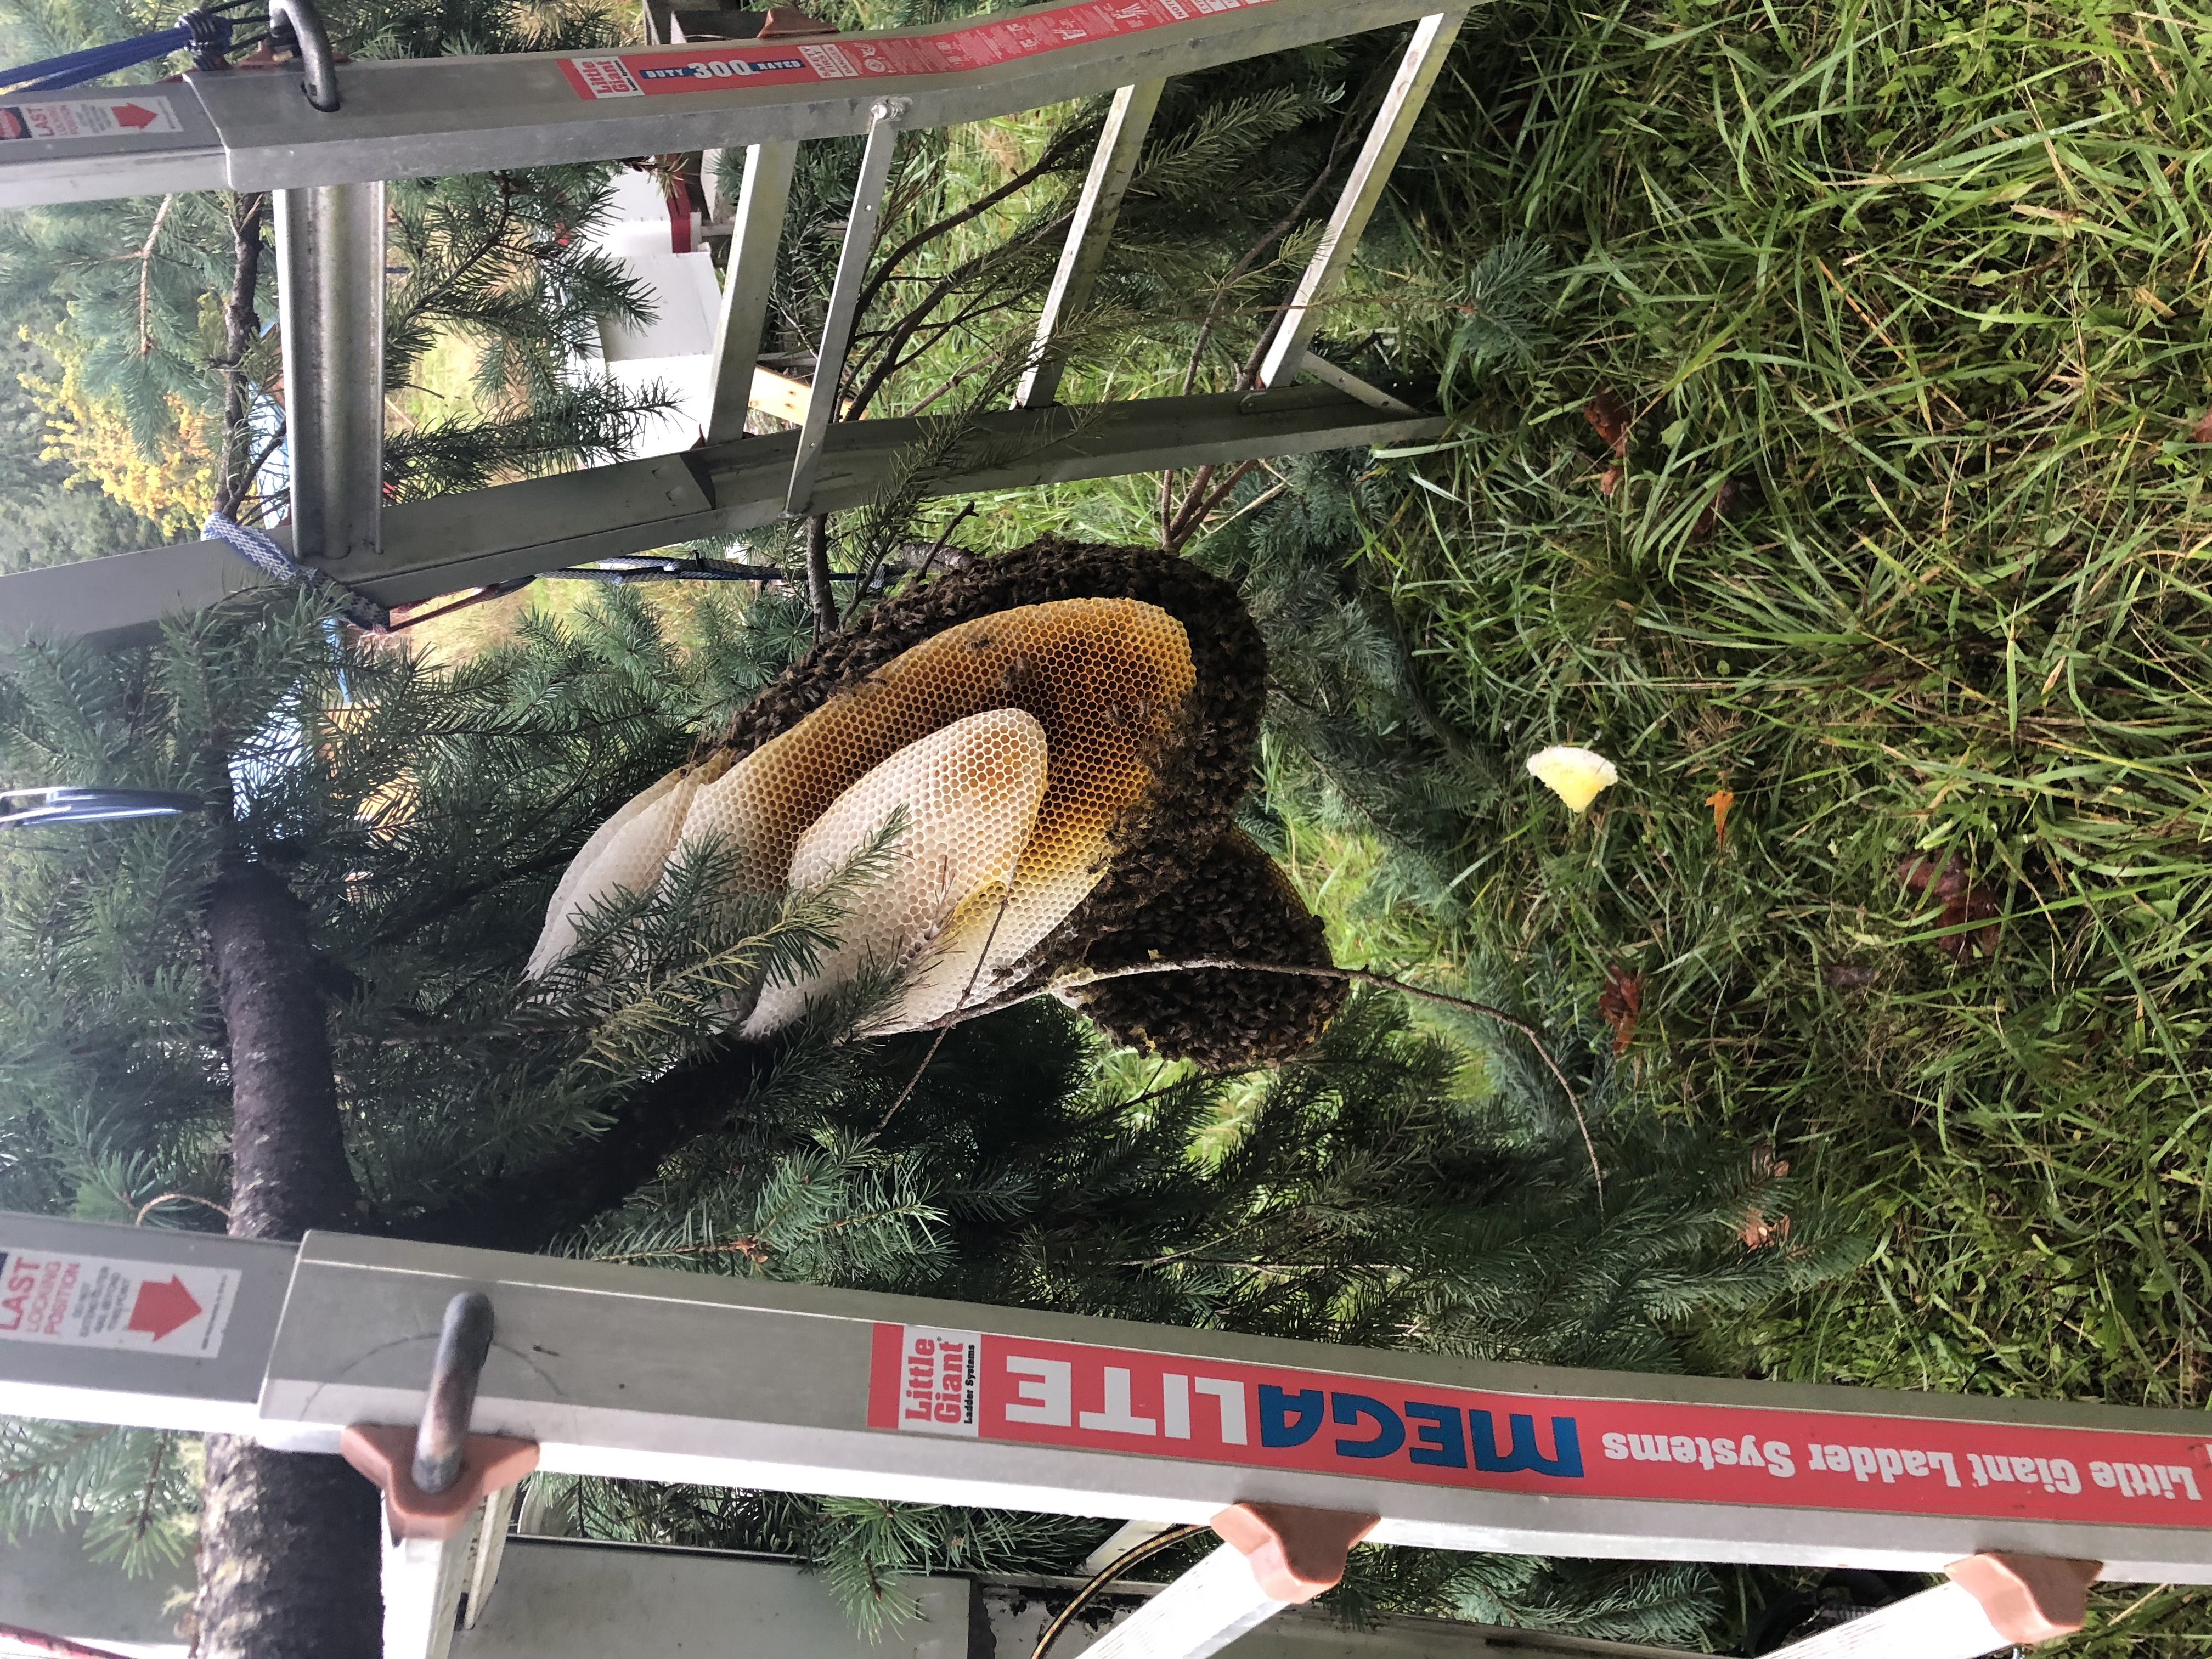
The branch twisted down pretty sharply, which did not help comb integrity, but it all held together!… at least temporarily….
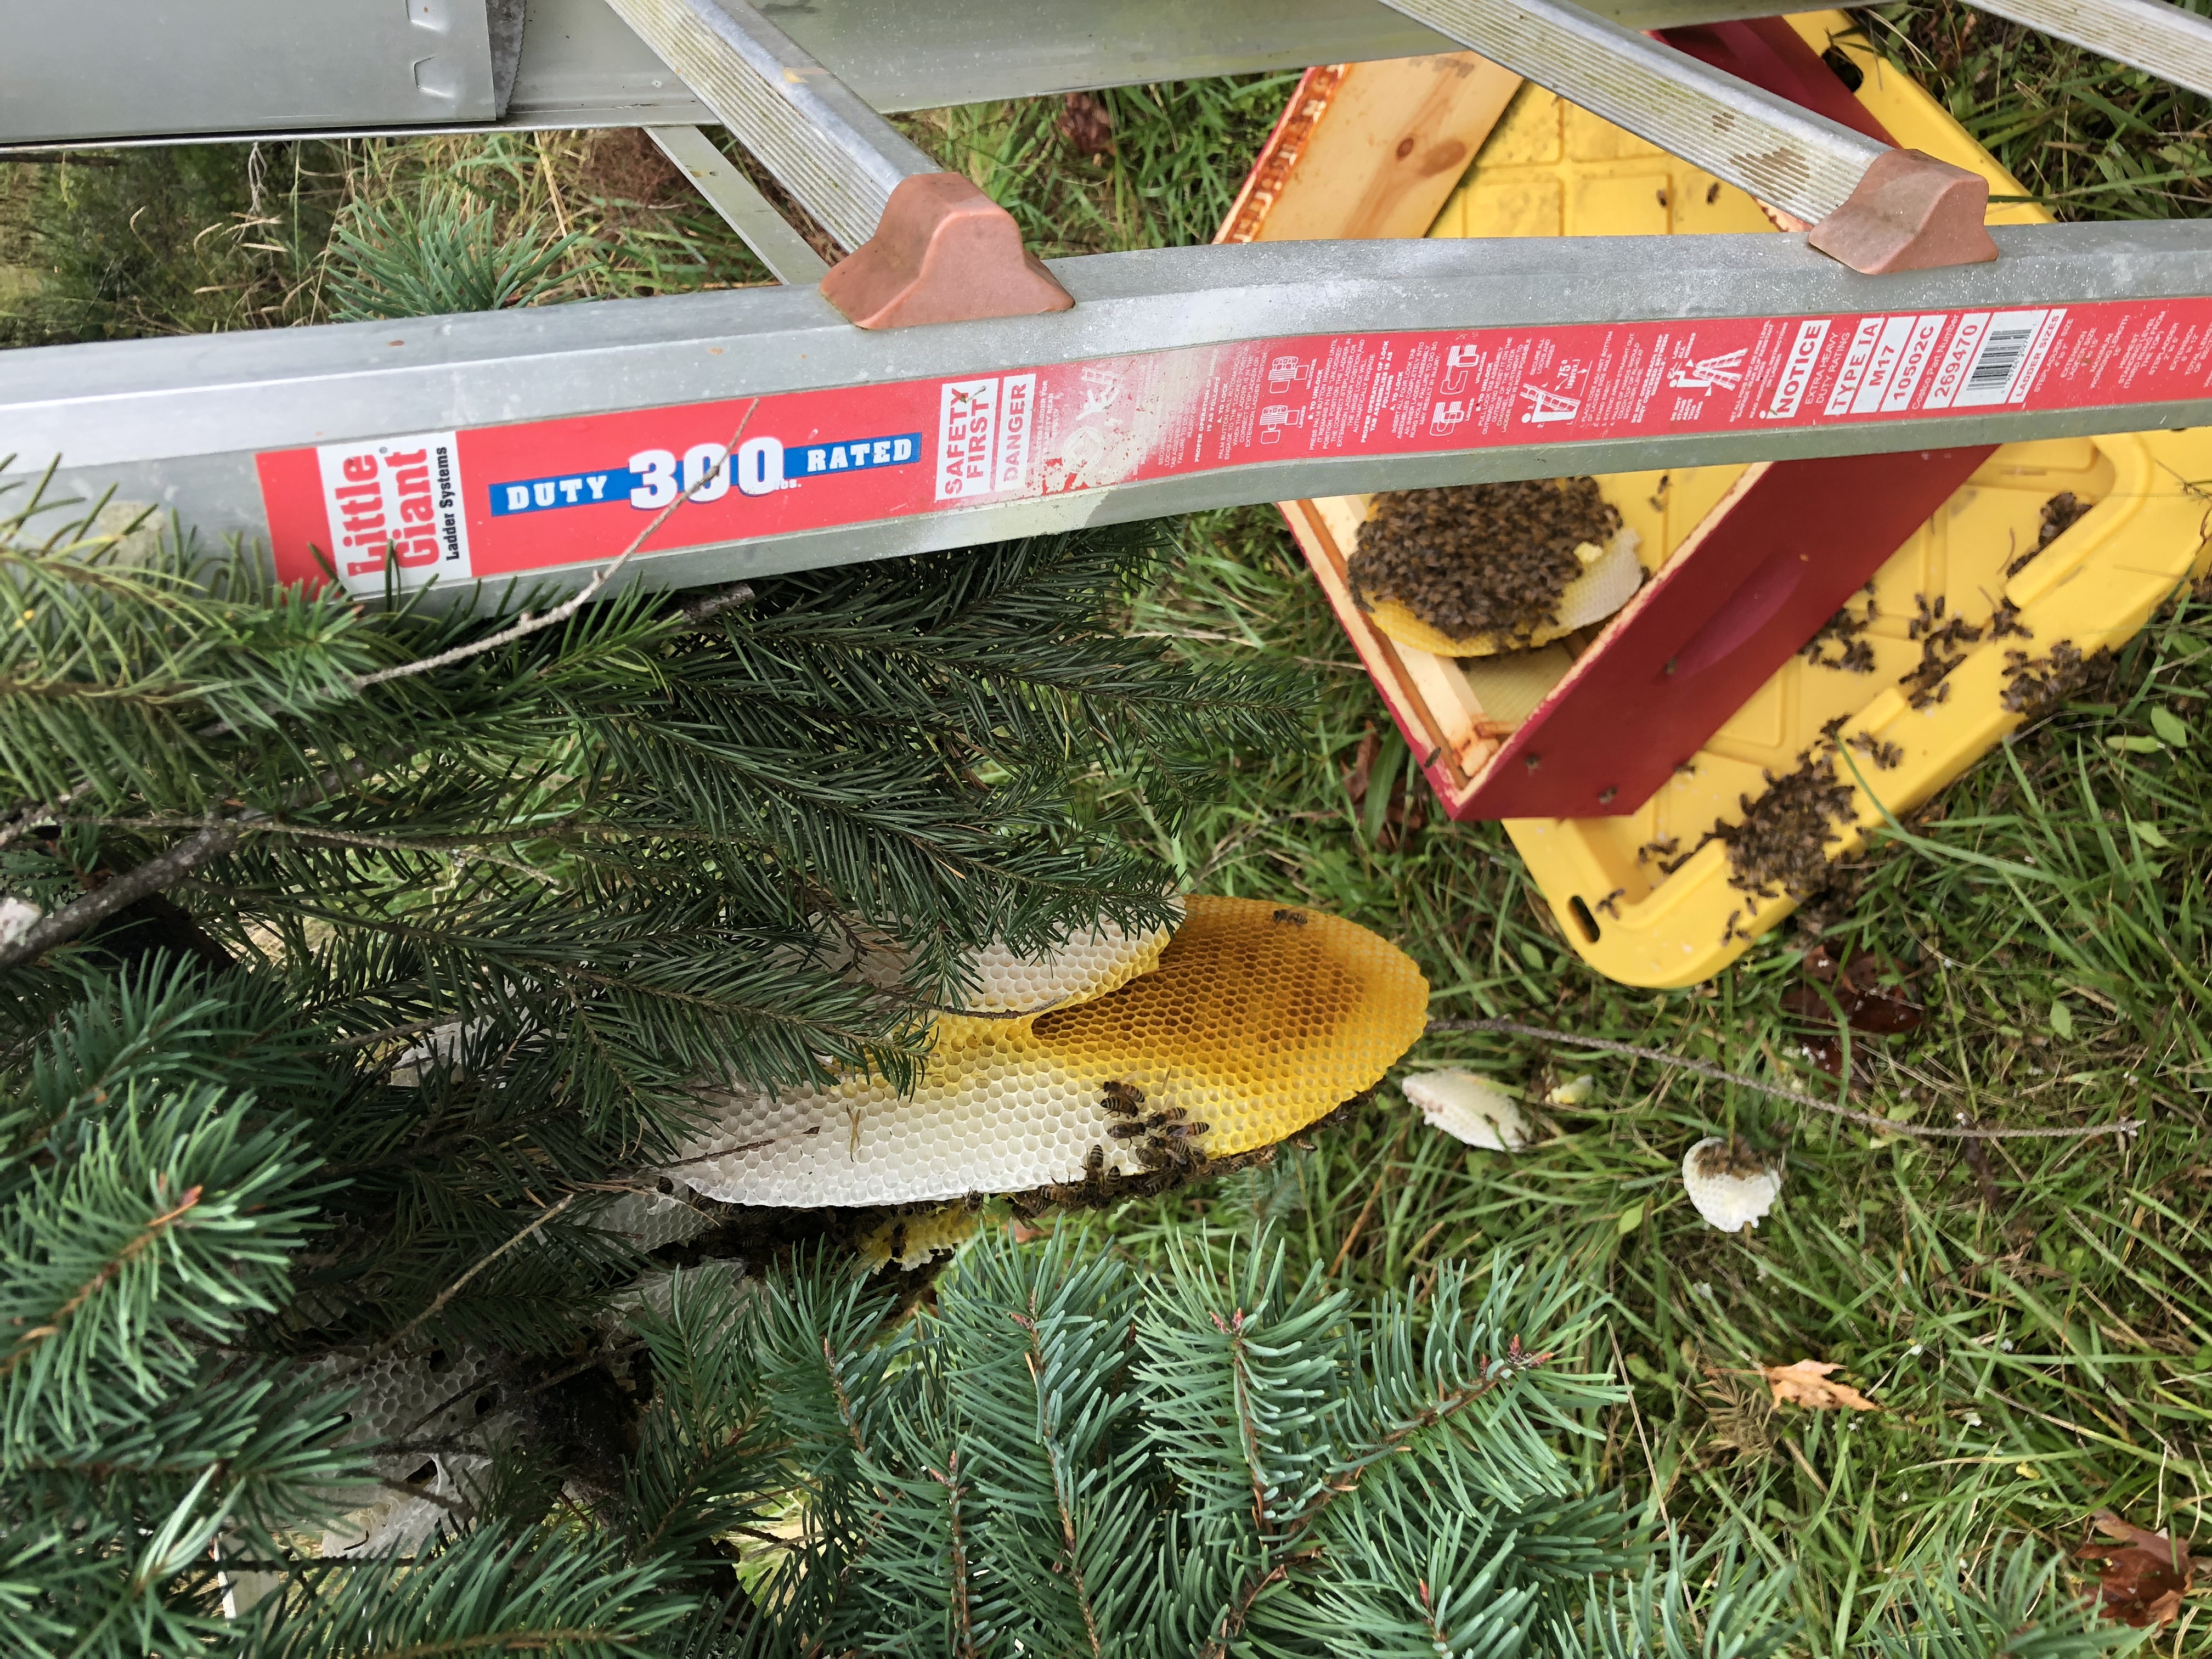
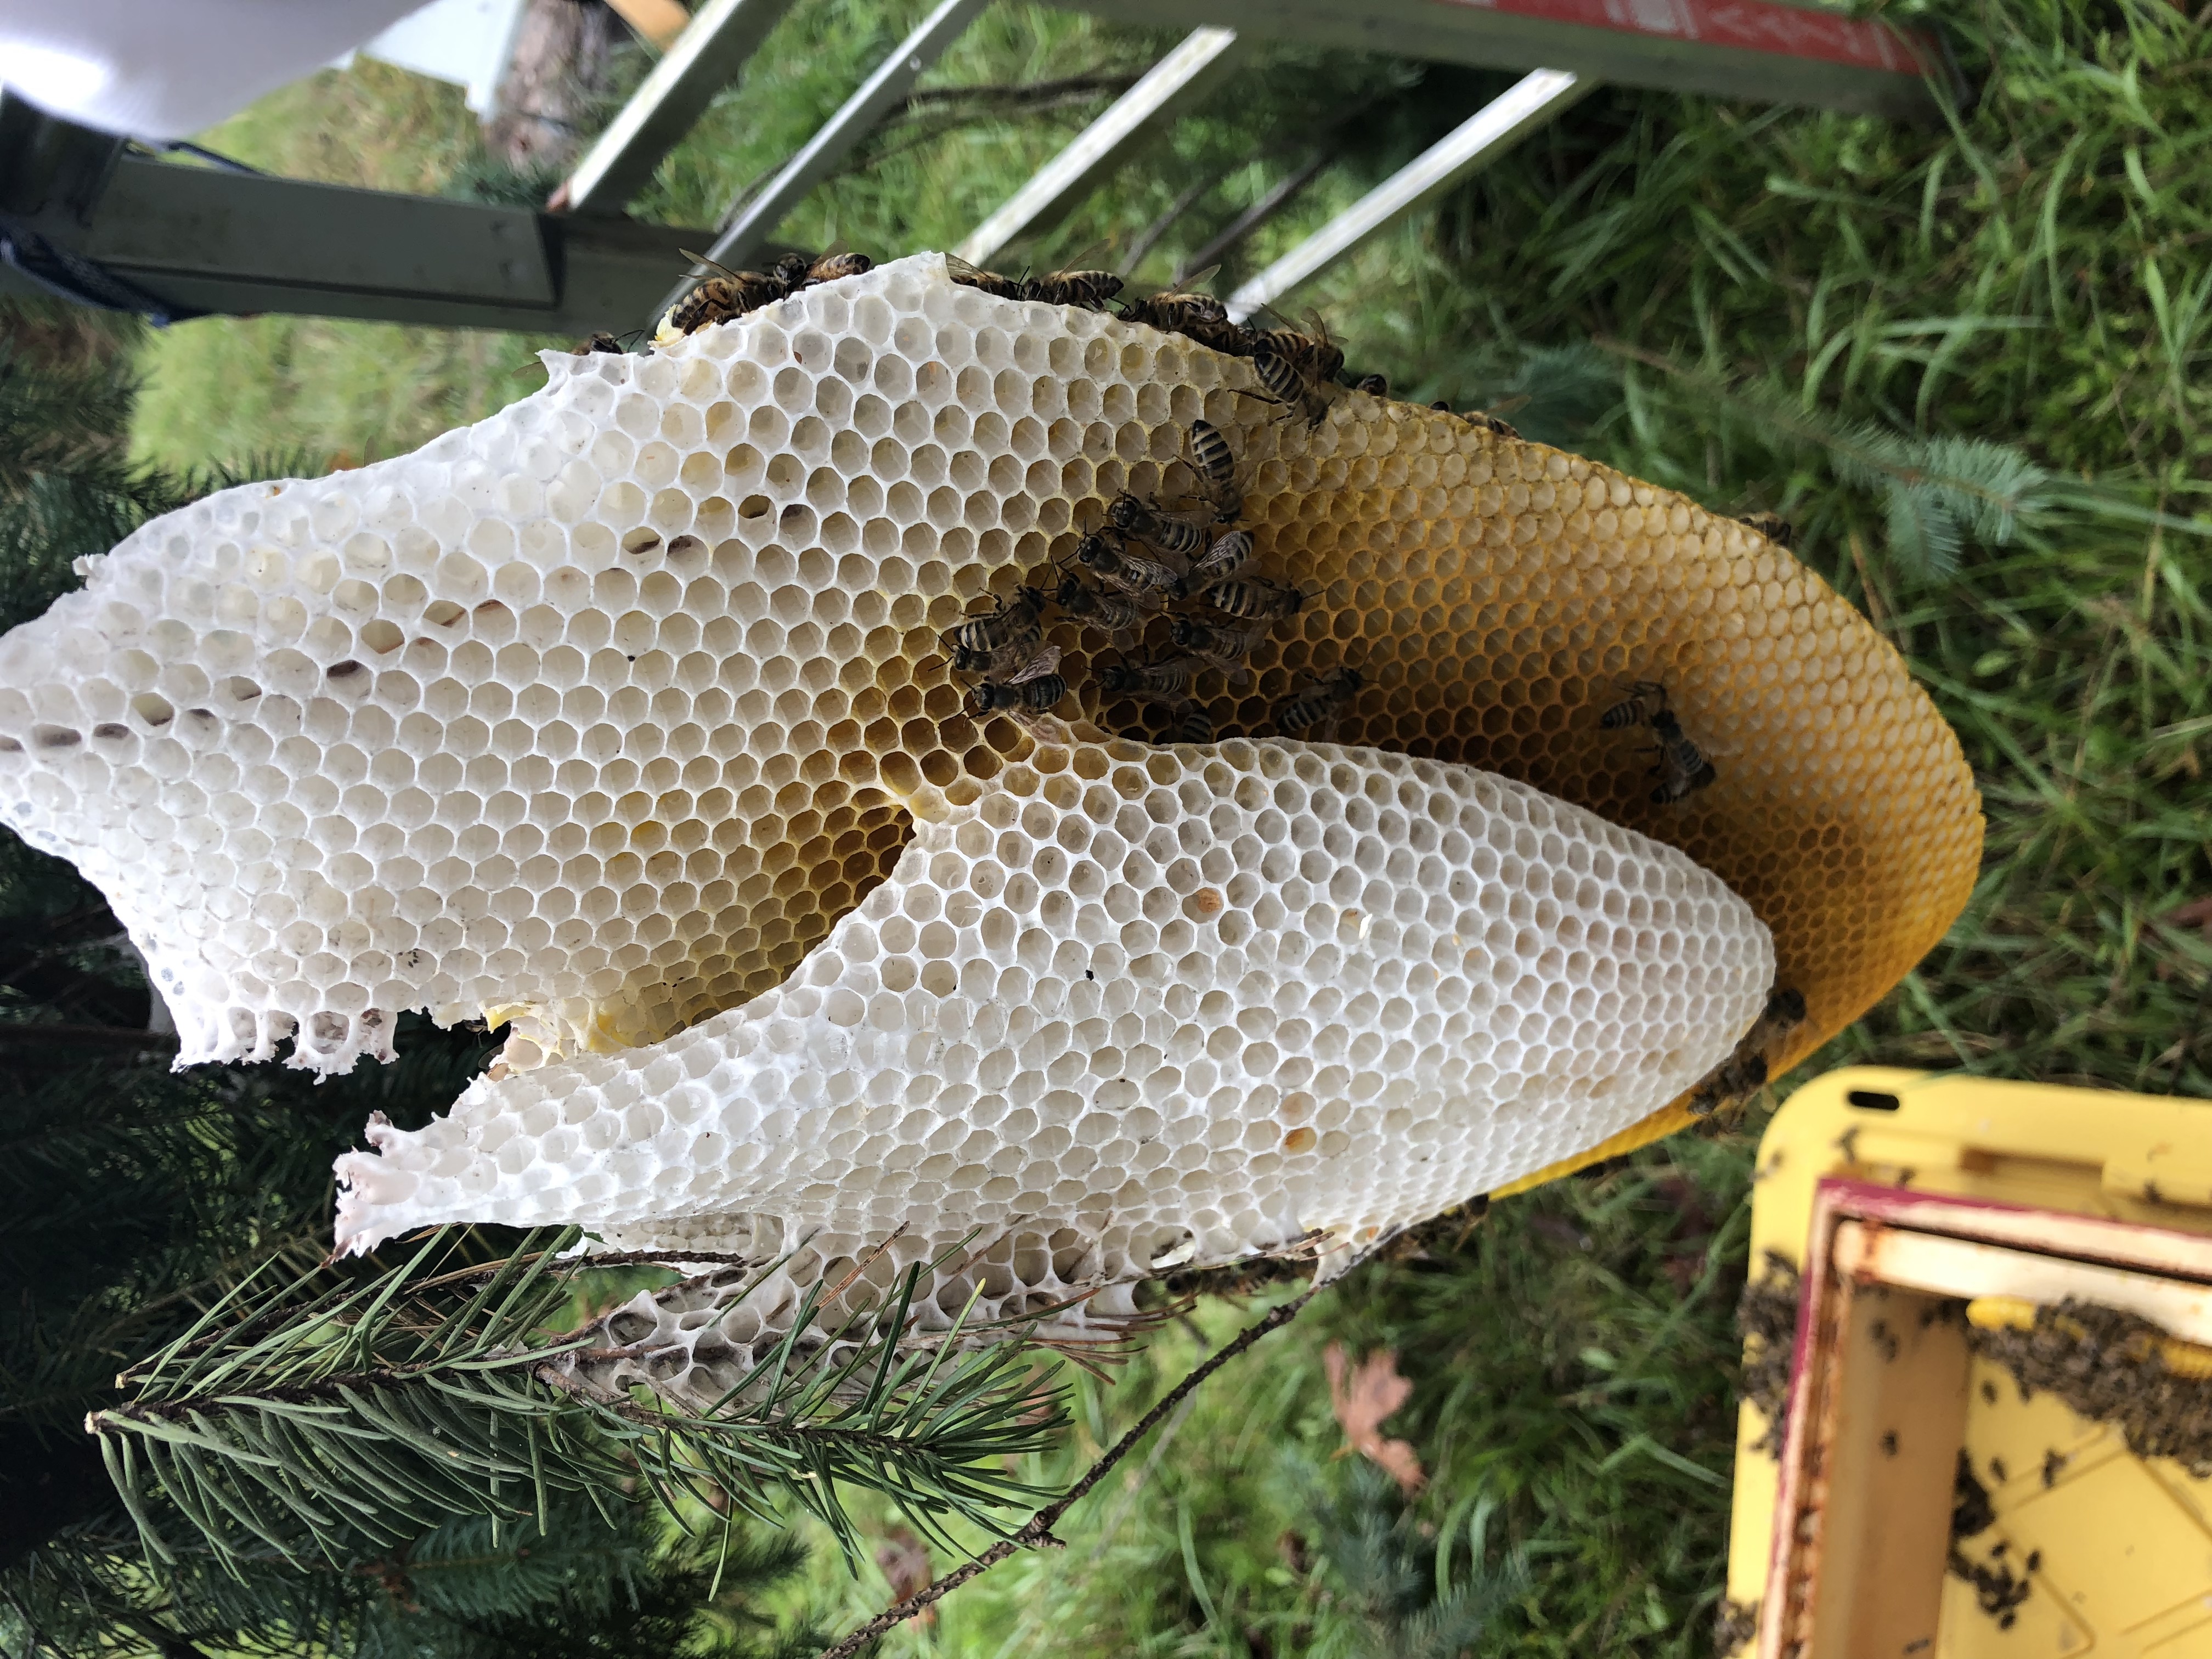
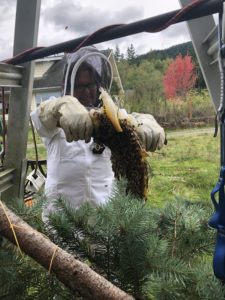
He brought it down and handed it down to me. Probably about 40 pounds, but most of that was branch. I was able to get it on the ladder, although a bit crooked initially.
The comb survived the whiplash of being cut, but was a little the worse for wear.
Note the bend in the comb, and the dangling comb on the left side. It was hanging on by a tiny little twig. It couldn’t last.
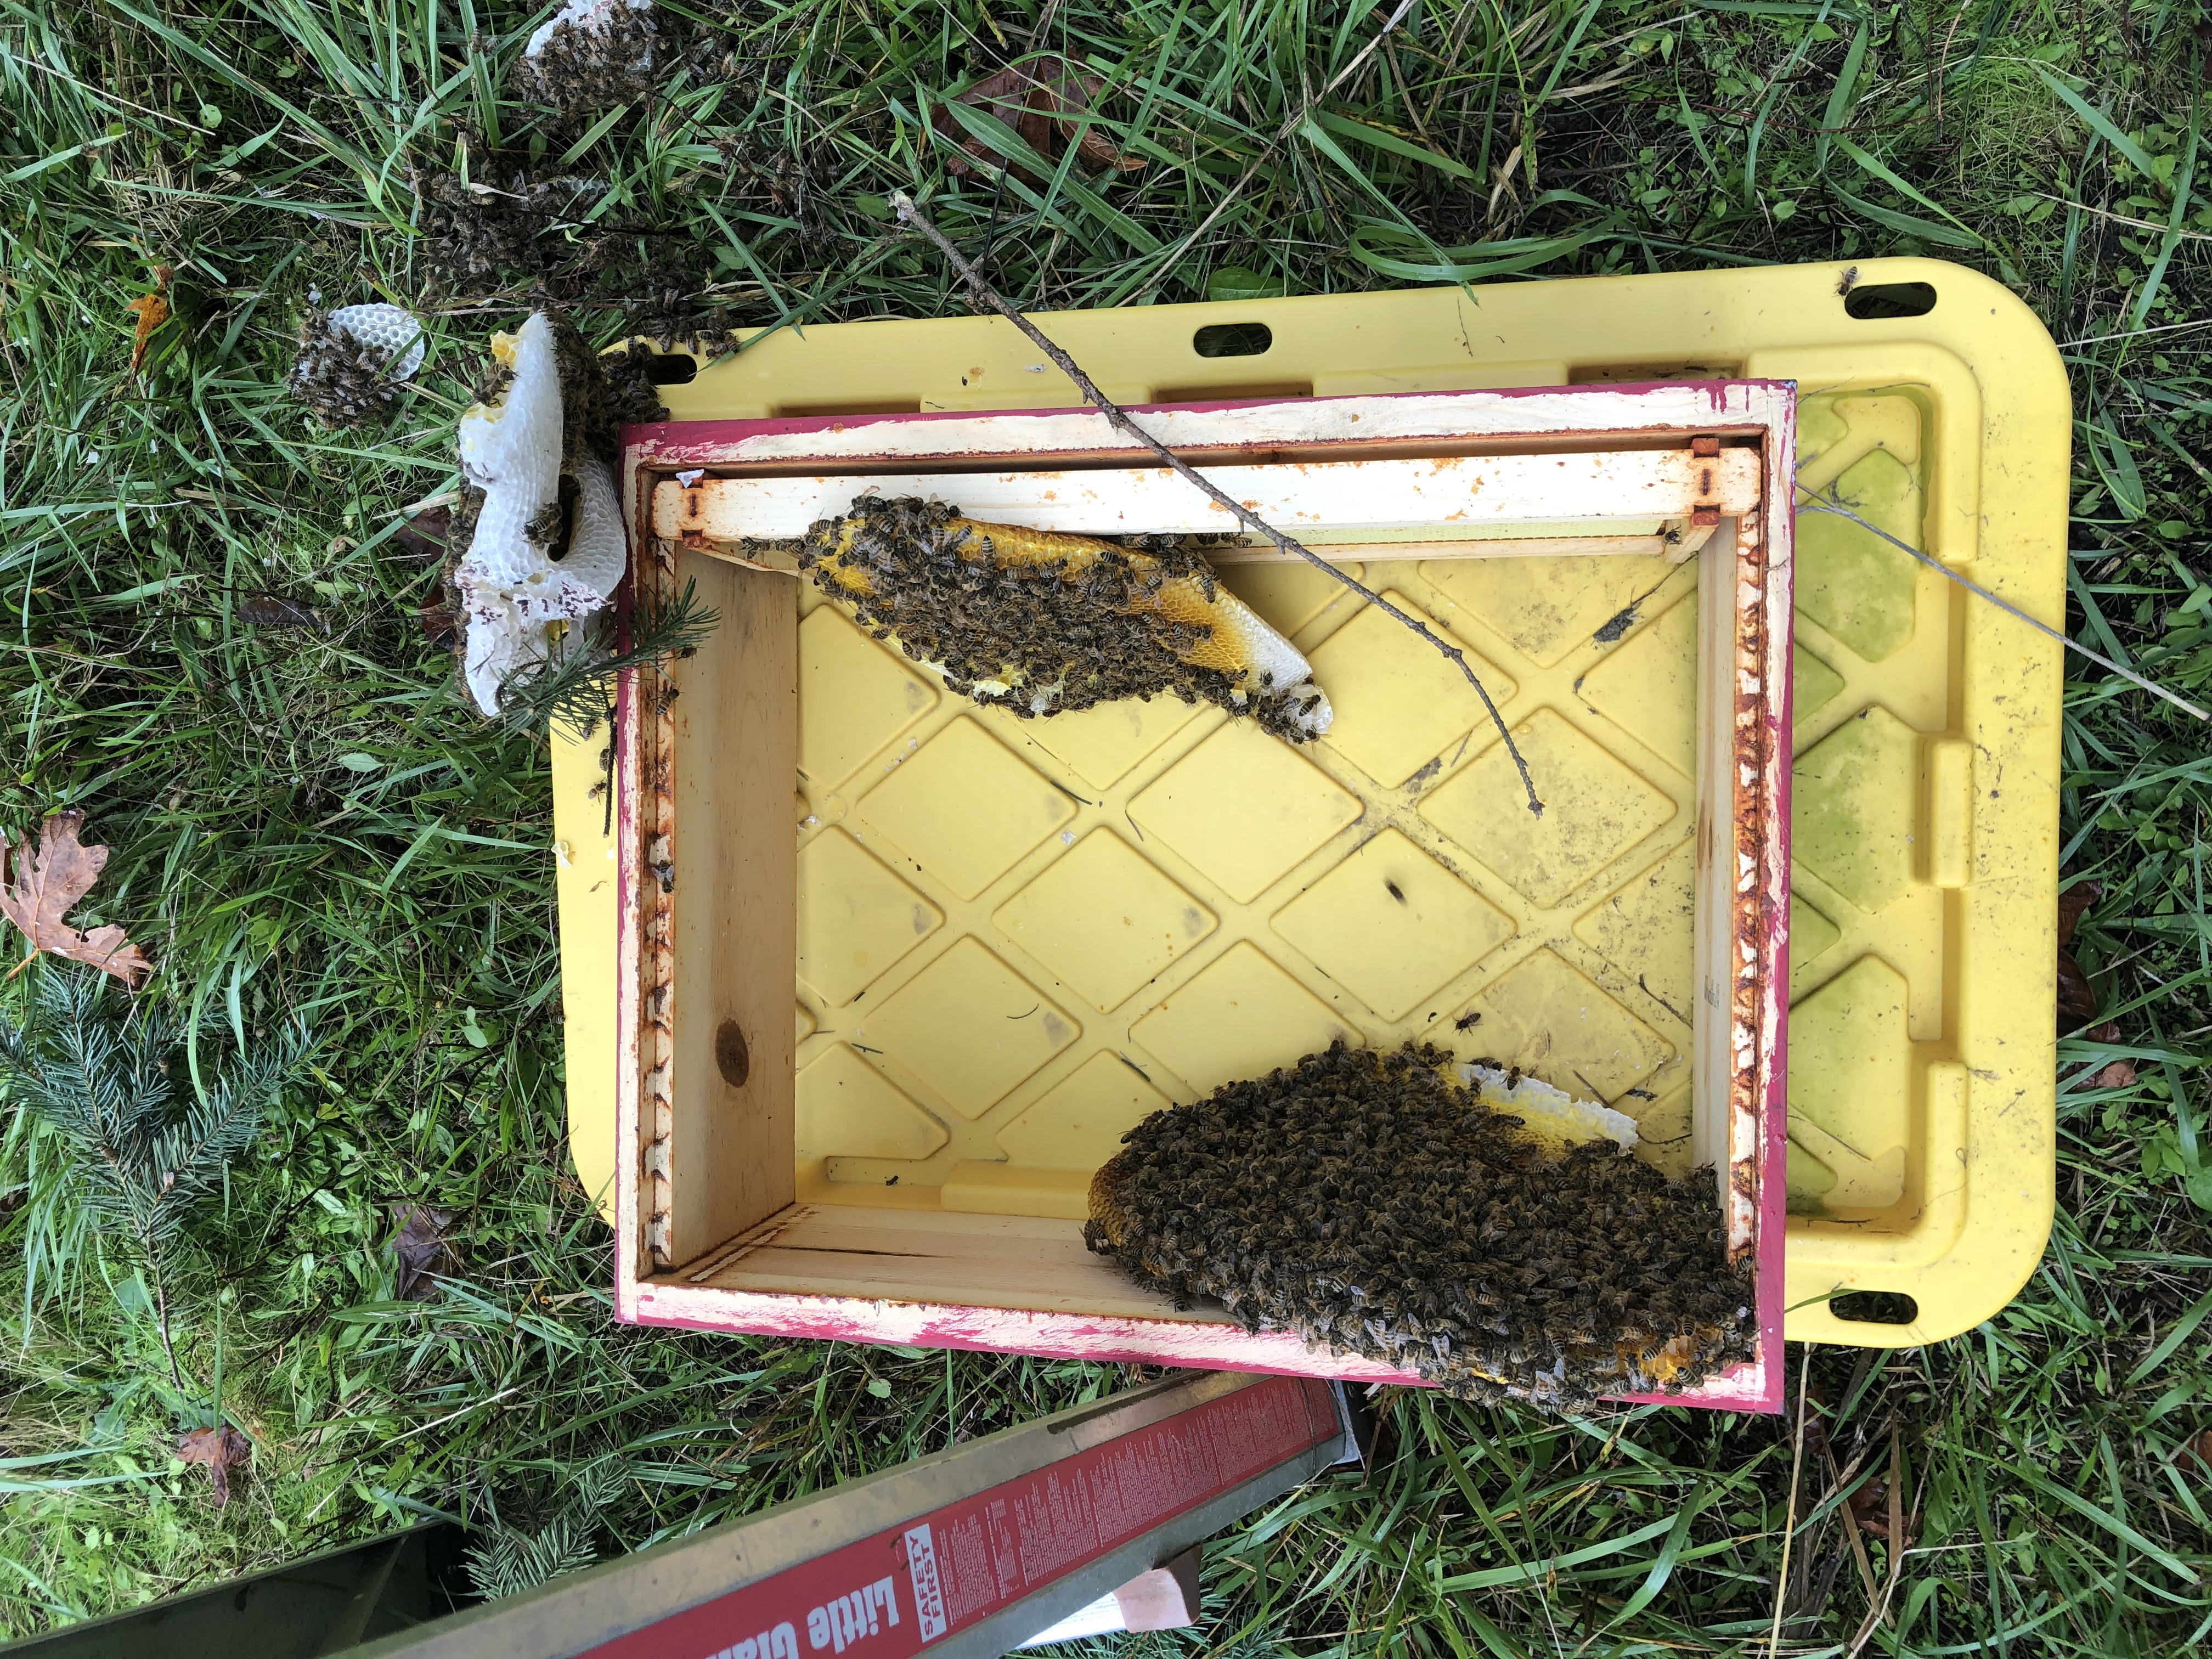
While I was bustling around getting a box and seeing Conor off, the dangler fell off. In this shot I have scooped it up and leaned it in the box.
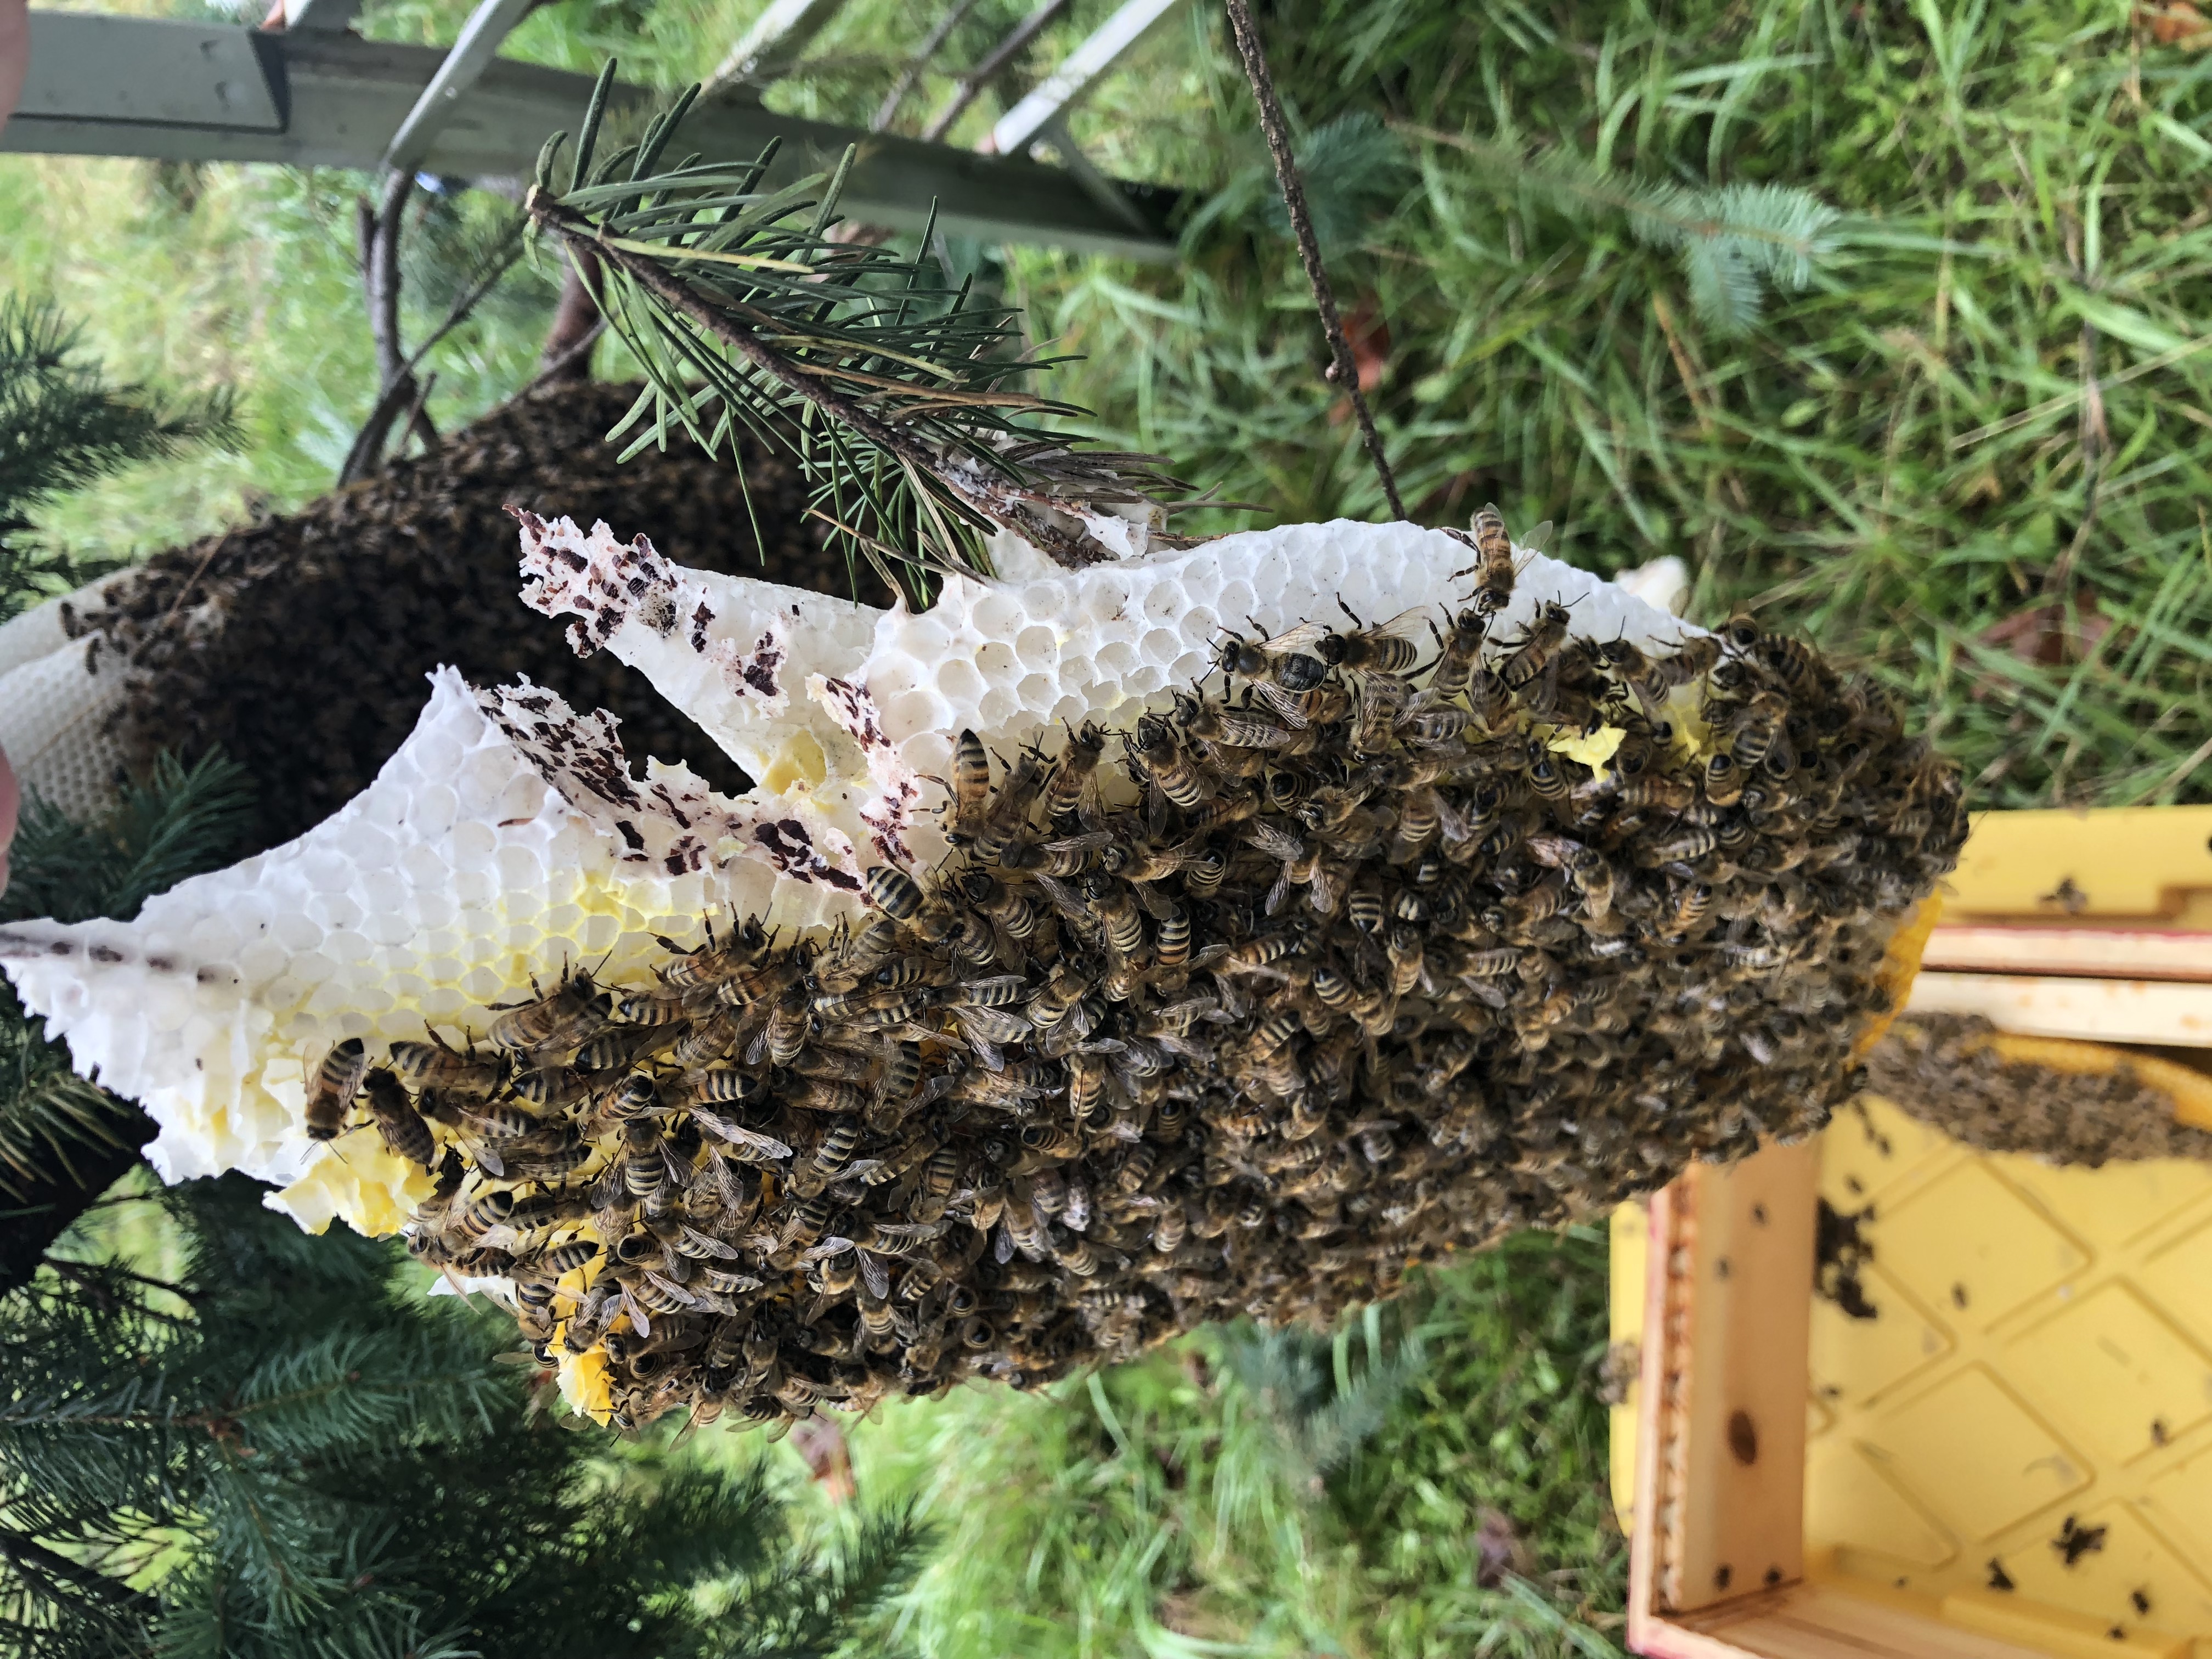
Another comb was coming loose!
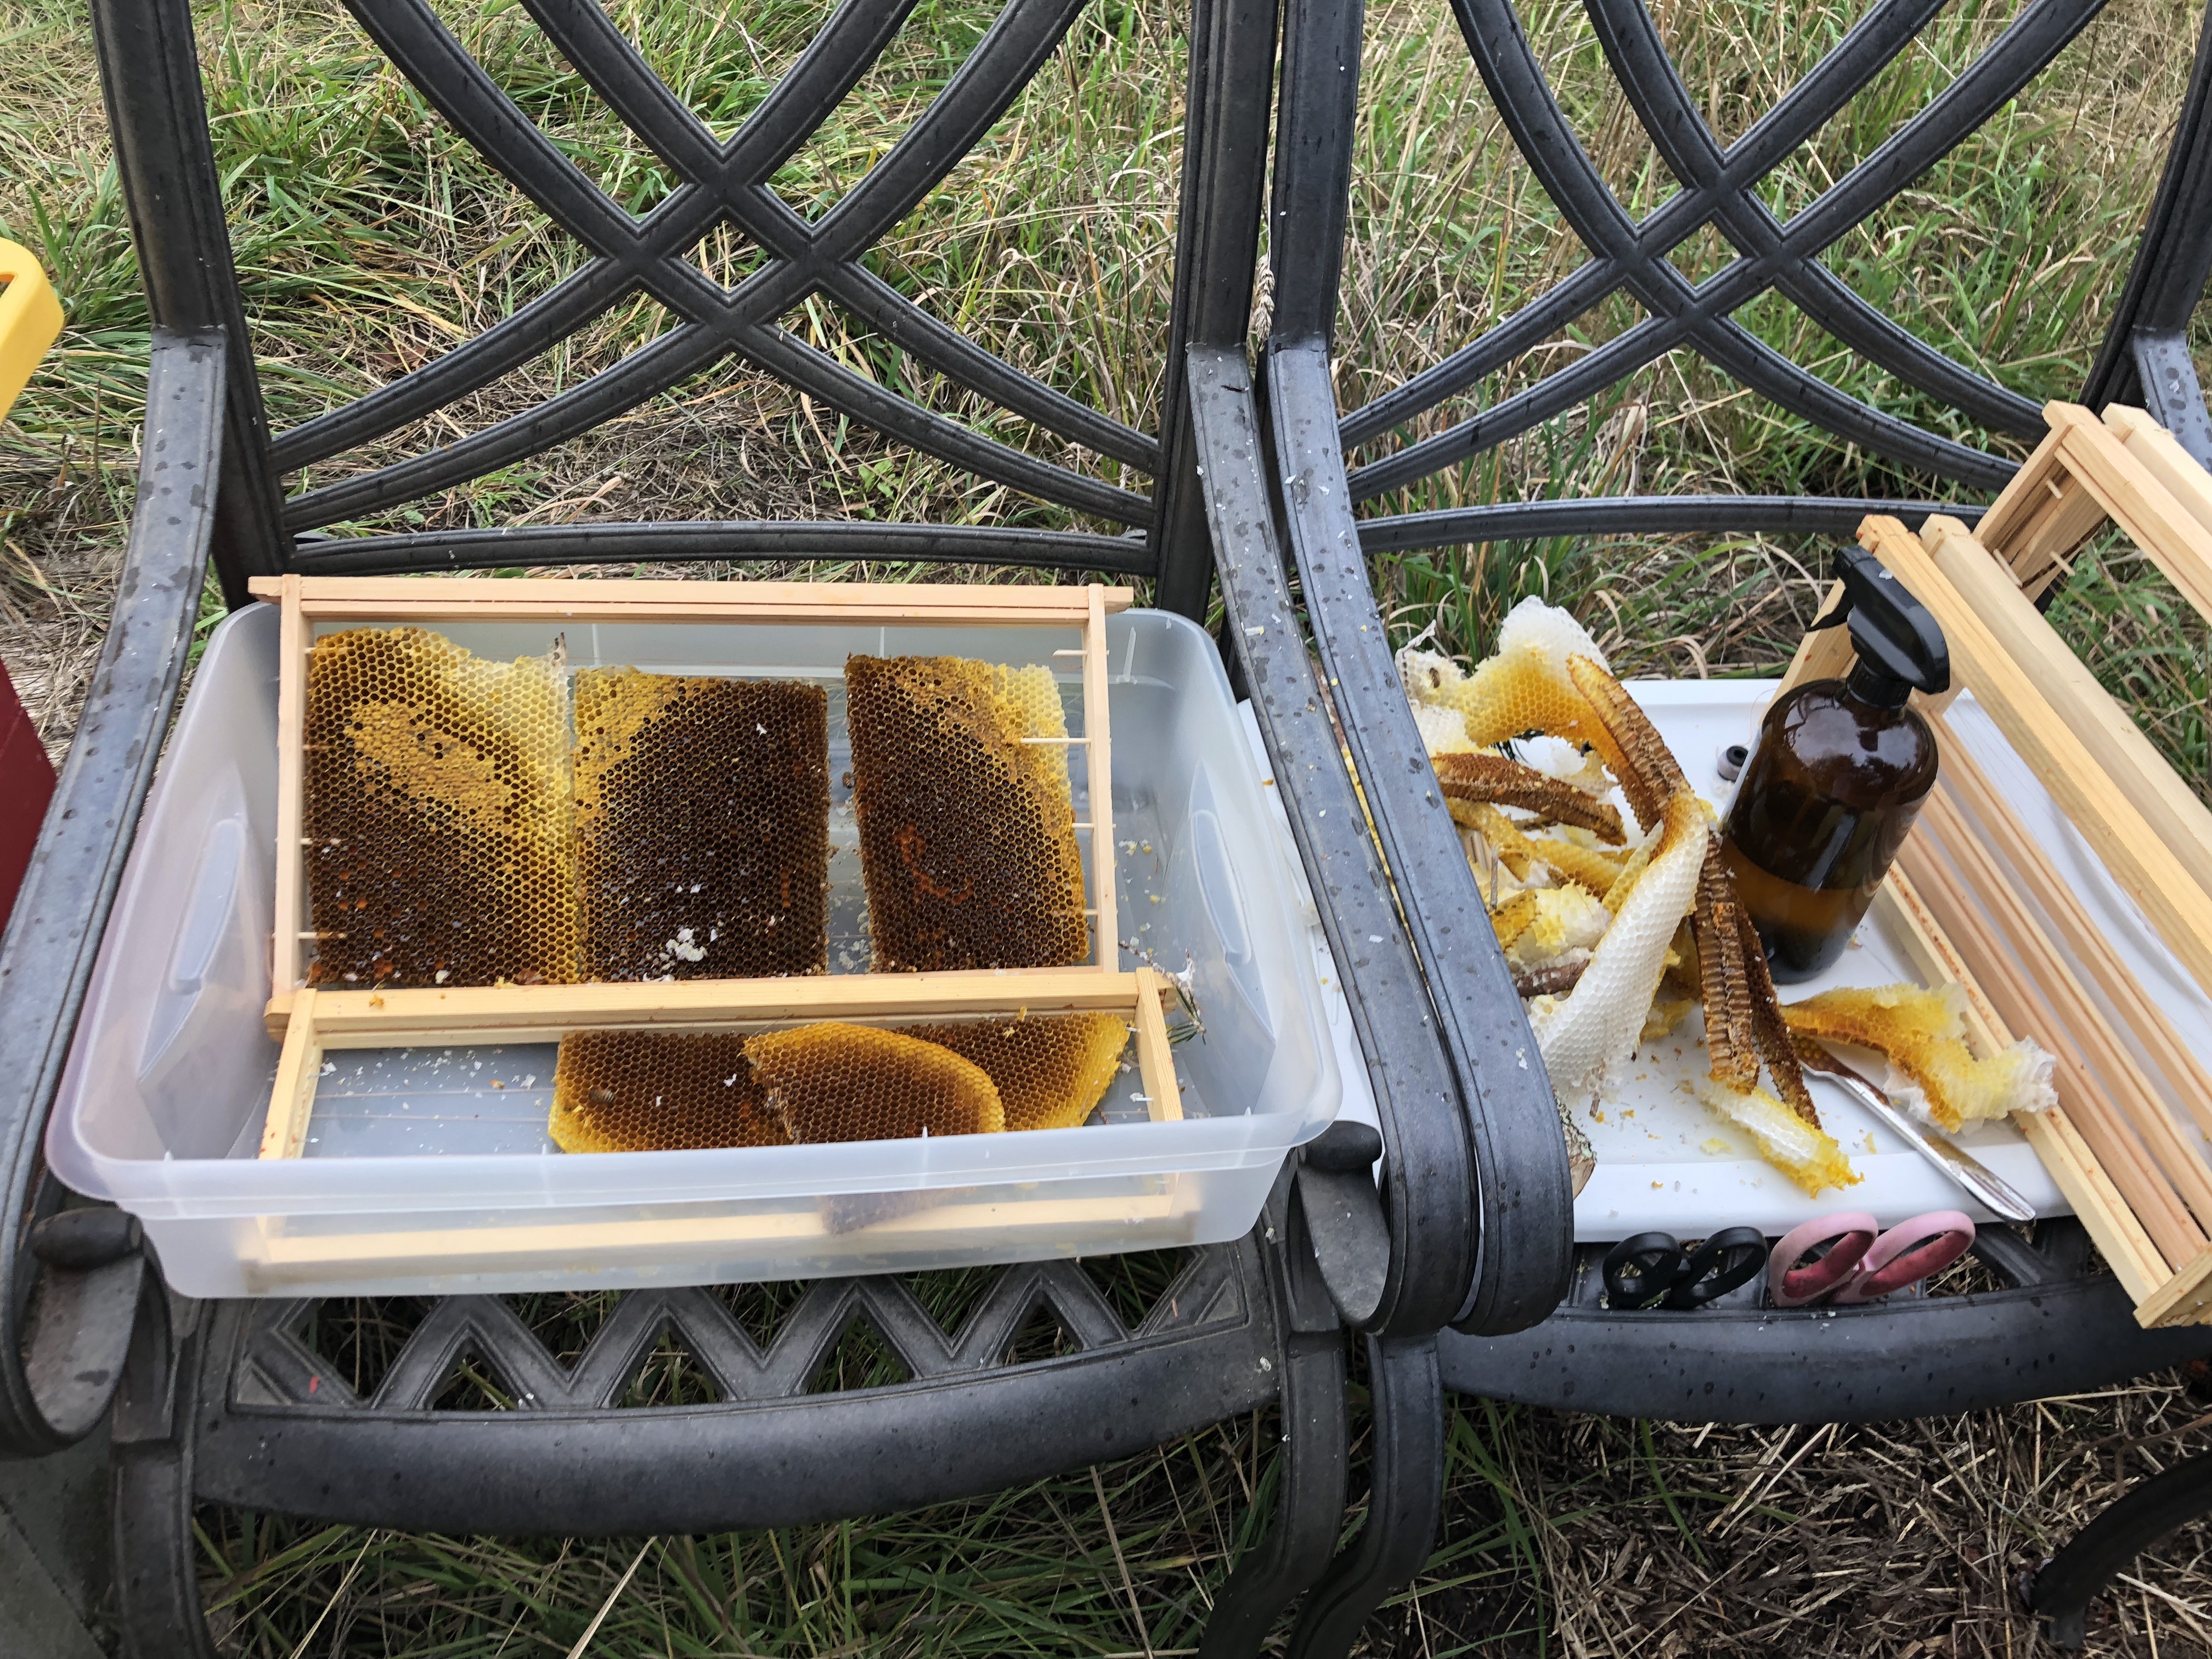
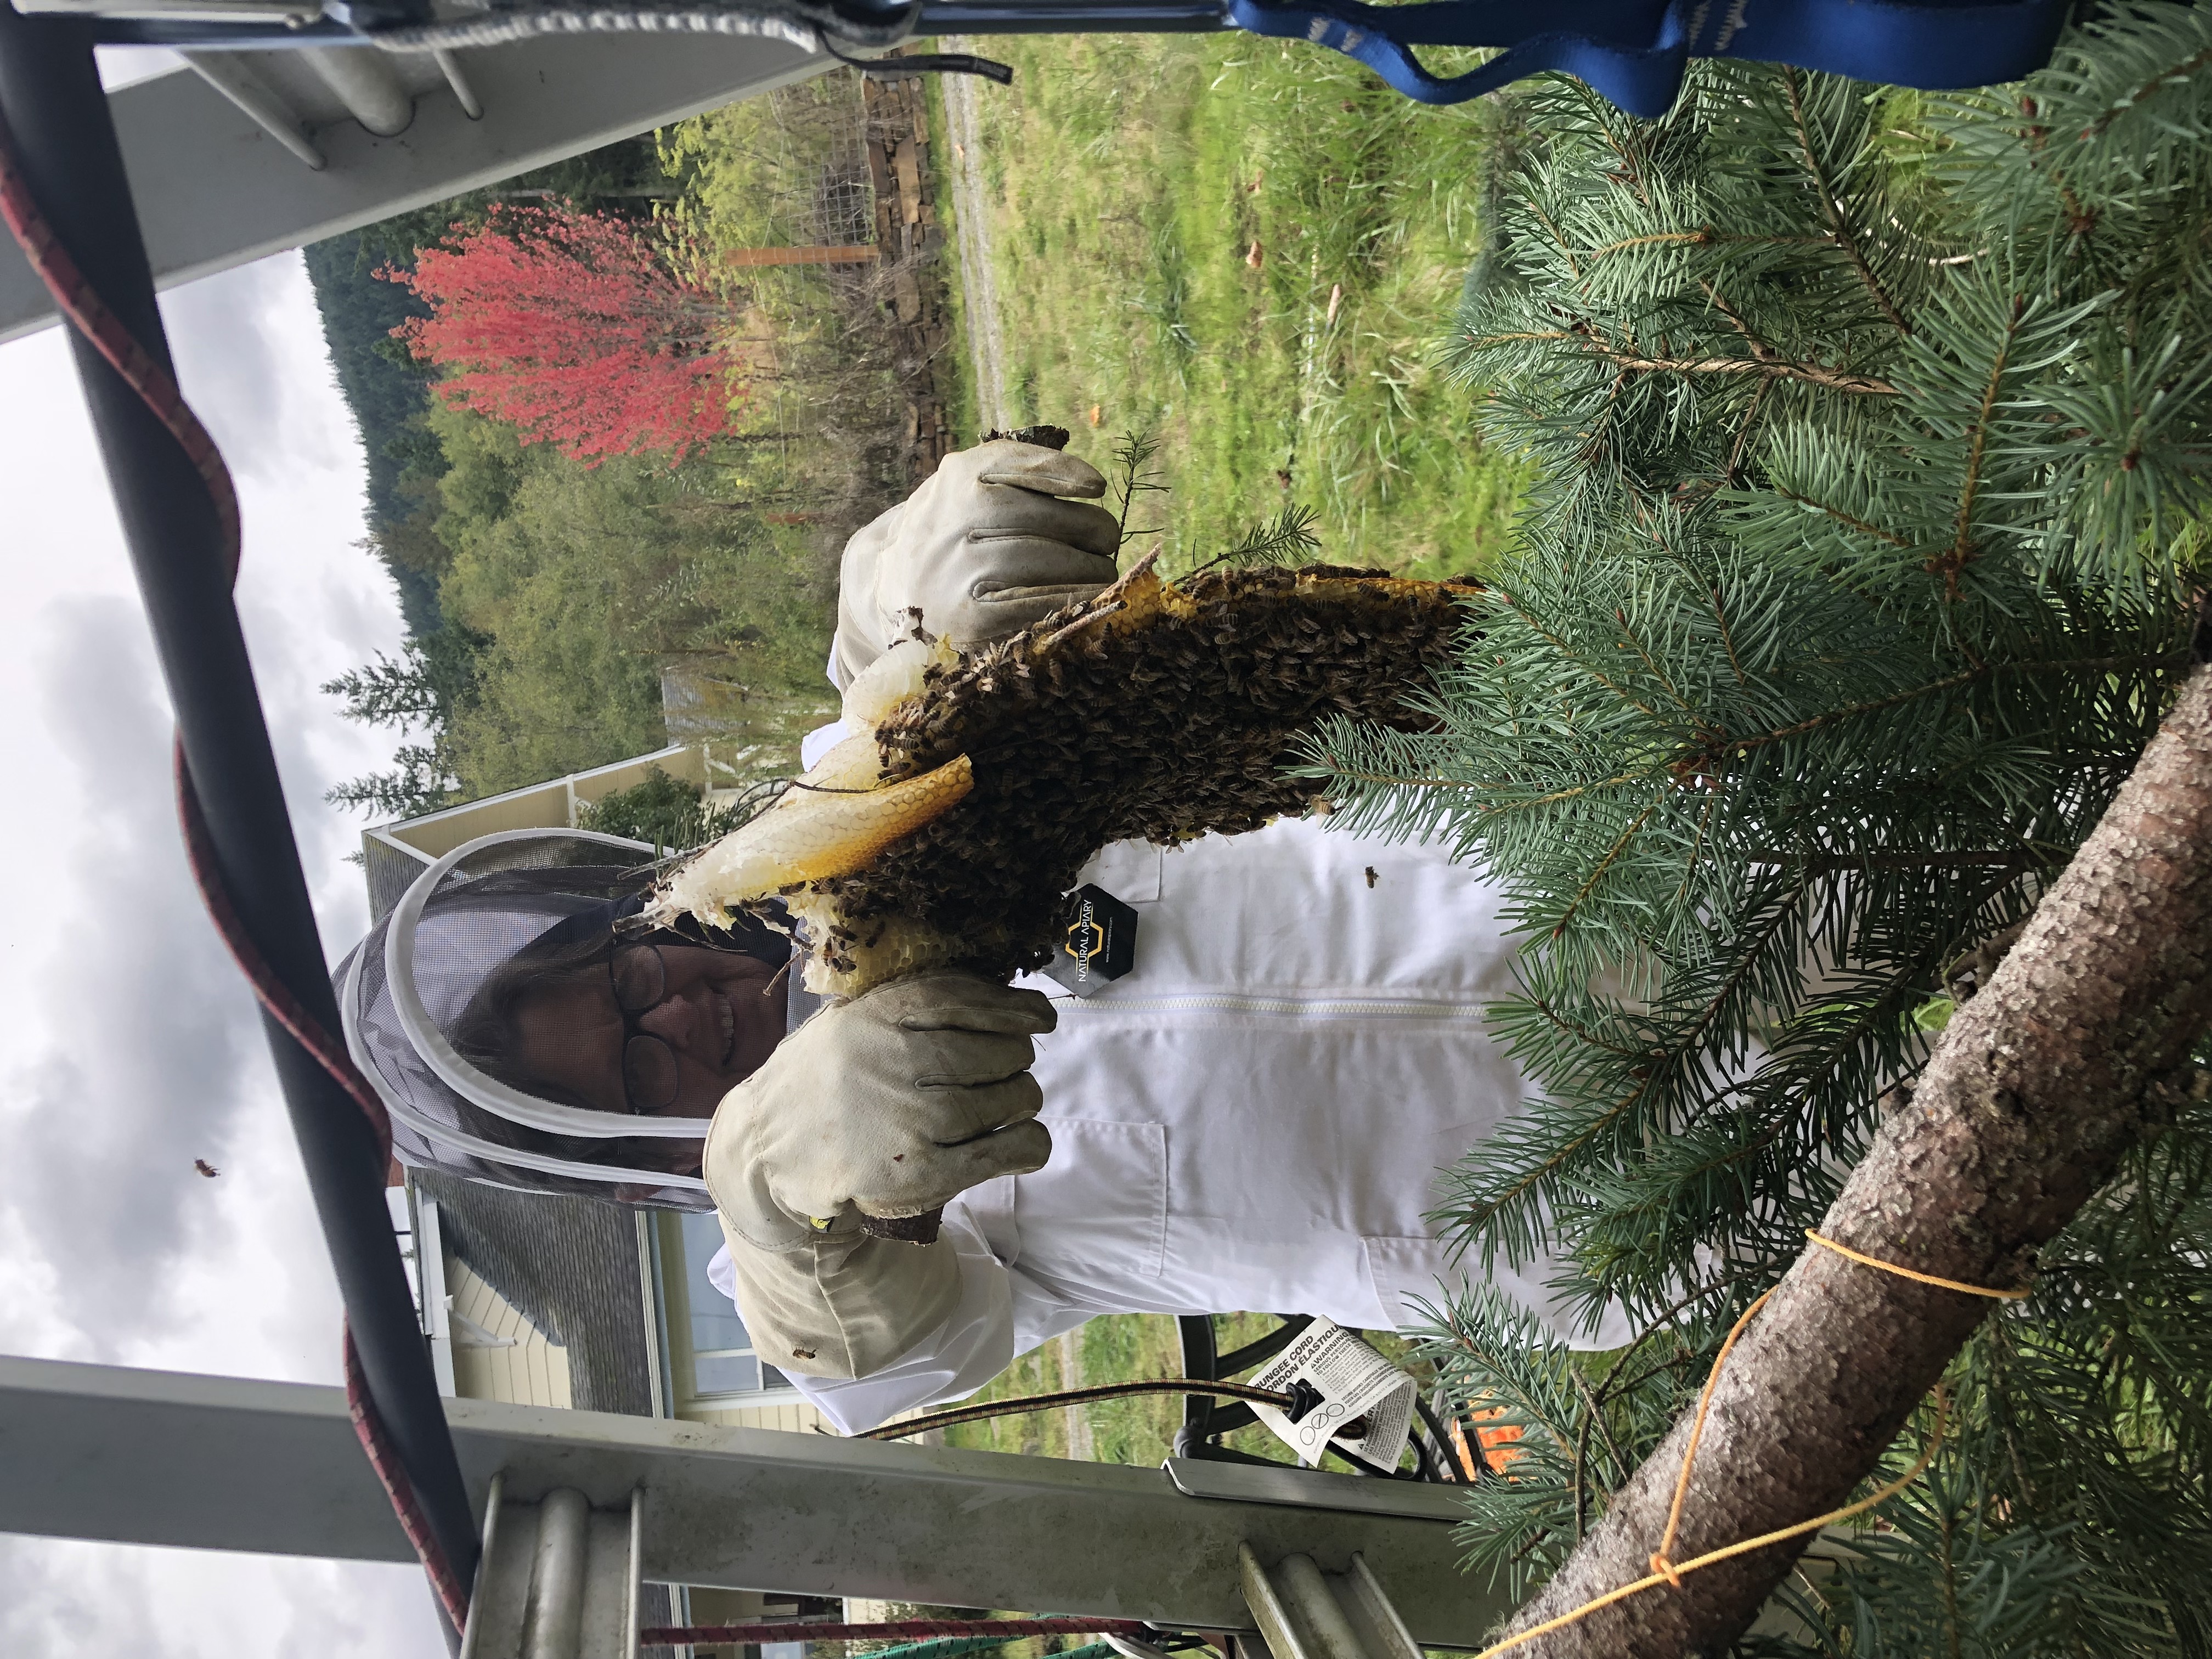
I carefully snipped this comb off before it could collapse (the only controlled comb removal in the whole thing, unfortunately). Here is the comb, all ready to go in the box (both sides).
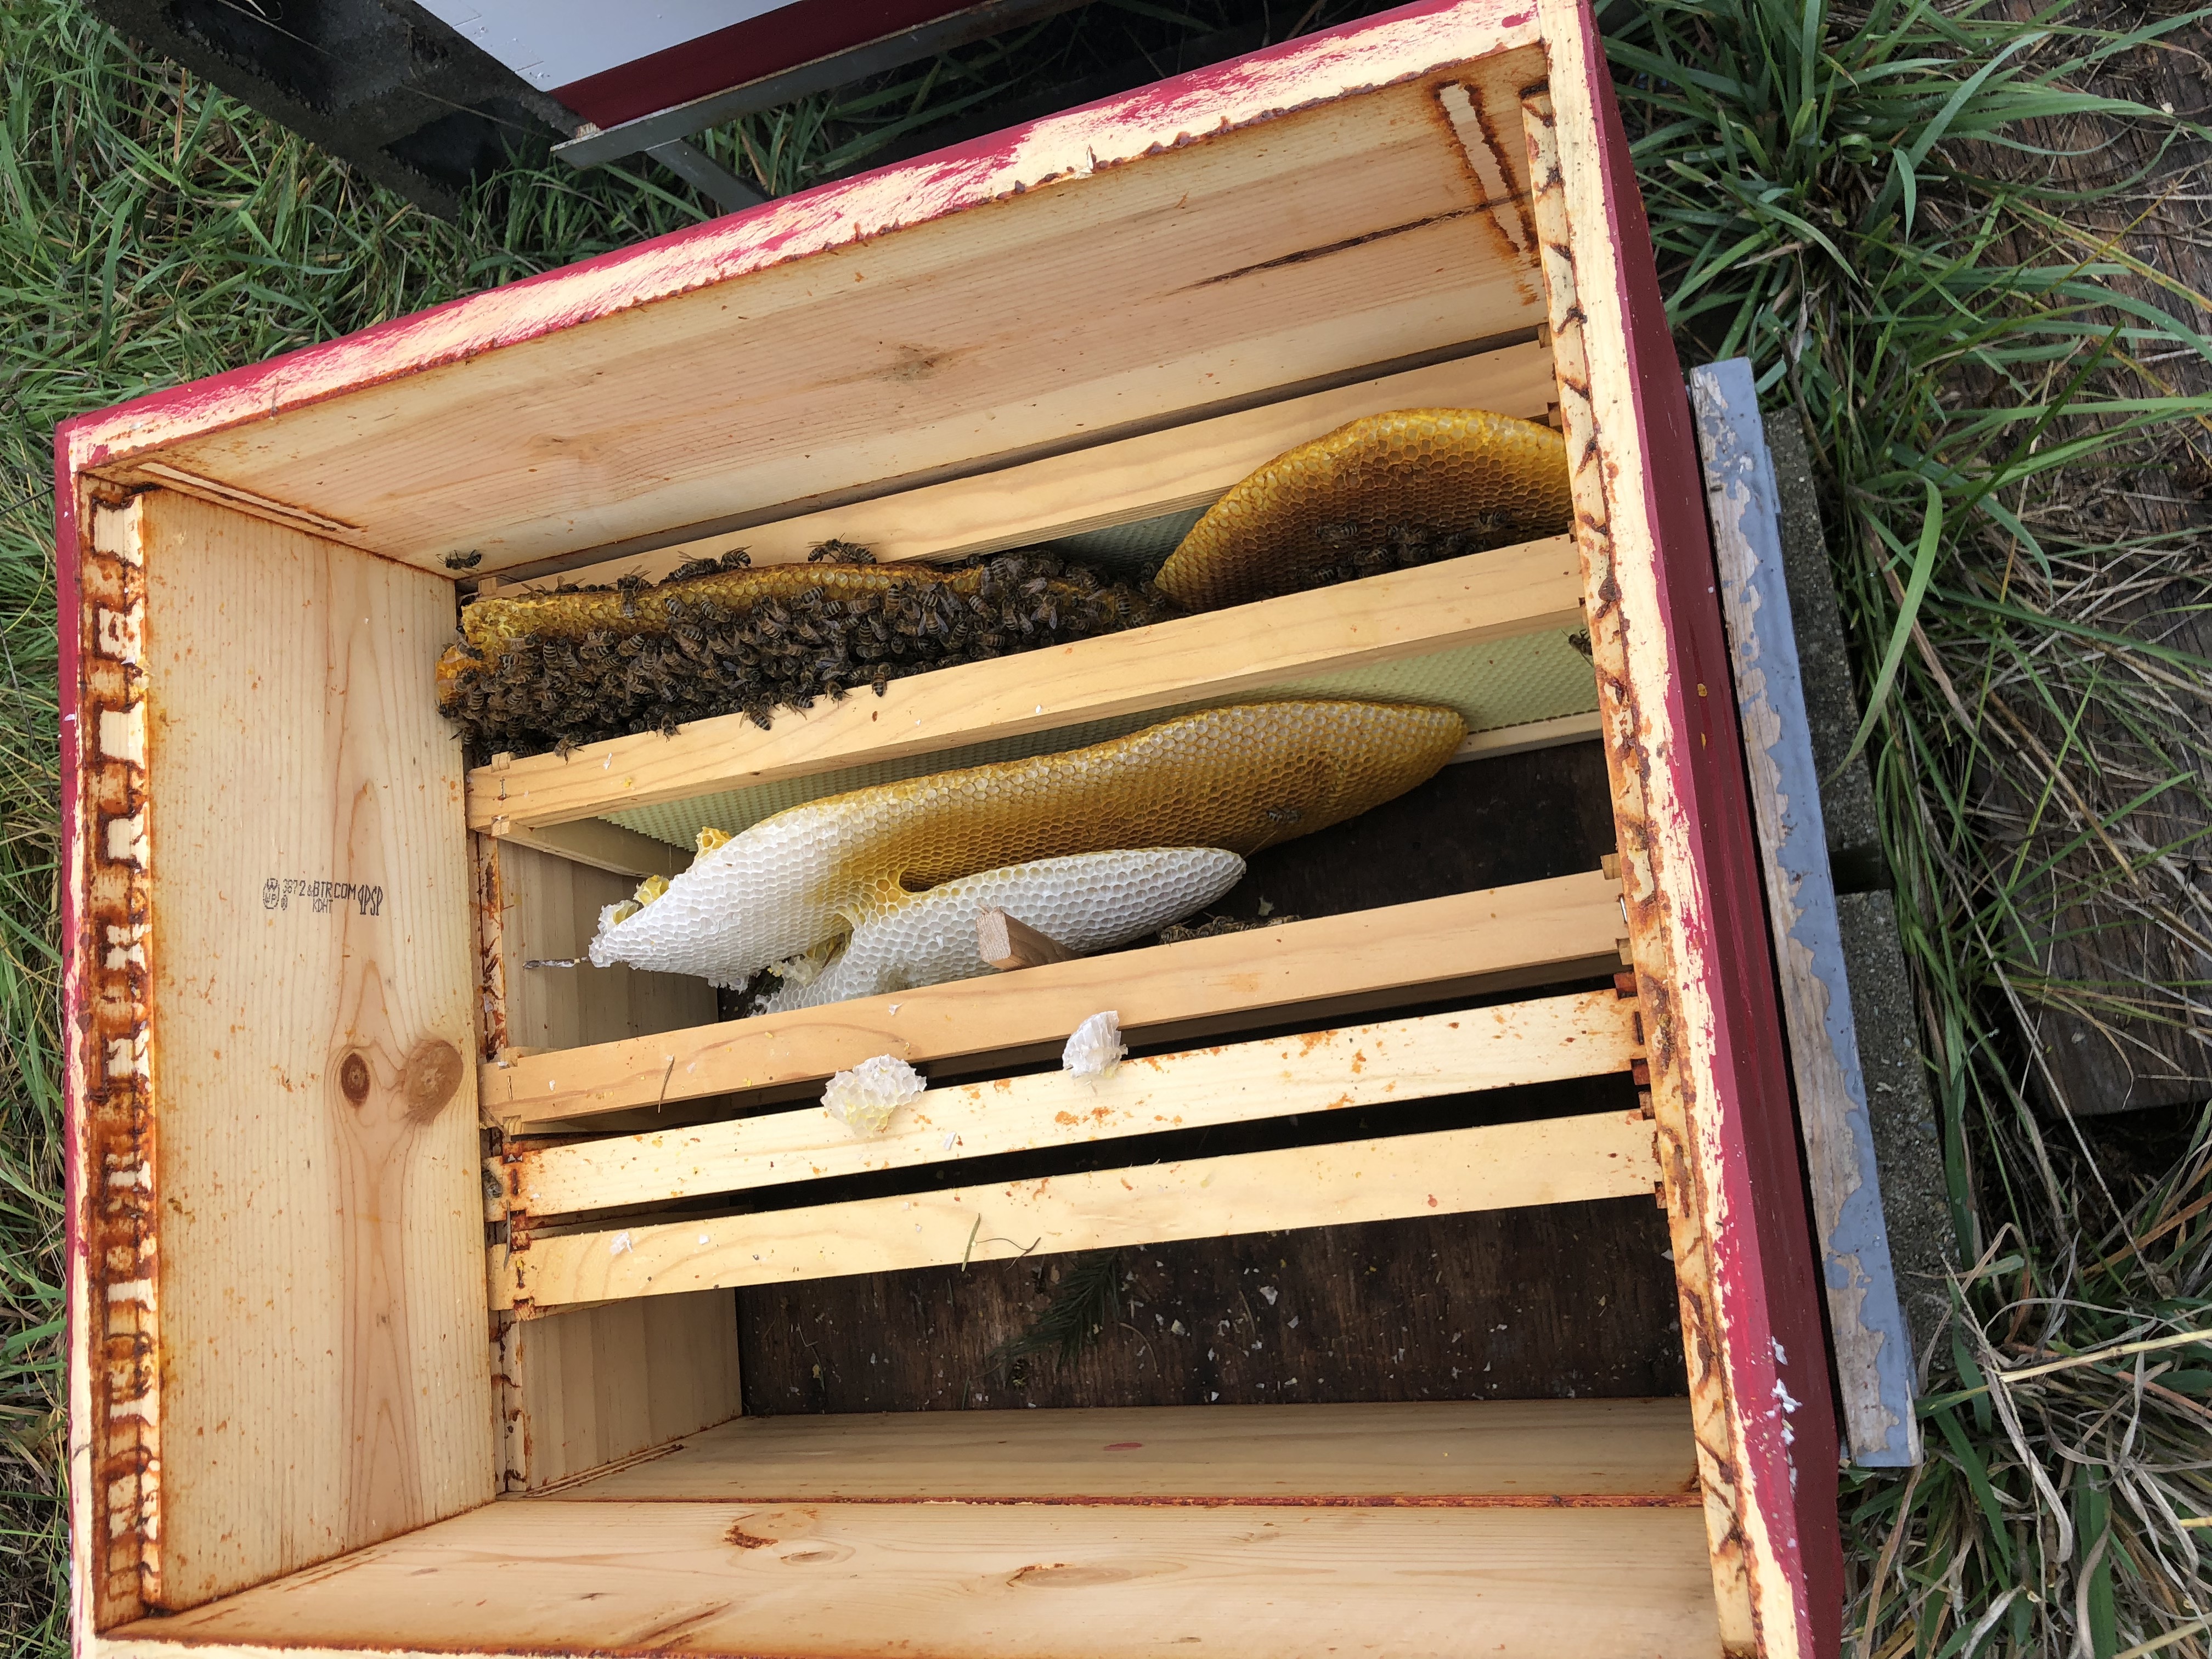
Here it is in the box. Not a good long-term solution, but ok for starters….
And then another comb fell off! Note comb now leaned on exterior of the box. So much for lovingly boxing up the whole comb unmolested. I hadn’t realized how fragile wild comb would be, especially in cool weather.
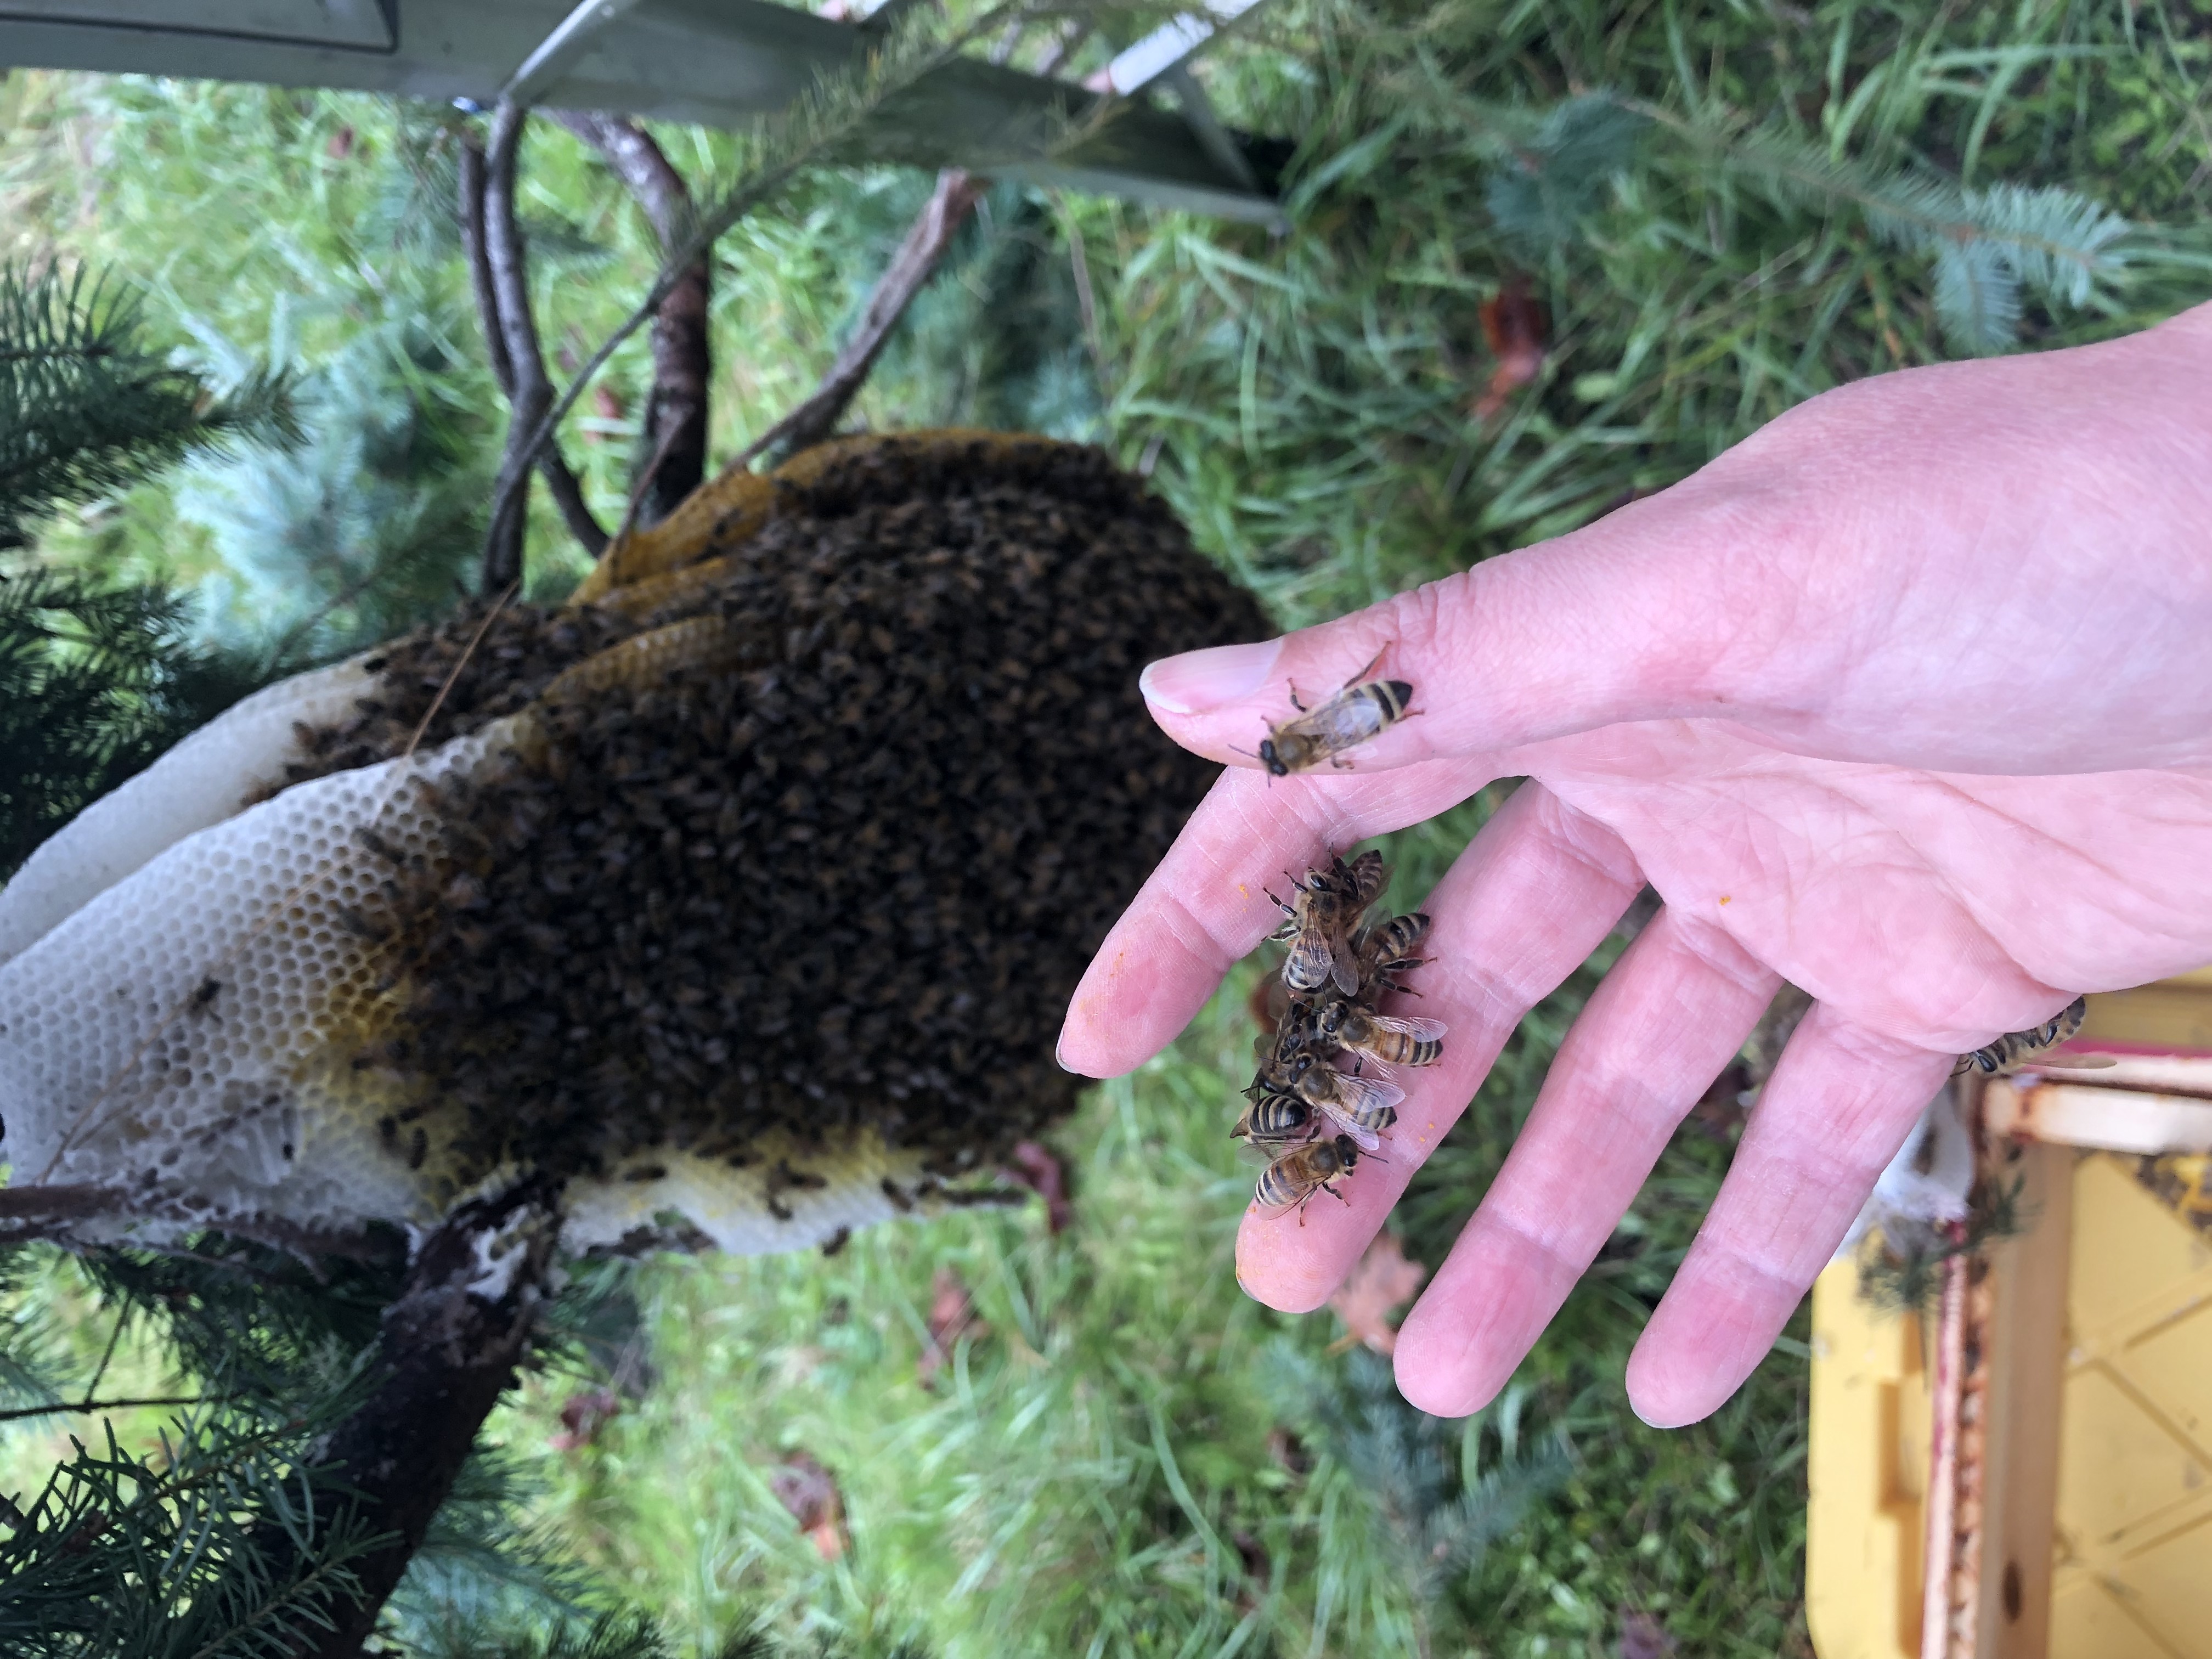
Fortunately the bees were confused but not aggressive. I couldn’t wear gloves, because I needed to be able to gently lift the comb.
Here are the combs that fell off, all tucked in snugly.

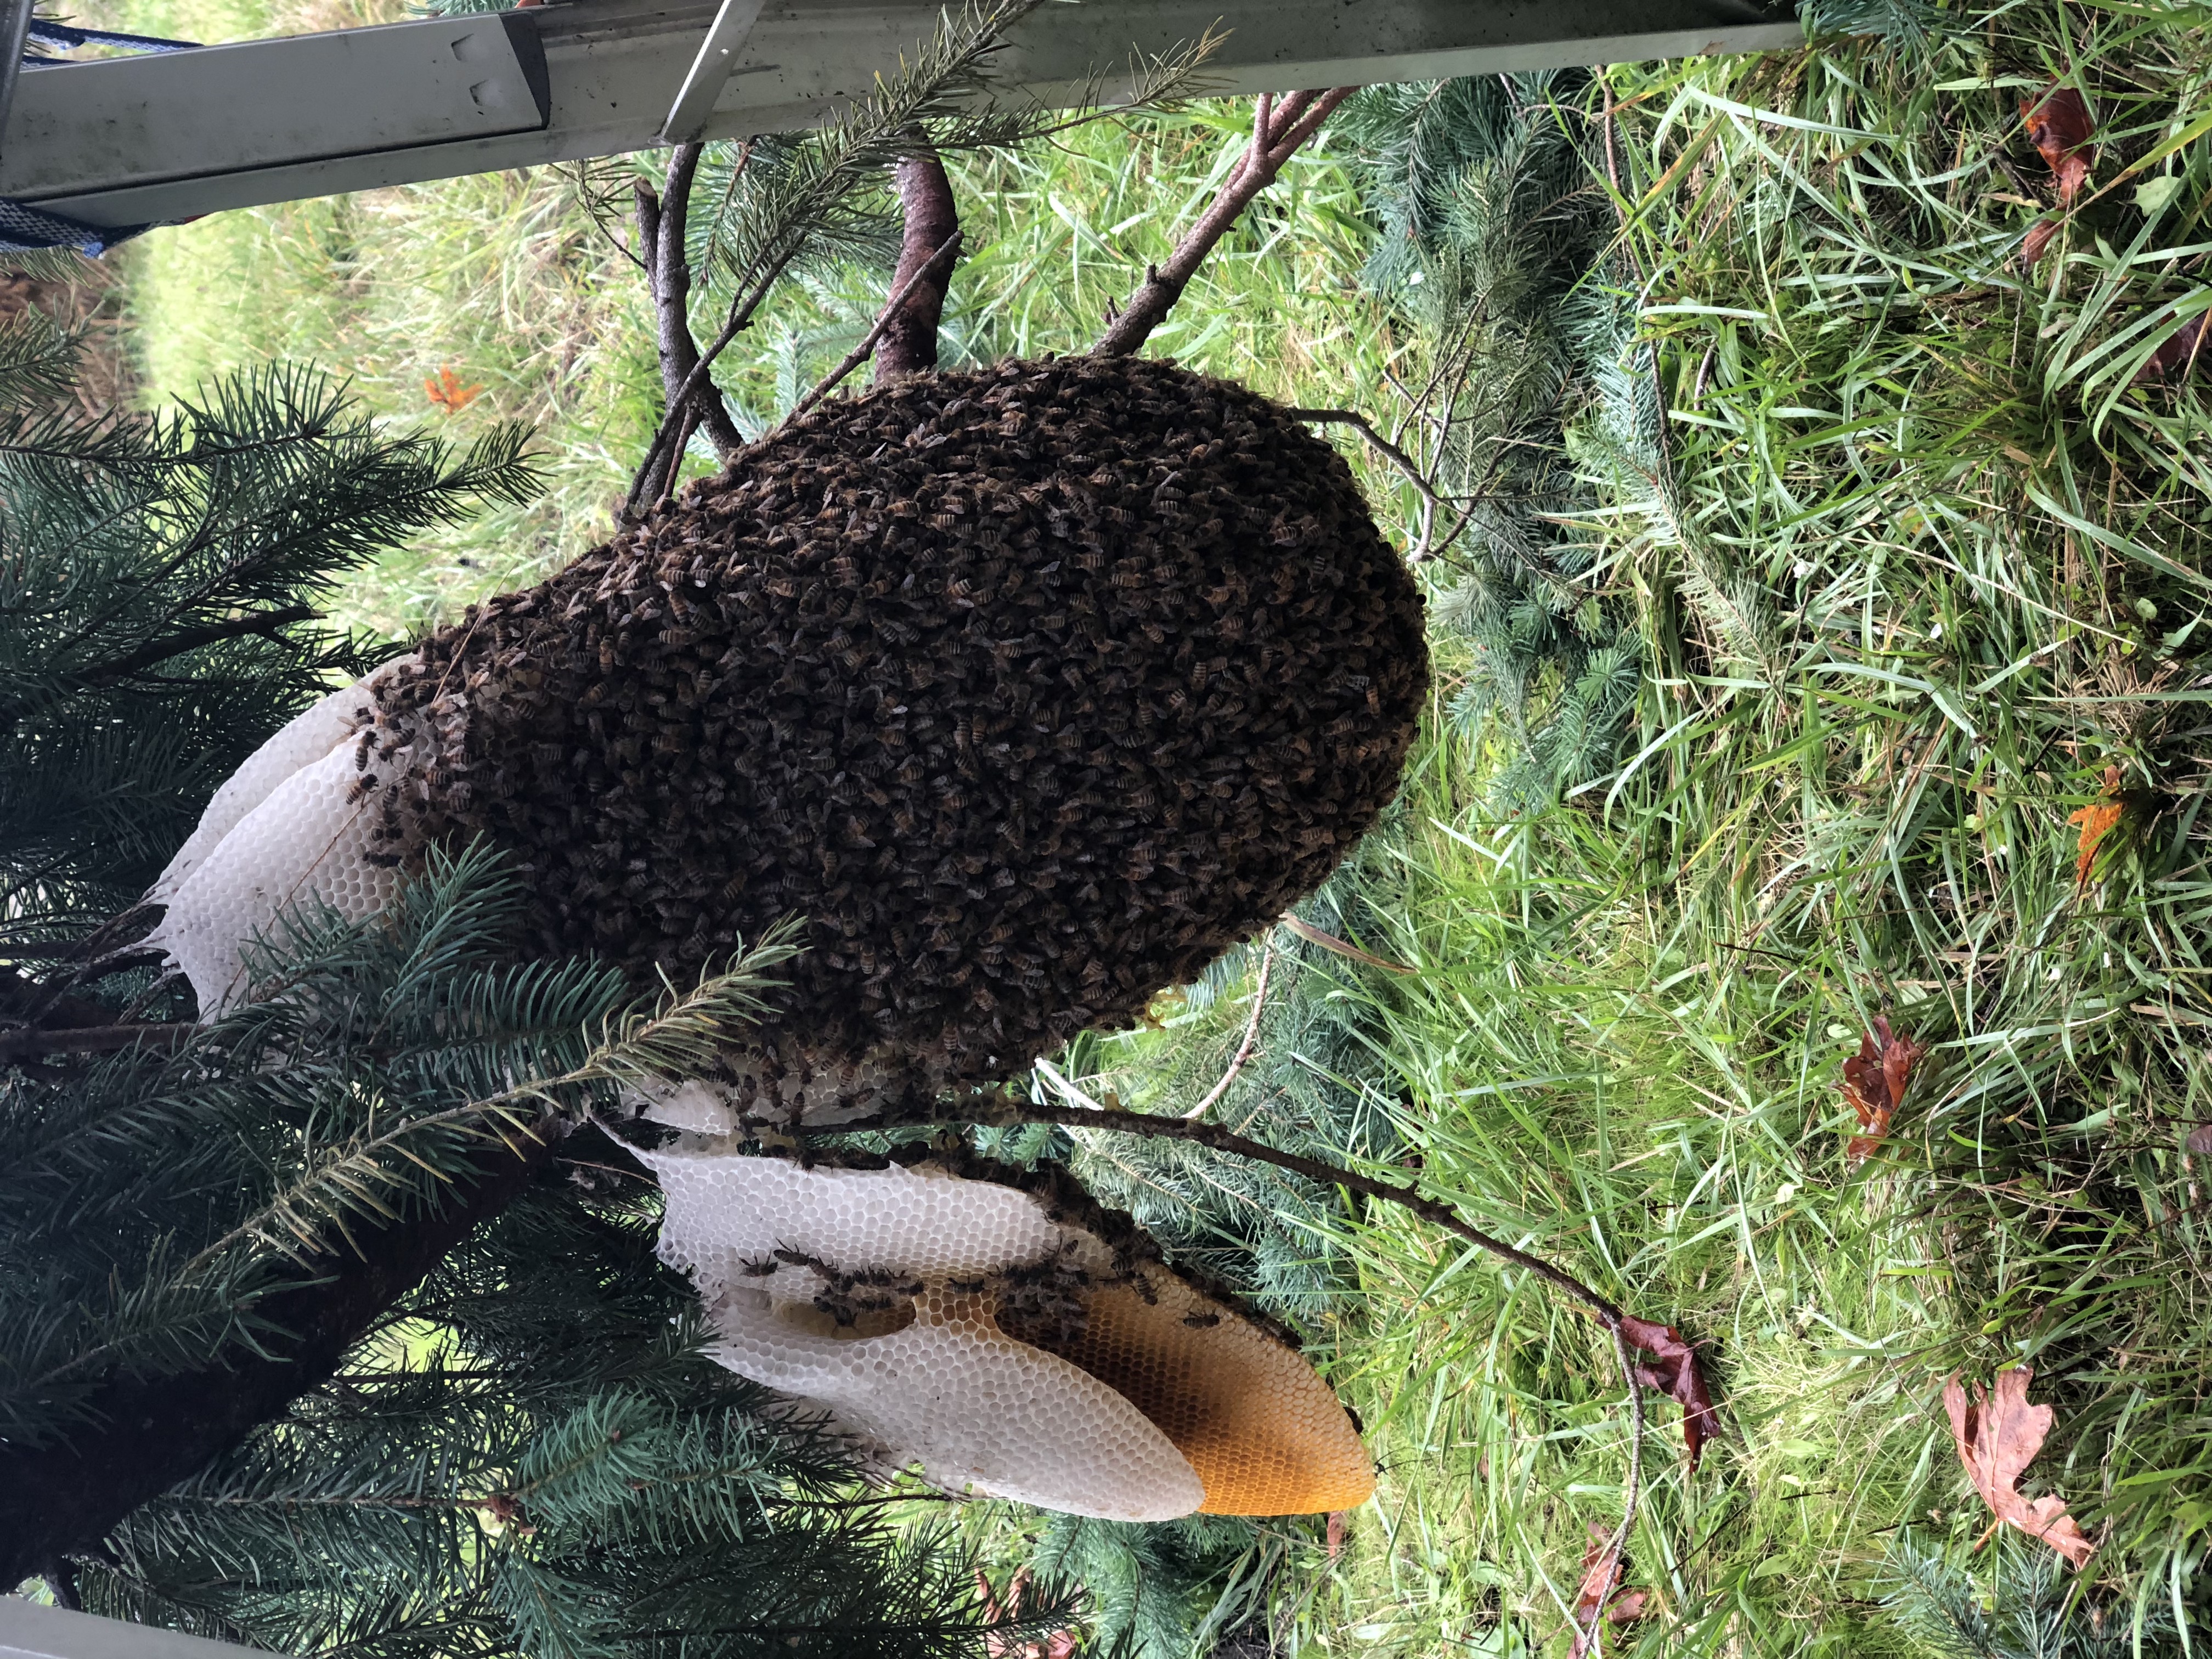
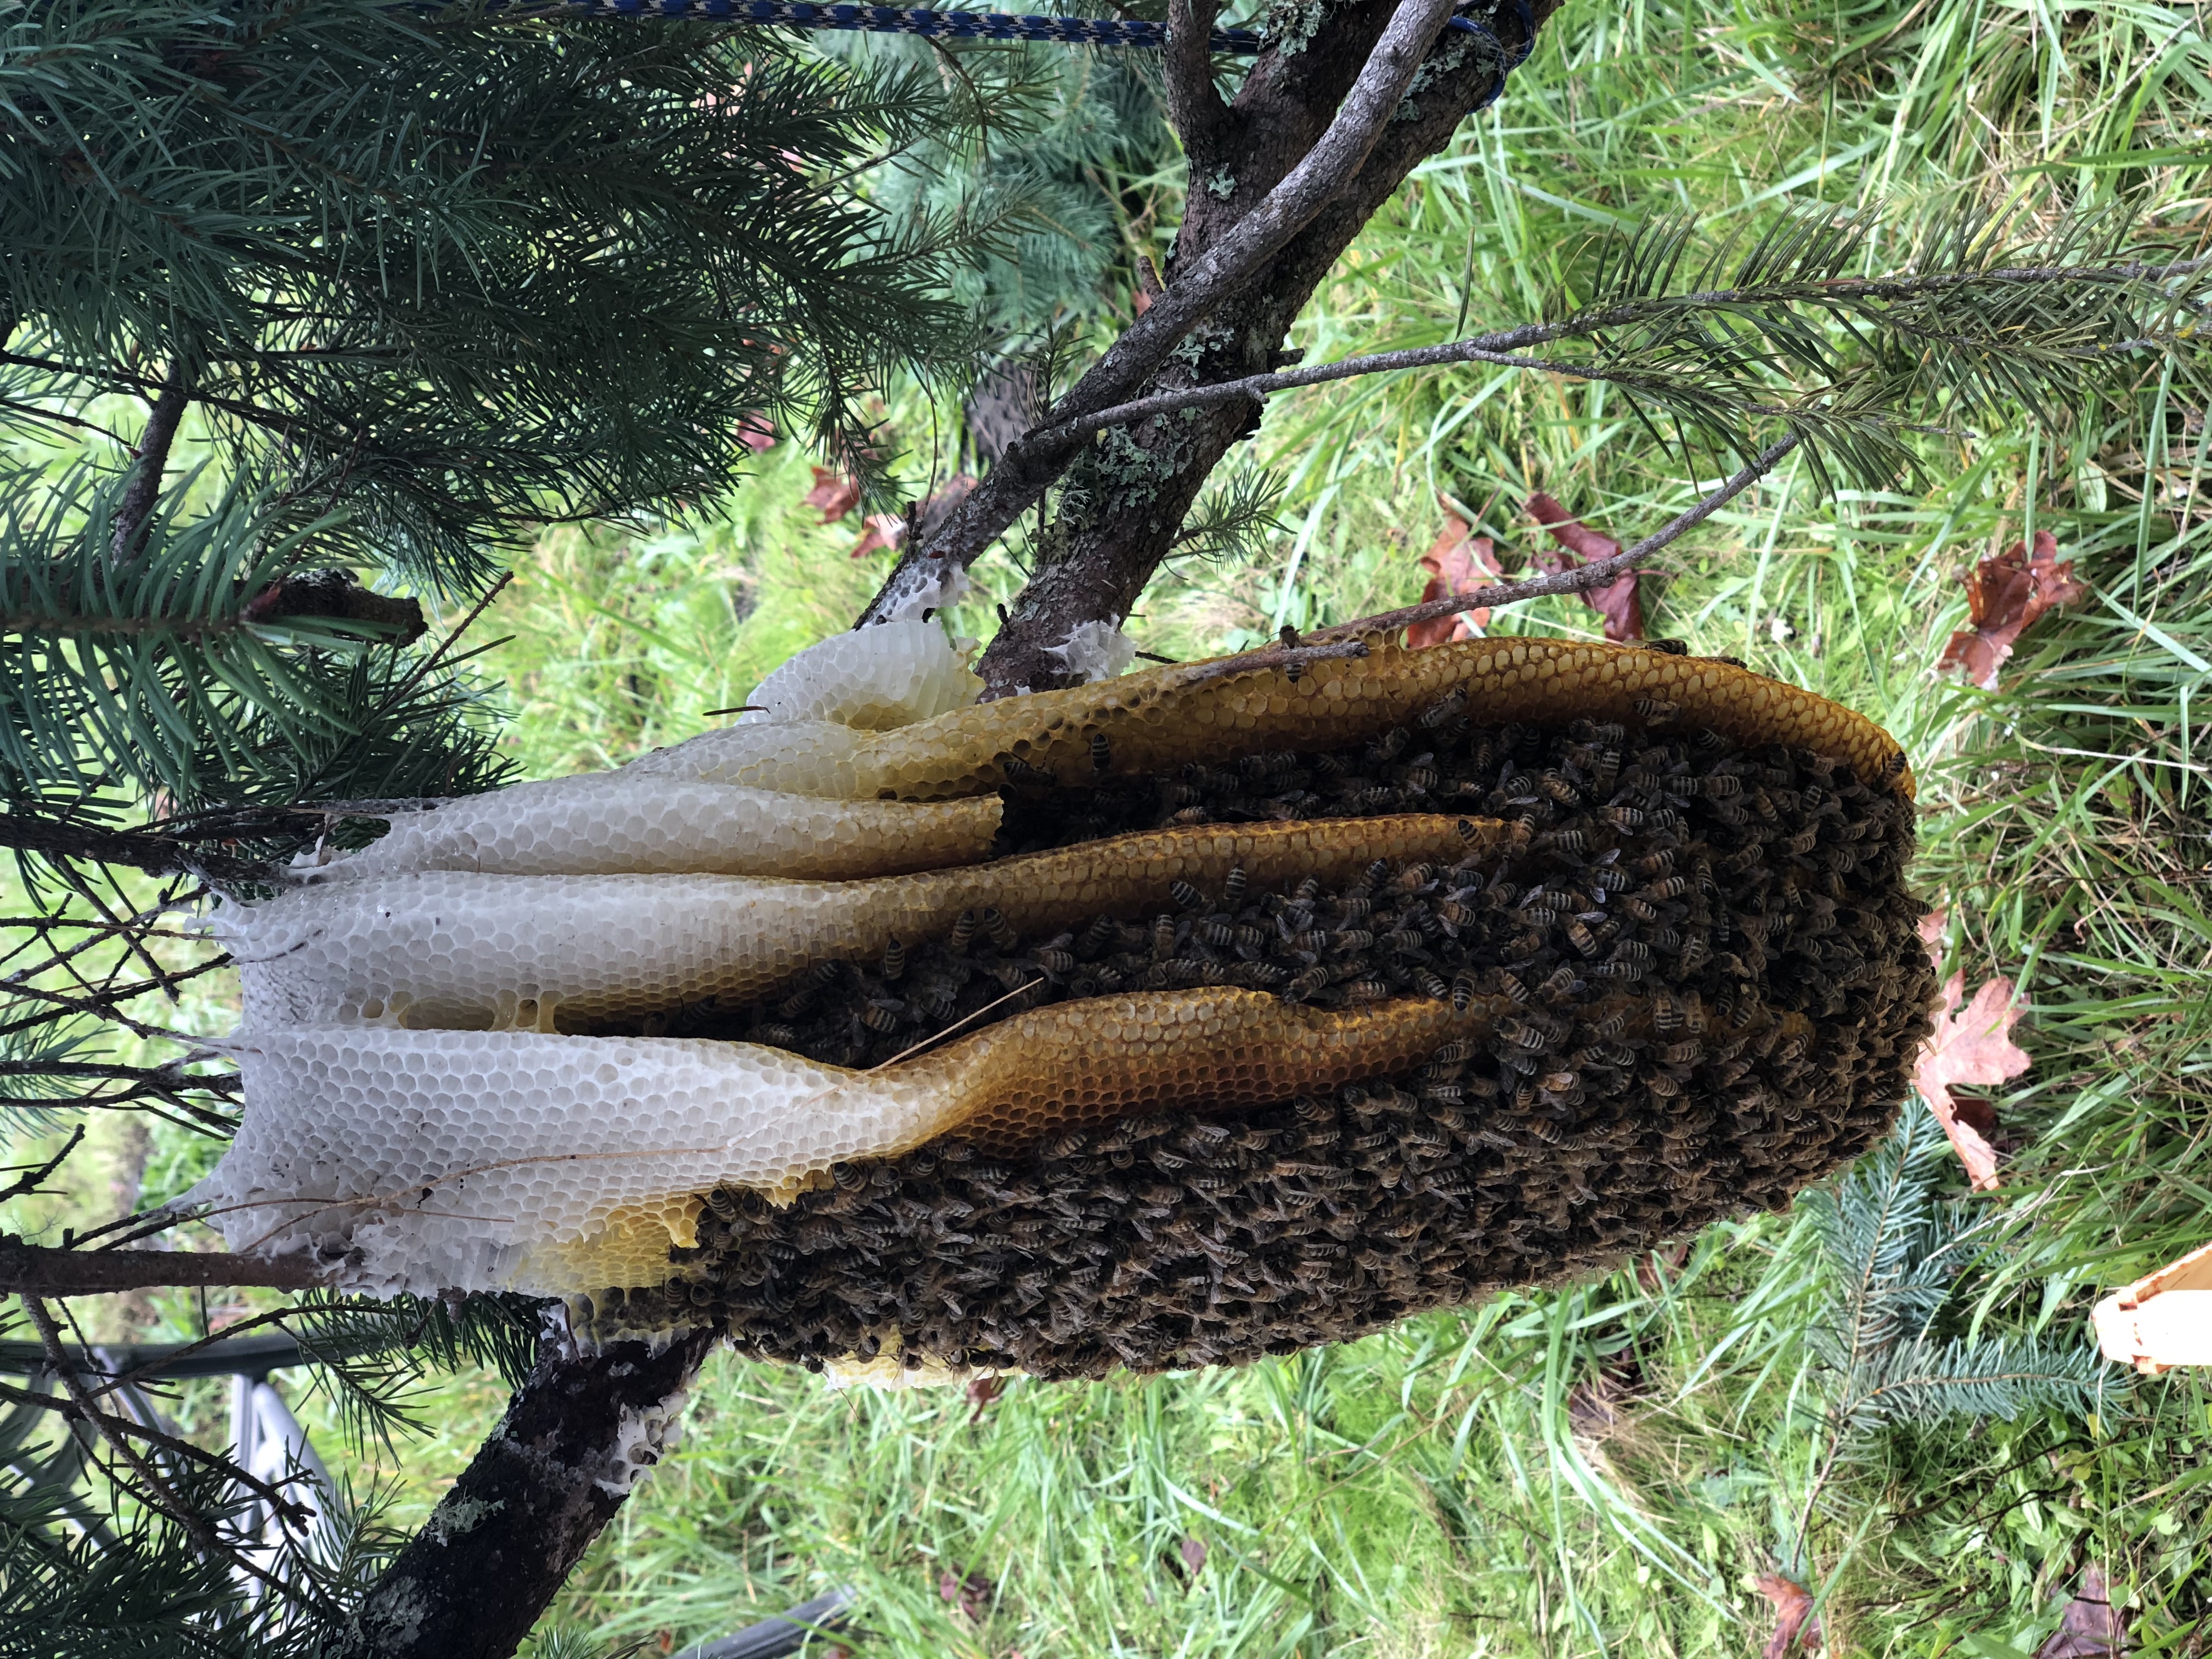
Still, a few combs left! I got the colony level — more or less – and stuck with the plan of taking them intact.
Narrator: she should have abandoned the plan.
In order to get the rest of the honeycomb free, I either had to cut the branch or break the comb. In retrospect, I should have broken the comb… but instead I decided to cut the branch.
Rob was working, but Mom and Dad were visiting for the day, so Mom held the branch stable while I made the cut.
Shortly before the cut, the other two big combs sloughed off, and I added them to my growing box of traumatized bees.
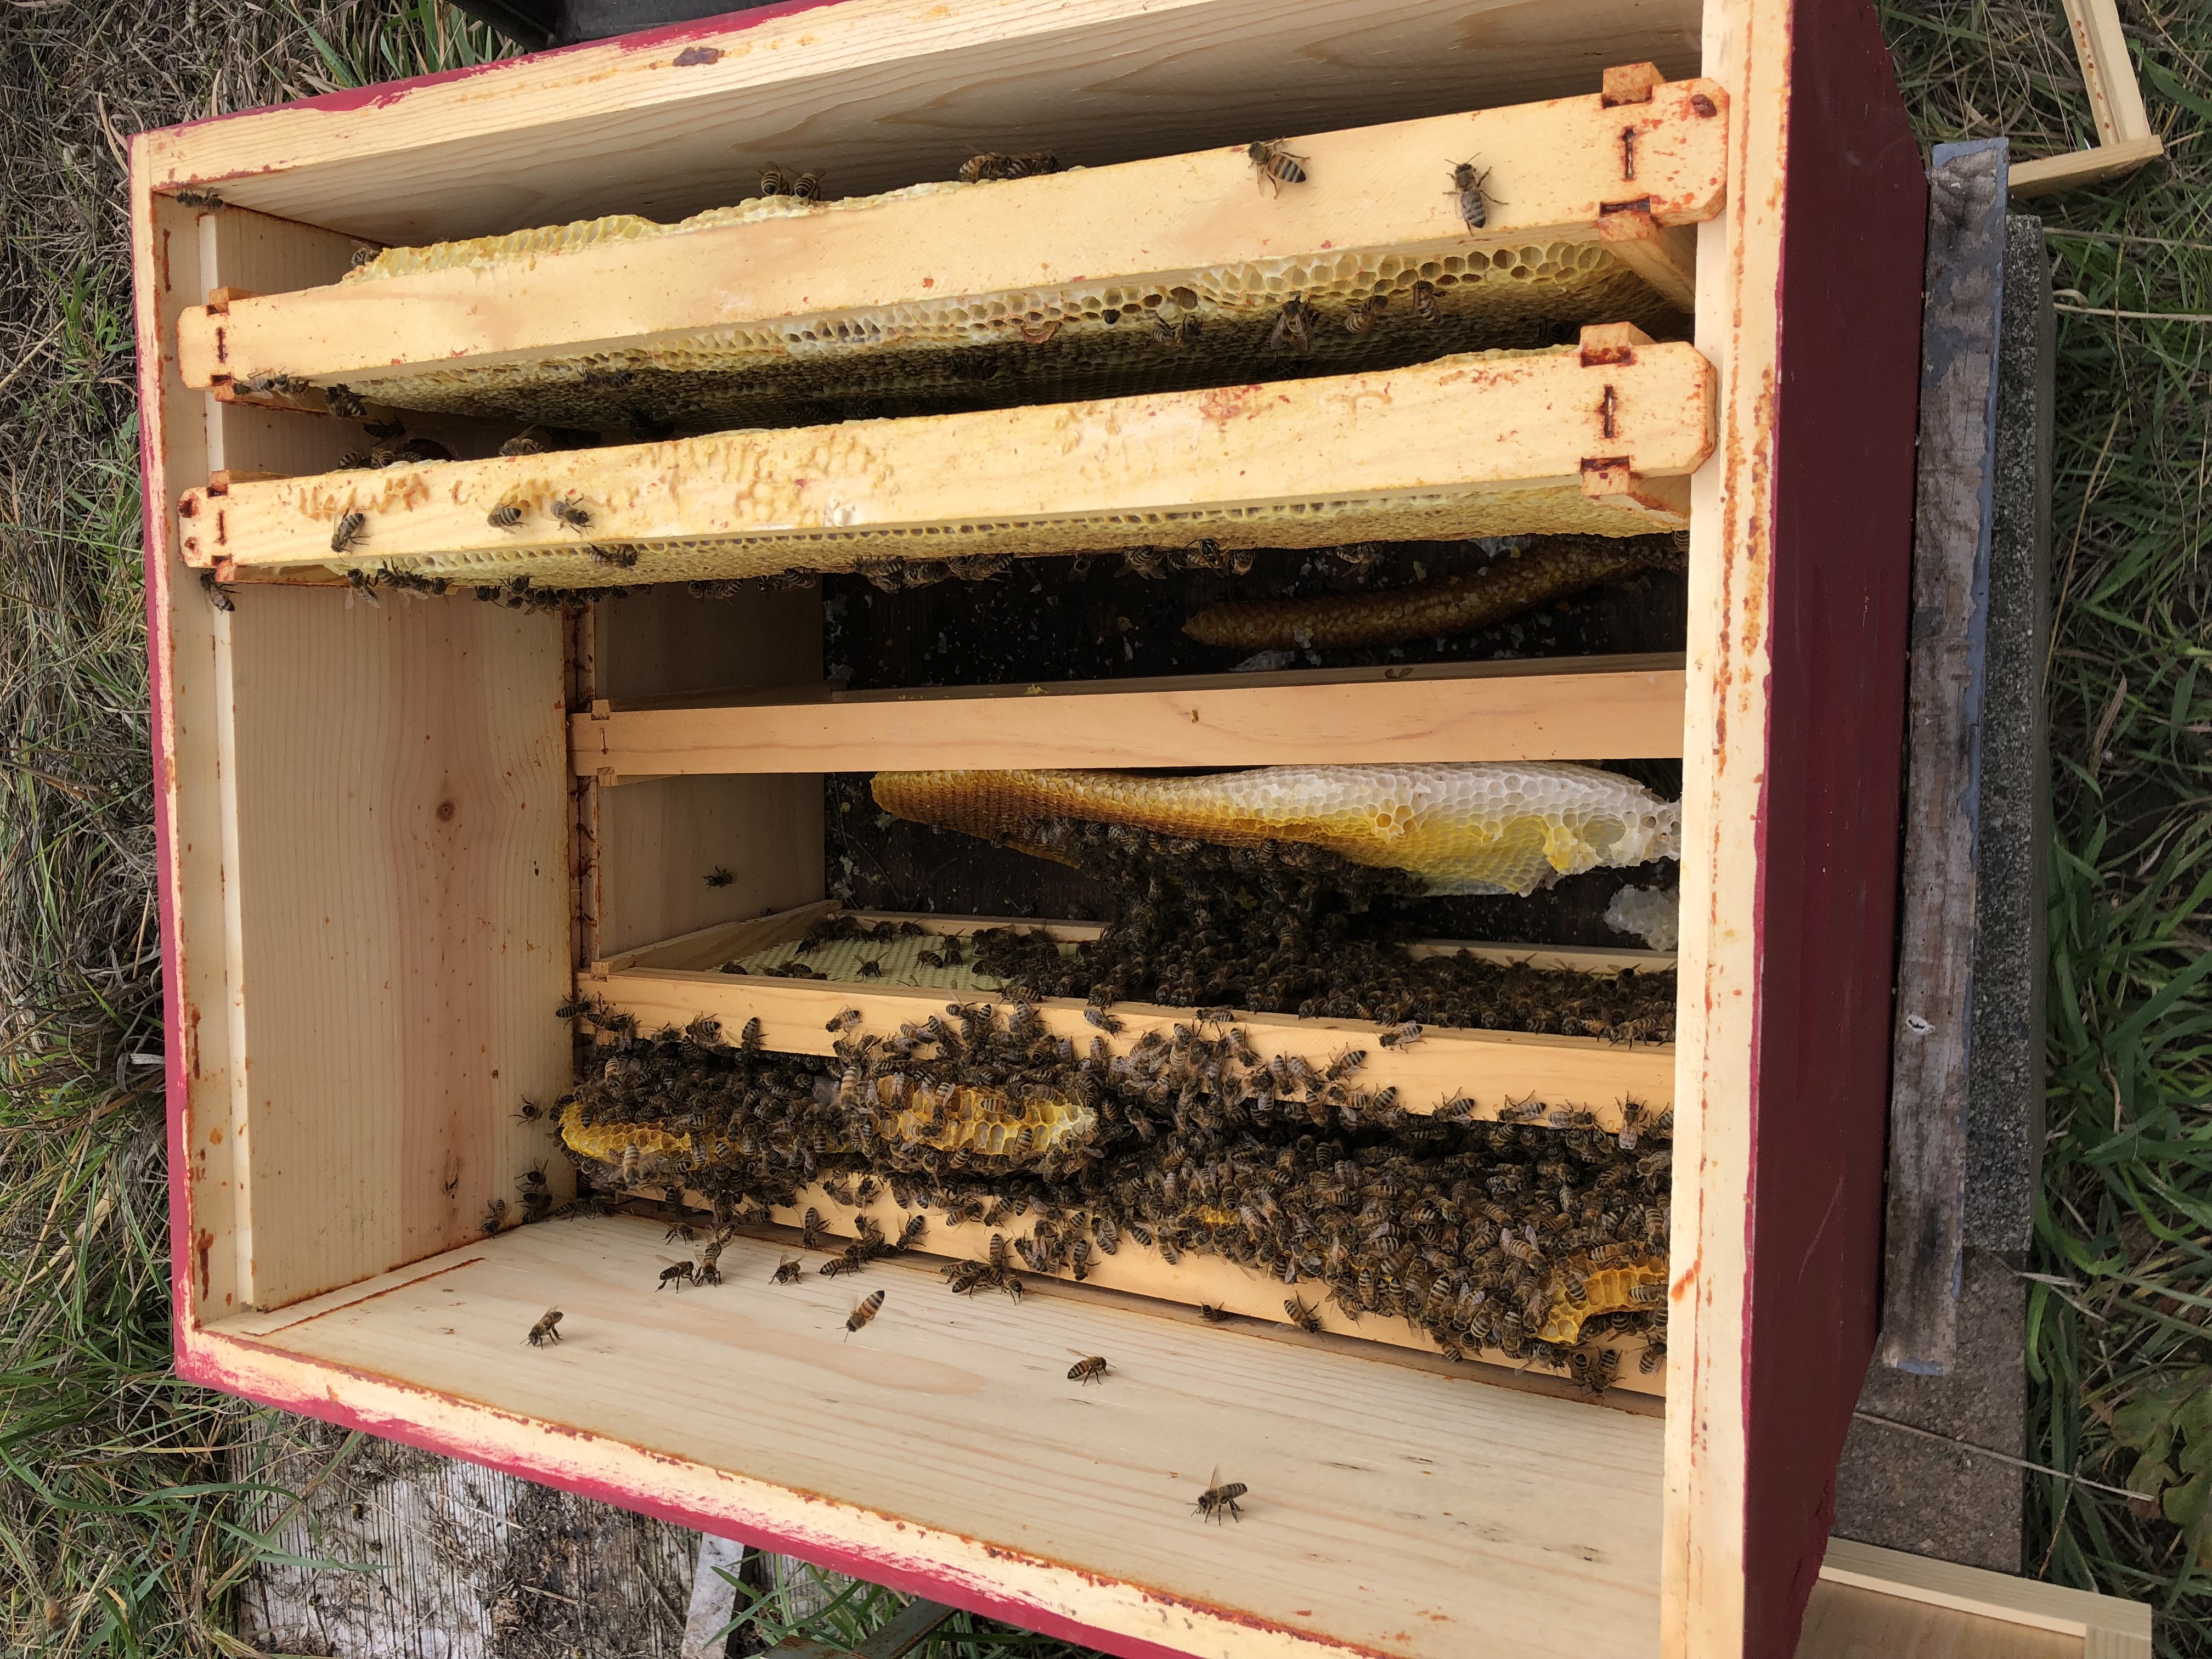
Phase I closed out with the pieces of comb tucked into three layers of hive, with commercial frames as spacers.
The good news was that the colony could then be closed up, safe from yellow jackets and weather. The bad news was that there was way too much air space, the hive would be completely unmanageable with the chunks of wild comb propped up here and there, and most of the comb was either upside-down or sideways.
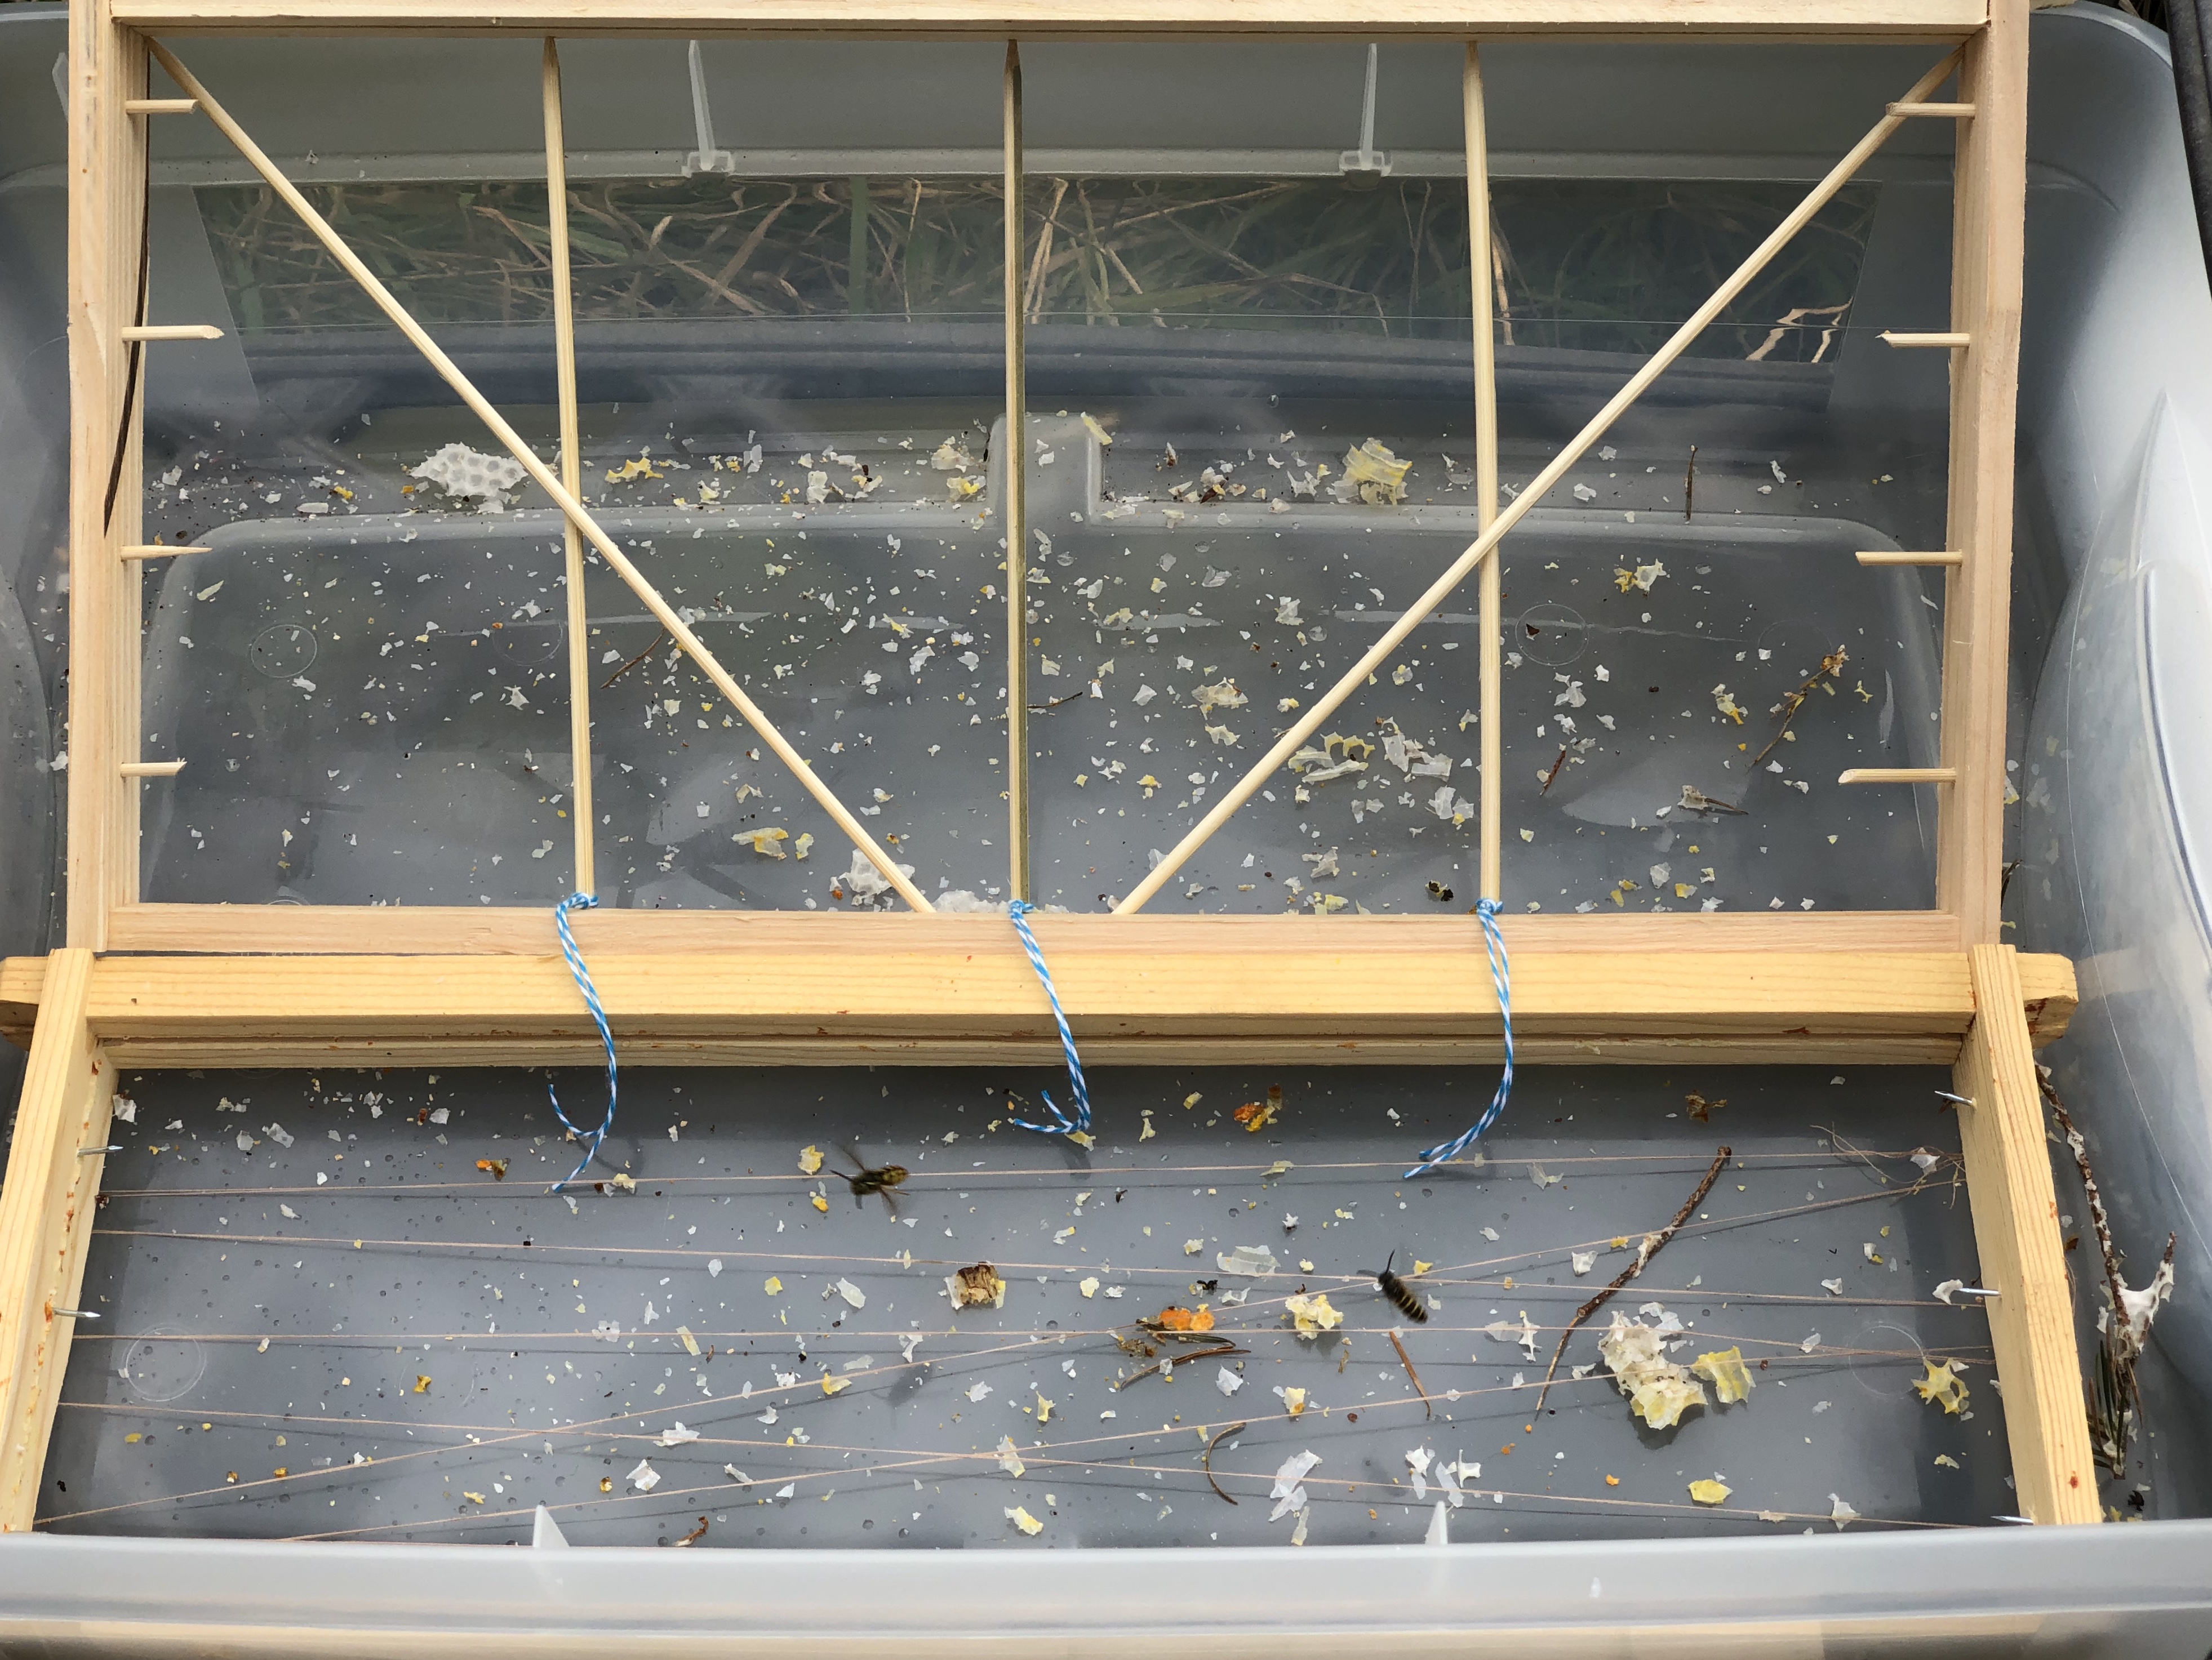
Since the original plan of keeping the colony intact didn’t work out, we needed to wait until things quieted down, and then try to insert the comb into frames. See Phase II!